How Do I Stay Warm in a Hammock?
It Can Be Done
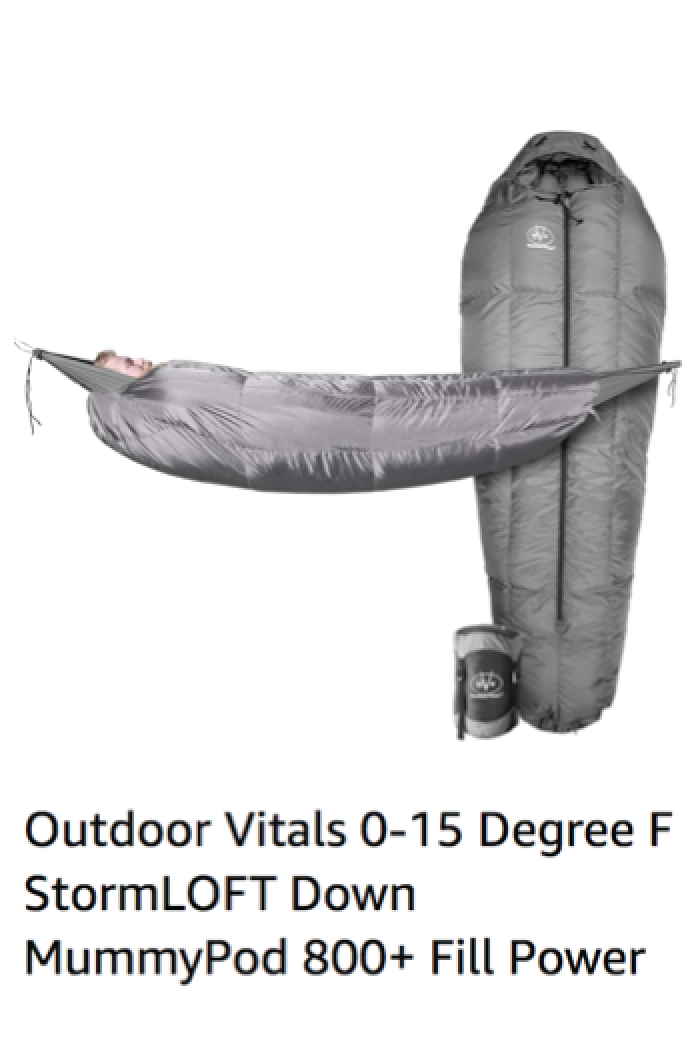
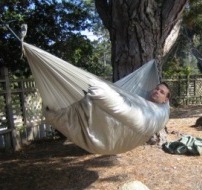
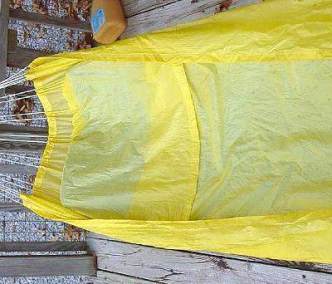
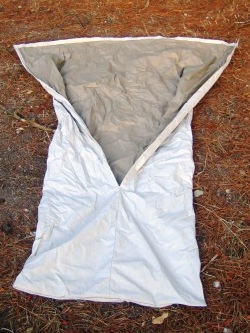
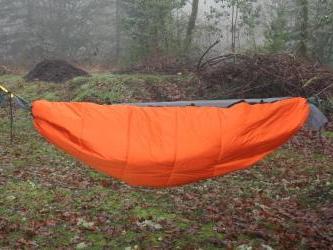
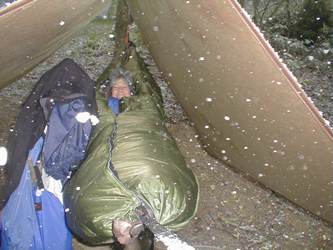
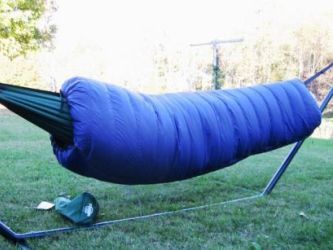
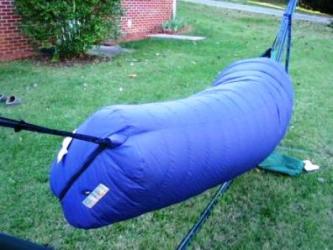
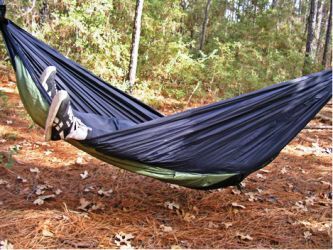
Pic by Doug Frick
Just Jeff's Outdoors Page"Going to the woods is going home, for I suppose we came from the woods originally." ~John Muir |
|
|
It Can Be Done
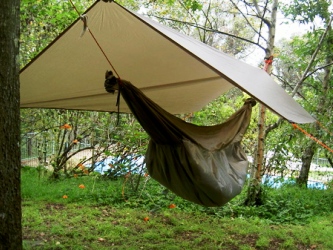
Pic by Doug Frick
| Introduction. |
Staying warm in a hammock presents a set of challenges not encountered by ground sleepers, and the methods aren't always intuitive. However, once a few basic principles are understood, a hammock camper can easily conquer these challenges and it's possible to sleep comfortably during all 4 seasons with little-to-no weight penalty over a ground setup.
Wind resistance is rather self-explanatory; it works like a windbreaker jacket. Protect yourself from the wind and you'll conserve heat.
Loft's function is not as intuitive. Here's how it works to keep a person warm in a sleeping bag. Basically, wrapping yourself in insulation creates a tiny little climate around your body. The amount of warmth this "microclime" is able to hold is a function of a few factors, and one of the most important is the loft, or thickness, of the sleeping bag. When you climb inside and your body generates heat, the bag will trap tiny pockets of warm air inside the insulation. These pockets are what keep your body heat from escaping, and a bag with more loft (i.e. a thicker bag) will have more air pockets to protect you from the cold. Conversely, a thinner bag will provide less protection.
That's common sense...a thicker bag gives more protection than a thinner bag. But here's how this principle applies to hammock campers. When you sleep in a hammock, your body compresses the sleeping bag's insulation under you, so a bag that's normally 5" thick now provides about half an inch or so of insulation to your bottom side.
When you sleep on the ground, your pad provides a layer of insulation that prevents the cold ground from stealing your body heat. That's actually a pad's primary purpose...not to cushion you from the ground. In a hammock, on the other hand, you now have no insulation except a flat sleeping bag between you and the wind blowing under you that's robbing your heat. The first night I slept in my Hennessy, it was mid-30s and windy. I was in a -40° bag, believe it or not, and I was freezing on my butt and shoulders and sweating on my chest. So what's the answer? Find a way to better insulate underneath you! So how do you do that?
There really isn't a perfect or universally accepted method of insulating a hammock...everything is a tradeoff and what works for me may not work for you. However, hammock campers generally agree that underquilts are the most comfortable and expensive, while closed-cell pads are the cheapest and easiest, and still way more comfortable than sleeping on the ground.
The "best" way I've found so far is a DownHammock, but until I get it perfected I'll continue to use my JRB underquilt set or PeaPod. This page discusses many of the other common options.
| Sleep with a pad in the hammock. |
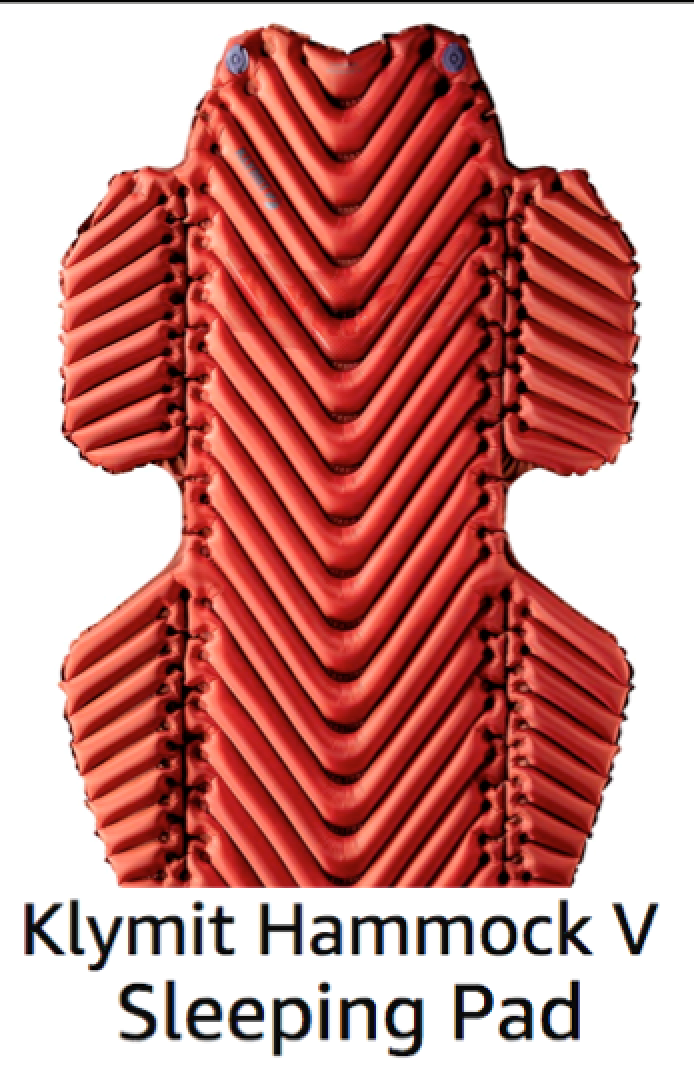
This is a very cheap and easy method of staying warm...buy a cheap closed-cell foam (CCF) pad from Walmart and put it inside the hammock. Just make sure it's wide enough. When you're sleeping on the ground, only a few parts of your body actually touch the pad, and the pad lays flat. In a hammock, the pad will wrap around you and you won't have any insulation on your shoulders. Many pads are only 20" wide, and this is too narrow for hammock camping. Walmart and Target sell 24" pads, like the Ozark Trail brand, that can work comfortably if you don't move around a lot. Better yet, get the 40"x60"x1/4" Oware pad from Oware USA and trim it to your specs.
A CCF pad (the dense rubbery kind) provides windblock because air cannot pass through it, and provides loft because its thickness does not compress when you lay on it. An open cell pad, like the egg crate mattress pads Walmart sells, will not hold warmth because it isn't windproof and will compress if you lay on it. Open cell pads can also soak up water like a sponge, which may be a disadvantage on the trail.
One benefit to carrying a CCF pad is that you always have it with you in case you want to sleep in a shelter. Also, if you get too cold you can always "go to ground" and abandon your hammock. With proper planning, this shouldn't happen.
I didn't like this option because a pad isn't as comfortable as sleeping directly on the hammock. Depending on the pad's thickness and amount of hammock sag, the pad can wrinkle and cause pressure points. More importantly, the closed-cell foam made me sweat so much that it soaked through the back of the sleeping bag. When I rolled over just a bit, the cold air hit my wet back and I was freezing, so I had to stay on my back until I was ready to get up and dry my bag. Others have complained about the difficulty of keeping the pad underneath them, especially when using a ThermaRest in a Hennessy.
I think the type of pad makes a HUGE difference, though. I've been using an Exped Downmat 7 with a JRB top quilt and I don't have the condensation issues that I had with the CCF pad, even when I was a bit overheated.
You can also use a few tricks to increase the coverage of a regular camping pad:
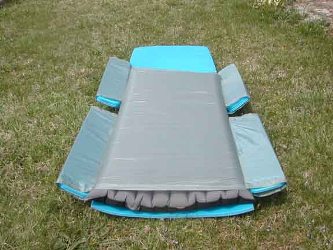
Sgt Rock's Wing Pad
Pic by Sgt Rock

Risk's Overlap Pad
Pic by Risk's
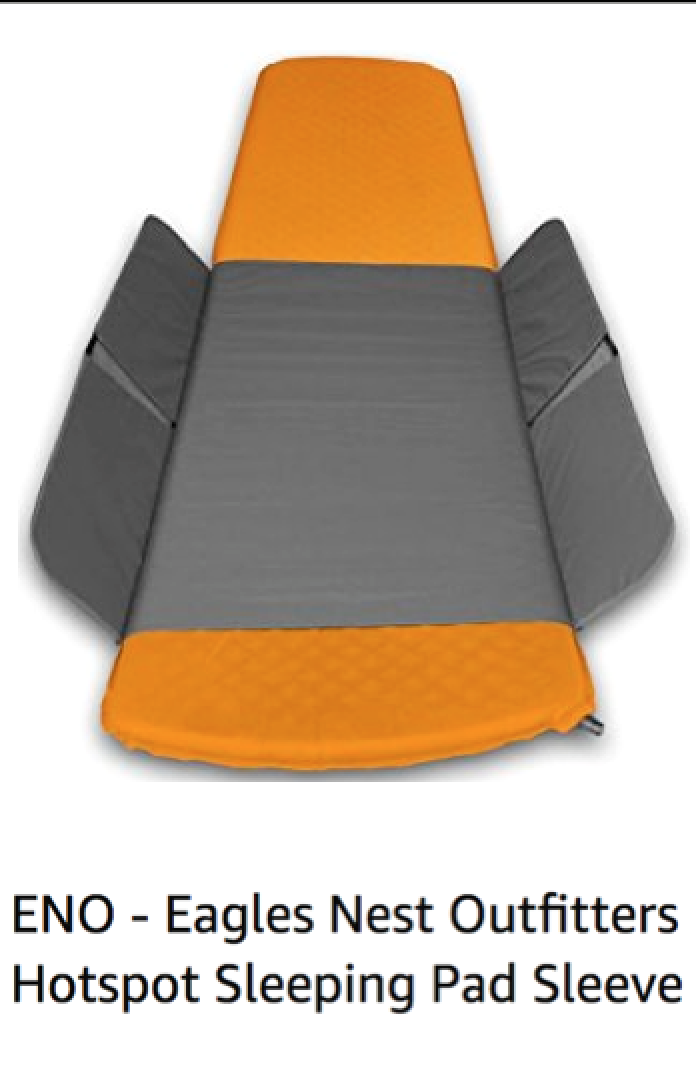
Ed Speer invented the Segmented Pad Extender (SPE), which is a nylon sheath with elastic that you slide your pad into, then slide small sections of CCF into the "wings" that wrap around your shoulders and hips to keep those areas insulated. (Eagles Nest Outfitters now makes the Hot Spot that serves the same purpose.) You can slide more than one pad into the SPE to tailor the amount of insulation to conditions. It's really an ingenious design. See BGT reviews of the SPE here.
I made a homemade SPE and reviewed it here. I'm having really good results with my SPE and an Exped Downmat 7. See the Gear Test for details, and I'll have a review of it when I get more experience with it.
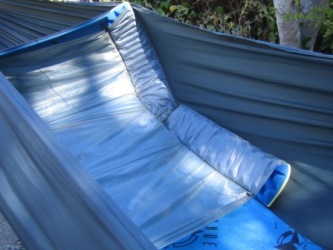
And Rick Frost made the Neat Frost Pad from a Neat Sheet. He even posted step-by-step instructions on the Yahoo site. (I have the instructions here, but you'll need Adobe Acrobat Reader to see them.)
Speer Segmented Pad Extender
Photo from Ed's SPE page
My Homemade SPE
Good coverage for a few more ounces
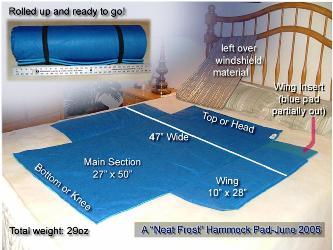
Rick Frost's Neat Frost Pad
Photo by Rick
Carol found a quick, easy way to attach side warmer pads. She just sewed two strips of elastic on each side of her Clark, then slips small "wing pads" into each side. Lay the big pad in the middle and the side warmers wrap around your shoulders. Her side pads weigh 1 oz each and the straps took about 20 minutes to install. You can put extra clothes in the straps, too.
Elastic Straps to Hold Side Pads on a Clark
Pic by Carol
Big Agnes makes sleeping bags with no insulation on bottom, but a pad sleeve to insert your pad, or one of their insulated air-core pads. This makes it much easier to stay on your pad as you move around at night, and keeps out the drafts that a quilt/pad combo can cause. If you have a Hennessy A-sym, the left-zip versions are easiest to use.
You can also make a two-layer hammock and put the pad between the layers. Check here for details.
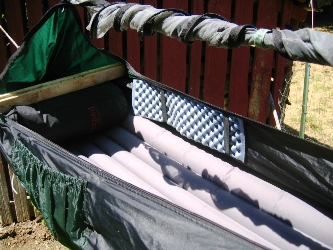
Much like the two-layer hammock, you can create a "Pad Pocket" underneath the hammock so you can insert insulation. With this method the pad stays put so you don't have to wrestle with it in the hammock, but you're also limited on adjustments, like if you wanted to change which diagonal you sleep on. Without inserting darts into the pocket, you'll have to use non-compressible insulation like a CCF pad. CD Pritchard has illustrated directions for creating this version.
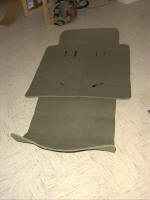
Detail of opening for inserting CCF pad
Pic by CD Pritchard
| A Few Examples: | Cost (US) | Weight (oz) | Packed Bulk (in) | Loft in Use (in) |
| Option #1: 2 x .25" CCF Pads (~45 F) | ||||
| One full-length, one as wings or overlap | ||||
| Notes: Rick's or Rock's pads, for example. | ||||
| Option #2: CCF Pads w/ SPE (~20 F) | ||||
| Full length .5" CCF pad | ||||
| Torso length .5" CCF pad | ||||
| SPE 2x2 | ||||
| SPE Wings (cut from torso length pad) | ||||
| Total: | ||||
| Notes: SPE makes it much easier to stay on pad and keep side insulation in position. | ||||
| Option #3: Exped Downmat 7 w/ SPE (Possibly 0 F) | ||||
| Exped Downmat 7 | ||||
| SPE 2x2 | ||||
| SPE wing pads | ||||
| Total: | ||||
|
||||
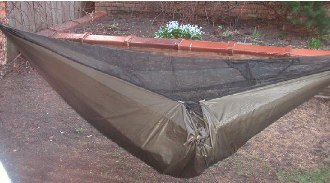
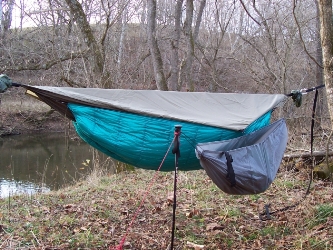
| Windproof Undercover. |
Ray Garlington invented the Garlington Taco, which is basically a windproof undercover that hangs like an underquilt below the hammock and prevents the wind from robbing your heat through convection. You can also put insulation inside the Taco...anything from leaves to blown-up garbage bag to extra clothing and sleeping bags to an open cell foam pad. (See here for details.) Ray now puts a "Bag o' Feathers" in there. See his Silk Hammock design for details on the Taco and Bag o' Feathers.
Gear Collector figured out how to make the stock Hennessy tarp fit as an A-sym undercover. Like all good winter hammocking pioneers, he wrote detailed instructions with pics here (Adobe Acrobat Reader needed to view file). Of course, you'll need another tarp (preferably a bigger one) to protect you from the rain.

Garlington Insulator on Speer Hammock
Original on Ray's page
Hennessy Underfly
Photo by Gear Collector
Some folks use materials like windshield heat reflectors and mylar space blankets to reflect radiated heat back to your body. I've never used these, but it seems like the biggest advantage with these is that they block the wind. If you have a good story about how one helped keep you warmer, email it to me and I'll post it here.
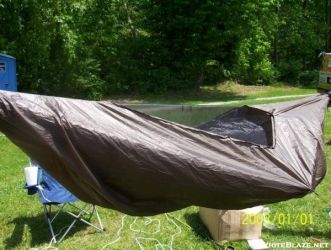
Hennessy SuperShelter
Pic by Sgt Rock
Jacks 'R' Better used to make a Weather Shield undercover from Microporous Polypropylene that was 100% waterproof and extremely breathable. It was designed to fit over their underquilts, but you could use it alone just like a Garlington Taco and put your own insulation inside. They made an overcover for your top quilt, too. See my Weather Shield Review and Test Page.
Now they have a Weather Shield Type 2 made from silnylon and DWR.
Weather Shield Bottom
Weather Shield Top
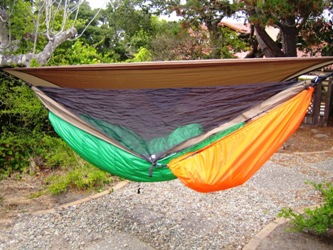
| Overcovers. |
Overcovers are a lot like undercovers, but they go on the top and trap heat inside the hammock. They work well to preserve heat in windy weather, but can get clammy in humid weather. In the pic of Sgt Rock's SuperShelter above, the under- and overcovers are all one piece...the new models have separate pieces, which allows moisture to vent out the sides. The HH version is ~3 oz of silnylon and has a big window at the top for ventilation.
Headchange4u made a DIY version from DWR...his doesn't have a window in the top, but DWR is breathable so it should be ok in most conditions. He basically made it the same shape as the HH bug net and put on attachments to hold it on the hammock.
DIY Overcover for Hennessy
Pic by Headchange4u
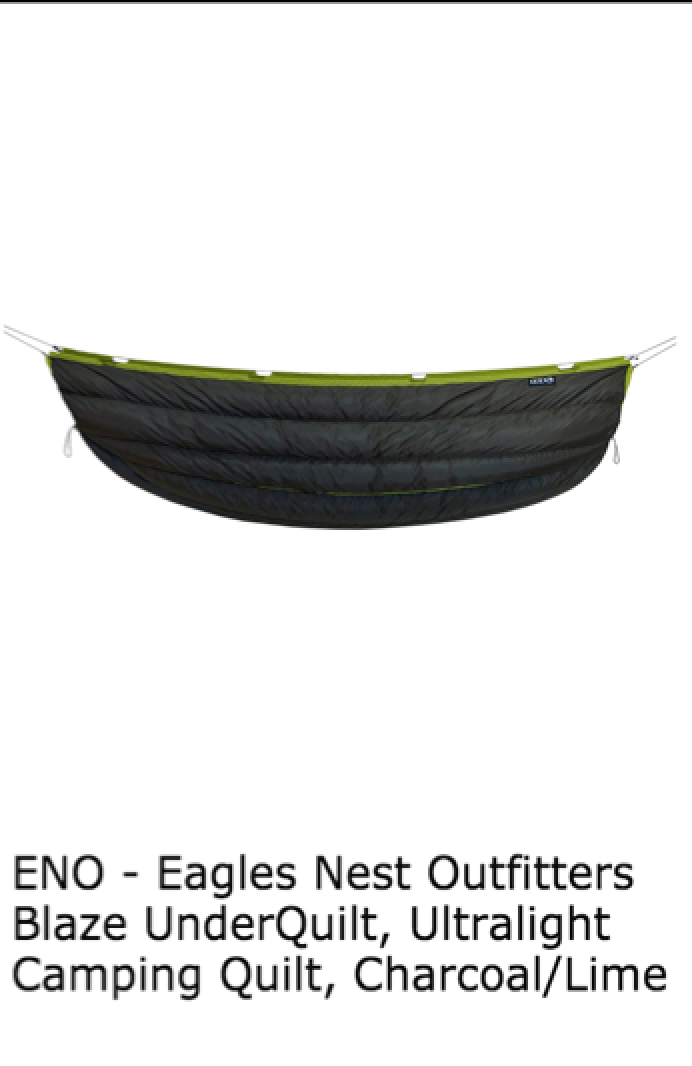
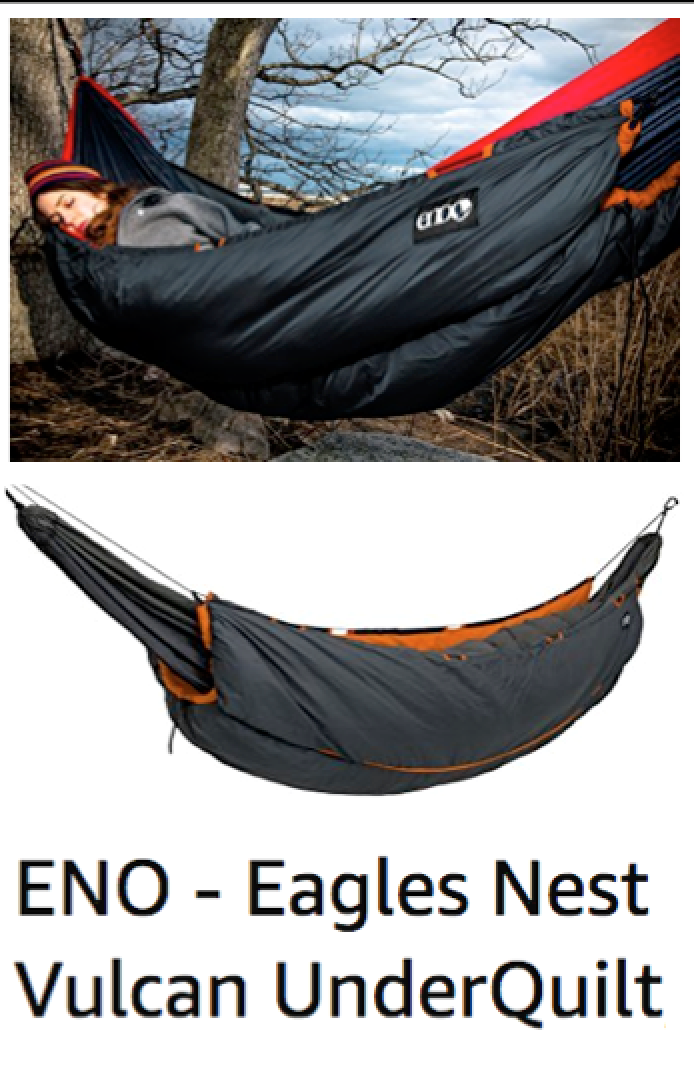
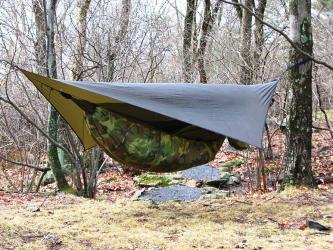
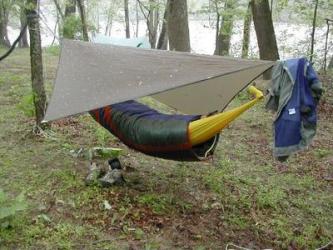
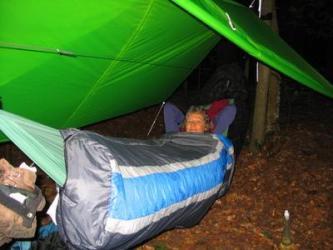
| Underquilts. |
Attach an "underquilt" to the bottom side of the hammock. If you're not lying on the quilt, it won't compress. Just make sure it's tight against the bottom of the hammock because any air space between the hammock and quilt will quickly get cold. This is the most comfortable way I've found on the market to stay warm in a hammock.
Jacks 'R' Better was the first company to sell underquilts, and the only company to sell down underquilts. They're made for Hennessy's line, but the Jacks haven't found a hammock yet that the quilts won't fit on. I use my 3-Season Set on my homemade Speer-type more often than on my Hennessy. See my BGT Owner Review for more details.
JRB's quilts are very versatile, too. I wear my No Sniveller as an insulation layer around camp, alleviating the need to carry an insulating vest or jacket just for the short time before I go to sleep. See my JRB page for lots of details on the JRB quilts.
At one time, only JRB and Kickass Quilts (Patrick) sold hammock underquilts. The KAQ design was bought out, and now lots of companies offer hammock underquilts. The ones made by American cottage manufactures tend to be much higher quality than the Chinese knockoffs. See my KAQ Test for ideas on how to make your own synthetic UQ. This model fits very well but I haven't tested a low temp yet. Patrick has taken his into the 20s F.
Underquilts are super-simple to make if you use synthetic insulation, and not too difficult if you already know how to use down. I have directions here for my synthetic versions.
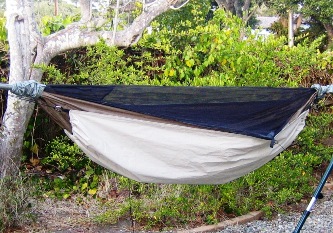
JRB Underquilt on a Hennessy
Pack Cover/Gear Hammock Attached
KAQ Potomac on a Hennessy
(pic credit)
Mirage's Primaloft Underquilt
Pic by Mirage
Dennis Klinsky's Underquilt
Photo from Thru-hiker.com
Amazon has some underquilts now (and top quilts, too!). The ones on Amazon tend to be a little cheaper than the handmade ones from smaller manufacturers, but I won't speak to the quality comparison.
| A Few Examples: | Cost (US) | Weight (oz) | Packed Bulk (in) | Loft in Use (in) |
| Option #1: JRB Nest (30-35 F) | ||||
| JRB Nest Underquilt | ||||
| JRB Suspension Set | ||||
| Total: | ||||
Notes:
|
||||
| Option #2: Kickass Quilts (~30 F) | ||||
| Kickass Quilt (Polarguard 3D) | ||||
| Notes: 80" long, 48" at widest point (shaped to Hennessy Asym). | ||||
| Bulk Comparison. |
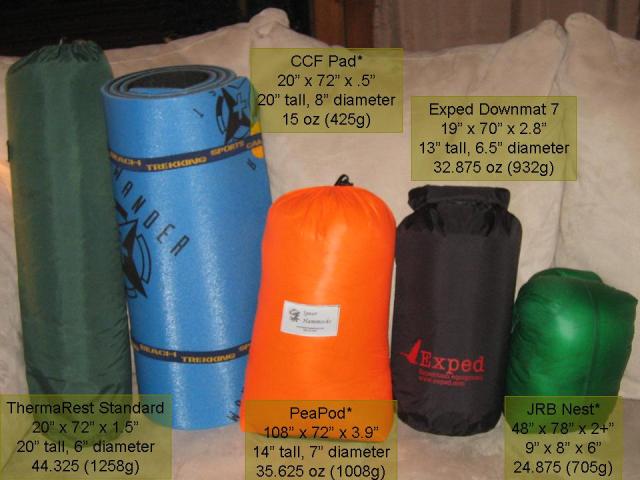 |
(Insulation Coverage) (Measured Stuffed Size) |
| Notes: JRB has 2 oz overstuff. PeaPod is 900fp down with 2 oz overstuff and provides top and bottom insulation. CCF pad includes a 4" diameter circle in the middle to stuff gear into. |
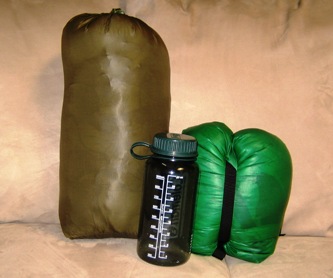 KAQ Potomac, JRB Nest, 1L Bottle |
| Ed Speer's PeaPod. |
The Speer PeaPod is like a down sleeping bag that completely surrounds the hammock and can get you to the 30s. You can add insulation inside the PeaPod, like his Top Blankets or dead leaves under the hammock, and use a top quilt inside the hammock, to increase the temperature range. Ed often sleeps with a pad inside his hammock, a PeaPod around it, and a Top Blanket used as a top quilt. The PeaPod won't work on a Hennessy.
MedicineMan wrote a pretty detailed PeaPod Review on Whiteblaze.net.
I've started my PeaPod Test page, which will eventually result in a full review when I get enough experience with it. I gained a lot of confidence in it at Winnemucca, though.
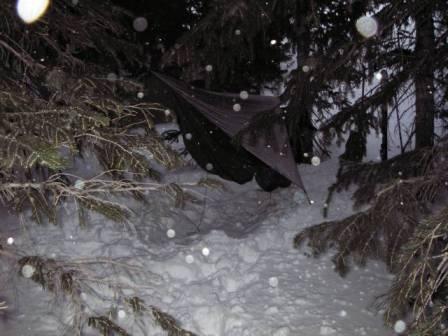
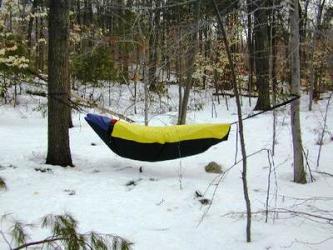
PeaPod in the Snow
Trip Report
PeaPod at Winnemucca
Trip Report
| A Few Examples: | Cost (US) | Weight (oz) | Packed Bulk (in) | Loft in Use (in) |
| Option #1: 700fp PeaPod (45-75 F) | ||||
| PeaPod 700fp down, no overstuff | ||||
| Notes: 1.5" loft on bottom, 1" on top | ||||
| Option #2: PeaPod All-The-Way (35 F) | ||||
| PeaPod 900fp down, 2 oz overstuff | ||||
| Notes: 2.2" loft on bottom, 1.7" on top. However, because of the large volume inside the PeaPod, I have to add a top quilt below about 50F. This brings the weight of the PeaPod to roughly the weight of the JRB 3-Season Set for the same temps. | ||||
| Pull-Up Bag. |
You can pull a sleeping bag all the way over a hammock so the hammock is actually inside the sleeping bag. I tried to zip my mummy bag around my hammock, but I couldn't get a good fit. Then I sewed a button-hole into the middle of the foot end, but I still couldn't get a good fit because the bag wasn't long enough. Another option is to cut a 6-7" hole in the foot end so the bag can slide up far enough to cover your shoulders (see pic). That's what Coy did in the picture below, and it kept him warm on our snowy night in the 30s at Hot Springs Campground.
You'll need to find a way to keep the head opening snug against the hammock so your warm air doesn't spill out; DebW put elastic around the neck so it snugs right up to the hammock with no adjustments. She also attached some material from the foot of the bag to the hammock supports to reduce lost heat (not shown in the pic below). Coy just stuffs a piece of clothing into the foot hole to act as a gasket.
DebW says it's not so tight as to restrict movement; she can still get on the proper diagonal and sleep on her side. Her bag still has its zipper so she can open it for ventilation. The bag might hang down quite a bit that way, though. She estimates her thin bag is good to ~50°F.
Coy's a big Alabama boy, and his bag restricts his movement a bit...he can't get diagonal, but he compensates by putting his heels on each side of the hammock to get the pressure off his knees and back. Must not be so bad if he still finds it more comfortable than sleeping on the ground.
Coy's bag over homemade hammock
Photo by Youngblood
DebW's Pull-Up Bag
Photo by DebW
Below are pics of Medicine Man's Western Mountaineering Ponderosa (15 F) pulled over a Crazy Crib hammock. He only uses this below 20F and reports no constriction. Both pics by Medicine Man.
| Pockets Underneath. |
The Clark Jungle Hammock has pockets on the bottom that you can stuff gear into for insulation, and some have integrated pad pockets to accomodate multiple sleeping pads. The pockets are on the right side in this picture.
Hikerhead's Clark Ultralight
(pic credit)
| Integrated Insulation. |
Synthetic Insulated Hammocks. If you want a compressible (and breathable) insulation for your hammock, you can build one with integrated insulation, like my PrimaLoft WarmHammock that I based on Risk's design.
Vick made an insulated hammock with Polarguard 3D. The insulated section is only 24"x78", but he sewed it diagonally onto the hammock body so he doesn't get cold shoulders or hips. The entire insulated hammock weighs only 20 oz including the hammock supports and snakeskins.
Integral Primaloft insulation on a Speer-type
WarmHammock Directions
Vick's Polarguard 3D Hammock
Photo by Vick
Down Insulated Hammocks. Down compresses better and weighs less than synthetic insulation, so I wanted to see how down works for an insulated hammock. It actually works better in my opinion - unlike a sheet of synthetic insulation, the down expands to the shape of the container, eliminating all air gaps and compression caused by hammock stretch (unless the bottom shell is too small). Standard pros and cons of the down vs synthetic debate apply.
I started by making a Down Hammock with ~10 ounces of integrated 900 fill-power down, baffled and darted.
But I didn't like laying right on the baffle seams and I didn't really think baffles were needed, so I took some down from that hammock to make the DownHammock Version 2, which has 6 oz of 900fp down and insulates from above my head to about my knees. It weighs less than 20 oz for hammock+insulation, and I don't need an underquilt or pad.
Wentworth made one too - here's his Hammock Forums thread about it.

DownHammock v2
Directions Here
Wentworth's Down-Insulated Hammock
Pic by Wentworth
| Hammock Bivies and TravelPods. |
My Hammock Sock adds more than 10° F of warmth, too. It keeps the wind from blowing across my underquilts much like the Taco, and if I use a ridgeline it keeps the wind from blowing across my toes. It gets humid inside if I breathe into it, but I haven't had any visible condensation yet. See HammockSock for instructions and my Foothills Trail Report for details about the tested temperature range. I even woke up in the snow at Hot Springs and didn't have any visible condensation.
HammockSock with Ridgeline
DebW's Hammock Bivy
Photo by DebW
| Hot Water Bottles. |
Water bottles can warm you up quickly if you become chilled at night. Just boil some water on your stove, pour it into a water bottle, slip the bottle into a sock (make sure it's sealed tight), and sleep with the water bottle against a major vein or artery. I like to put it against my groin (femoral artery) or in my armpits when I'm cold.
Collapsible water containers, like Platypus bladders or Nalgene soft-sided cantenes work great for this. My current favorite is a soft-sided 3L Nalgene cantene...I put in the hot water and lay it on my body (usually on my belly or femoral artery), and it shapes exactly to wherever it's laying. Then as it cools up I can use it as a pillow, too.
Here's the one I use:
| Vapor Barriers. |
Vapor barriers are a somewhat controversial topic. Do some research if you're inclined to use this method. One good source is Stephenson's Warmlite page.
The closest I come to vapor barriers is sleeping in my rainsuit. I wear thin polyester long johns, then my rain suit (breathable, so not really a VB), then I put my fleece jacket on top. I think it helps a little but I haven't done any testing to confirm. One time I slept with my fleece inside my rain jacket, though, and the fleece was wet when I woke up, so it makes some difference.
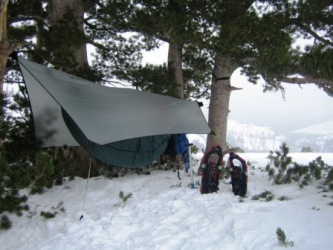
| Site Selection. |
(Acknowledgements to Ed Speer's Hammock Camping book, among others)
Just like tenting, selecting the proper site may be the most important skill to staying warm (or cool) in a hammock.
When searching for a campsite, the hammock camper is free from the constraints of many tenters...no need for level ground, no worries about rocks or roots, no concern for drainage, etc. However, even in a good site the hammocker is more vulnerable to wind and temperature shifts than a ground sleeper. One of the most important factors in the suitability of a hammock site is how exposed it is to the wind. If warmth is the goal, search for sites with natural windblocks like dense vegetation, boulders or cliffs.
Camping on the leeward side (as opposed to the windward side) of ridges and hills can make a substantial difference. In the Southeastern U.S., the weather generally blows in from the West to the East, so in the winter I usually camp on the Eastern side of ridges. This also offers the advantage of morning sun to heat up the site before I get moving.
Additionally, sleeping at the top of a hill or ridge will expose you to the wind, but sleeping at the bottom will also put you in a cold zone. As warm air rises, cold air sinks to the lowest elevation, creating a "cold sink" as temperatures drop during the night. Search for sites midway up ridges and hills.
If a stream is running along the valley floor, the temperature could be 5-10° F colder than the temperature of a site with only thirty feet or so of elevation gain! Lakes can have the same effect, so look for sites not located near water, especially running water like streams and rivers.
Hammock orientation also plays a role. If the wind is coming from the West, orient the hammock North-South and pitch the tarp close to the ground on the windward side. This will add another layer of windblock to your hammock. If you would like to take advantage of the wind to cool you off, orient your feet into the wind and angle your tarp to deflect the wind onto your hammock.
| Natural Materials. |
In addition to picking a good site with natural windblocks, nature offers other ways to keep a hammock warm. Ed Speer writes in Hammock Camping that dry leaves can be used between the PeaPod and hammock to add more loft. While I don't like the idea of putting vegetation inside my insulation, it can certainly help in a pinch.
But Medicine Man came up with a pretty good solution that combines natural materials with site selection. He pitches his MacCat Deluxe all the way to the ground and hangs his hammock a few inches off the ground. Then he piled up some leaves and duff (which you can't see very well in the picture) so the hammock is actually laying inside the pile. The hammock still supports his body weight, but the leaves and duff prevent the wind from blowing under the hammock, which reduces convective heat loss. Great idea, MM! Just be sure to scatter your pile when you break camp so you Leave No Trace.
And NigelP took the below picture in France...it's almost a snow cave! Great idea, and it looks like it blocked quite a bit of wind.
Medicine Man's MacCat and Duff Pile
(pic credit)

NigelP's Hammock Cave
(pic credit)
Top of Page | Site Map | Privacy Policy
© 2005 to Present | Email Me