Support System with Crazy Creek Buckles
I really like the buckles on the Crazy Creek system, but I didn't like how the webbing has to be doubled to use it. So I got two buckles and made my own system using Ed Speer's 1" polypro webbing. With this system, I only have to wrap the webbing once around the tree, and I can adjust or center the hammock very easily from underneath the tarp. And although I've never had a problem with water running down the straps onto the hammock, this system also has cord connecting it to the hammock, so if any water makes it past the buckle a drip string will catch the remaining drips.
Final Weight: 1-1/8 oz (32 g) each, plus webbing (weight varies depending on length)
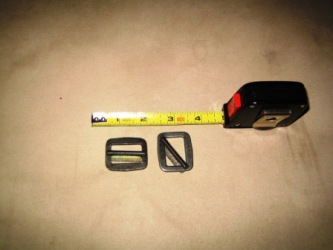 |
Here are the buckles as they arrived from Crazy Creek. I think they're stamped or cast b/c I don't see a weld in there, so they should be strong enough even though Crazy Creek's customer service didn't have a tested weight when I asked. The slider can't slip out even when turned diagonally inside the buckle. The buckles weigh 7/8 oz (26 g) each. Arkwater tracked down another source for the buckles here. They're called "metal cinch buckles" and the pic looks exactly like the Crazy Creek ones, but with a different finish. They also have a 1-3/4" buckle for use with wider webbing. |
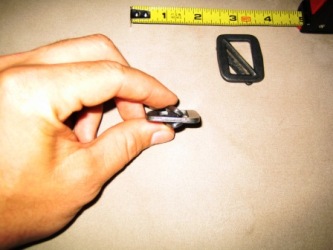 |
This shows the "V" shape of the slider. |
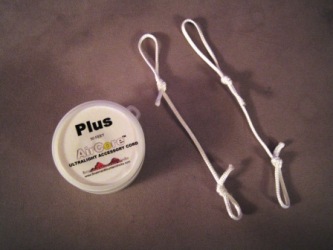 |
I used Air Core Plus from BPL for the cord, tying an overhand on a bight at each end. I made a big one for the end that will go on the webbing so that two strands of cord will make contact with the webbing, dispersing the weight. |
 |
Here's the final product. Steps to get here:
|
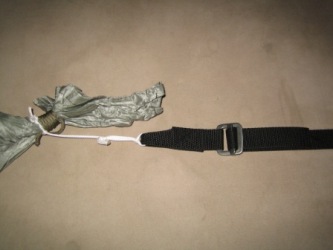 |
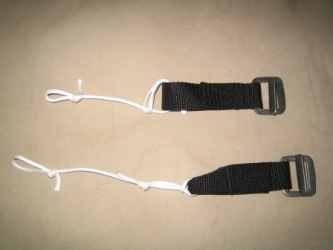
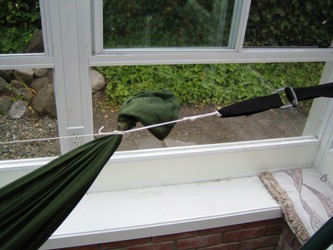
And here's what it looks like with a hammock and webbing. I should be able to use a shorter piece of webbing for the support with this buckle because the webbing only has to go around the tree once. When I decide how much I need (probably 5-6'), I'll post a final weight...I expect it to be 2.5 oz per side, for a total of 5 oz. My current webbing system is a 130" strap per side, 2 oz each, 4 oz total. My lightest support system is Air Core Plus and HH tree huggers, totaling 2.5 oz, so the buckle system is a net gain of 2.5 oz. Not sure if that's worth it... |
 |
DownHammock v2 with ridgeline. |