Gravity Filter from Katadyn Hiker Filter and Walmart Dry Bag
I used the Katadyn Hiker filter, the bottle neck and cap from a flexible Nalgene bottle (NOT the soft-sided canteen), and the 8L bag from the Walmart DryBag 3-pack. The SmarTube will allow me to screw the tubing right onto a water bottle, then just disconnect the tube from the filter and drink from it.
Final weight is 5-1/8 oz (144 g), not including the tubing because I'd carry that anyway. I could probably scrape another fraction of an ounce from the filter, and changing the bag to cuben fiber would save a bit as well.
Discuss This Project Here.
| DIY Gravity Filter | |
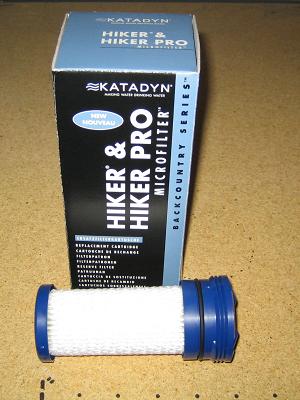 |
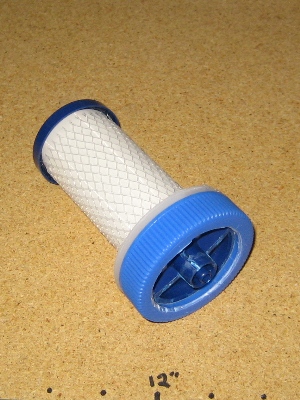
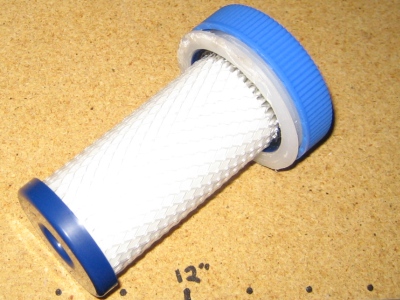
I started with the Katadyn Hiker and Hiker Pro filter. It weighs 3-1/4 oz (92 g). I cut off the threads with a Dremel...had to use the reinforced cutting disk because it broke the flimsy ones. |
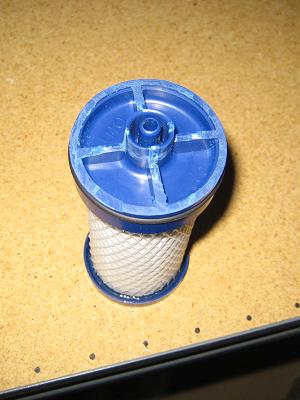 |
I wanted to leave the nipple guard on there, so I ended up leaving some of the crosspieces on it as well. I could probably take off another fraction of an ounce by trimming it further. It now weighs 2-7/8 oz (82 g). |
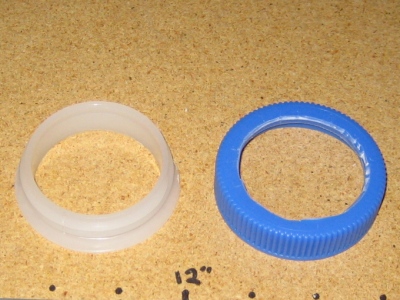 |
Here's the bottle neck and cap after they've been cut down. I used the Dremel again to cut off the bottle neck, then used a razor to cut out the center of the cap. (I cut the bottom of the Nalgene off at 500mL mark so now I have a cup for Joker to use for holding his freezerbag meals.) |
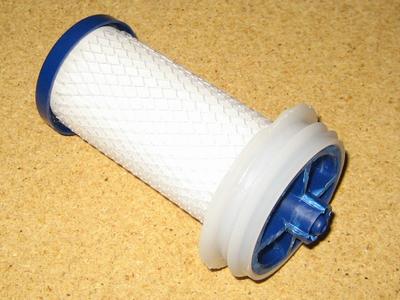 |
The filter fits exactly into the Nalgene mouth, and the filter's O-ring keeps it nice and snug. |
 |
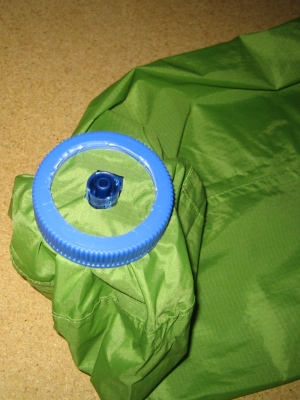
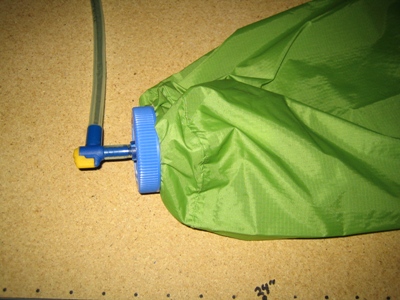
And here's the cap on the neck. When completed, the fabric of the water bag will go between the white bottle neck and the blue cap. |
 |
Another view of the bottle neck and cap. |
 |
For this step, put the bottle neck inside the bag and screw the cap on from outside. Push the filter into the bottle neck. Then I used the razor to trim the water bag around the nipple guard. |
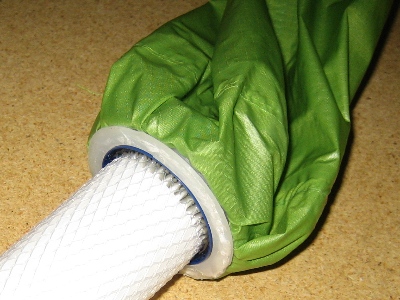 |
Water bag turned inside out to show the bottle neck and filter. |
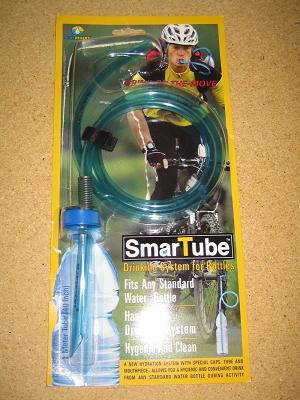 |
Here's the SmarTube that I'll use to connect the filter directly to the water bottles without having to balance everything on the ground, without worrying about leakage, etc. And it'll be convenient because when the bottle is full, I'll just disconnect the hose from the filter and use the tube as a straw. No worries about contaminating the hose during storage. I'll have to experiment with this for filling it up. The valve that lets air into the bottle while you're drinking keeps the water from sloshing out of the bottle. I turned it upside down and there was a slow drip...just don't turn the bottle upside down and it'll be ok. But I'm not sure if it'll let the air out while it's filling up. Easy test...I'll update soon. |
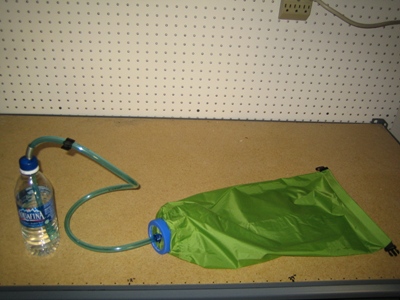 |
And here's the completed filter. |
 |
Here's the Camelbak ErgoLock that's on my Platy tube. When I find my other one, I'll attach this directly to the filter as an on/off valve like this. It'll stay permanently attached so I can turn it off, but not have a tube connected, while I fill the water bag. Then attach the hose and turn it on. |