Nesquik Windscreen
I recently started experimenting again with my OES Alcohol Stove (the same Brian who makes the MacCat tarp). I detailed one of the experiments in the 2 oz Kitchen setup writeup, but I wasn't really happy with how unstable it was. So I decided to make a more integrated setup that would also be more stable. It looks pretty durable, too.
The Nesquik can performs the function of windscreen, ground cover, and pot stand all for 2-5/8 oz (74 g) plus tent stakes (gutter nails) - but most importantly, it's VERY stable. I still need to tweak it for efficiency, but I'm pretty satisfied that the concept is proven.
This setup weighs a total of 4-3/4 oz (135 g) including the stove, screen, gutter nails, lid, Foster's pot and Nesquik screen - everything except fuel and fuel bottle. I haven't made a cozy yet, either.
| Item | Weight (oz - g) |
| OES Stove | |
| Fosters Pot | |
| Lid | |
| Windscreen | |
| 2 x Gutter Nails | |
| Total Weighed Together: 4-3/4 oz - 135 g | |
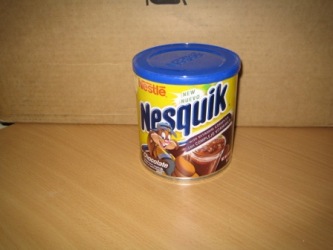 |
Here's the can I started with. Nesquik, 14.1 oz (400 g) Net Wt, 4" diameter by 4.25" height. I first tried it with a different drink mix can, but after I got home I figured out that the side was made of cardboard even though the top and bottom were metal...make sure the whole thing is metal.
The first step was to remove the label, then use a normal can opener to cut off the lip around the top rim. |
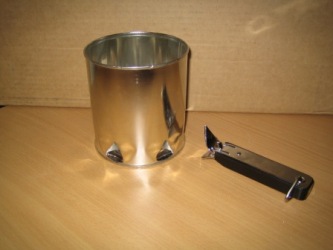 |
Then I used a church key to punch air holes in the bottom. I probably need to file down the sharp edges before I put it in my pack, but all the edges are on the inside so it's not a big deal. |
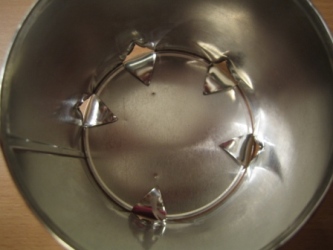 |
Top View - I wanted to make the amount of air adjustable for windy conditions, so I put four in one side and only one in the other. In windy conditions, I'll put the side with only one hole towards the wind. It might need more ventilation than this, though. |
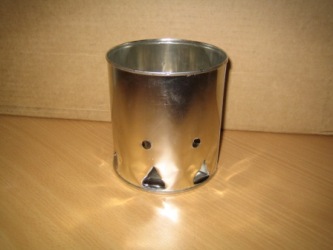 |
Then I drilled the holes for the pot support. I centered them about 2" high and 1.75" apart, then repeated on the other side for a total of four holes.
I drilled a pilot hole with a 5/32" bit, then used a 5/16" bit for the final hole. I had to be pretty careful because once the bit went through it caught the edge of the hole and tore it up a bit. I had to use nippers and a file to remove the sharp edges. The burner holes on the stove are about 1" off the ground, and allowing for the bottom of the can, this puts the bottom of the pot about 7/8" above the burner holes. |
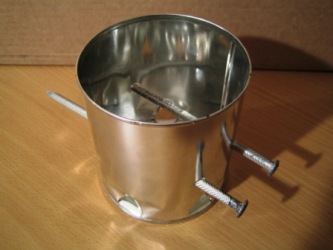 |
Then put the gutter nails through the holes to make the pot stand. |
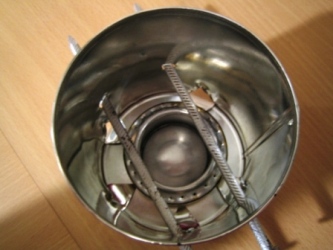 |
From the top looking in, with the stove inside. |
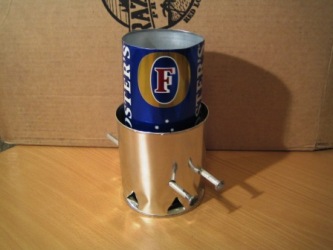 |
With the Foster's pot on the pot stand, there's about a 3/8" gap all around. If this isn't enough for ventilation I might punch another hold or two into the top. |
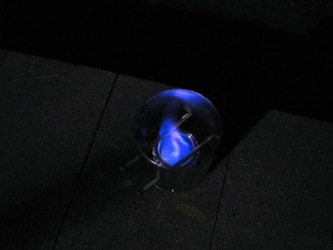 |
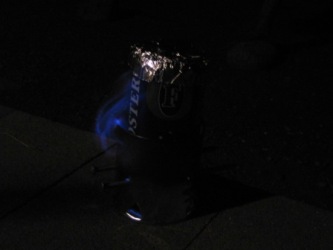
The screen outside with the stove lit (before it pressurized). Other than tweaking for efficiency, the only bad thing I found so far is that it's kinda hard to light. I put the fuel in the stove, then set the stove inside the screen - then had to reach my hand down in there to light it. I didn't burn myself but it still wasn't very comfortable. If it's not a problem after a few more tests I might just leave it...otherwise, I might drill a hole right above the stove so I can put a match in there. After I lit the stove, I inserted the gutter nails and put the pot on. I was kind of concerned that it might trap too much heat and cause an explosion, but I'm still here so it's all good. I did see some yellow flame on the outside and thought the screen was melting and burning, but it was only the glue from the label burning off...the can is a bit discolored above the flame level, even on the outside, but it doesn't look like the heat damaged it at all. |
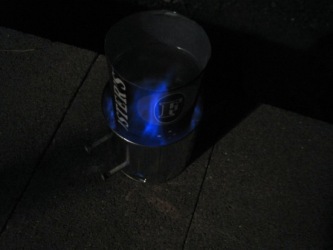 |
Flames licked up the sides the whole time it burned so I still have some tinkering to do. |
 |
Test #1 - Boiled 2 cups of tap water (probably ~45 F) in 5:45 on 45 mL (about 1.5 oz) of denatured alcohol. It stayed at a rolling boil until the flame burned out at 7:45. Ambient temp was 55 F and wind was ~3 mph.
Test #2 - 1 oz (30 mL) of fuel burned for 5:50, but the pressure dropped around 3:50 and the "roar" stopped. At burnout, the water was starting to bubble but wasn't boiling. I think the stove can probably do better if I tweak the screen a bit, but I'm gonna check with Brian and see if he has tested numbers that I can use as a baseline. |
 |
Click on the pic for a video of the burn (4 MB, 25 sec). |