Just Jeff's Outdoors Page

"Going to the woods is going home, for I suppose we came from the woods originally." ~John Muir

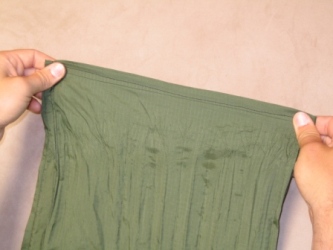
How Do I Make My Own Hammock?

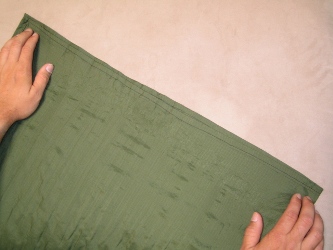
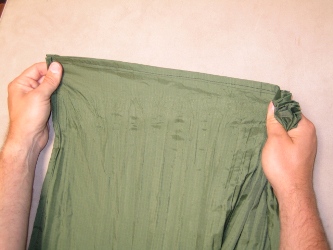
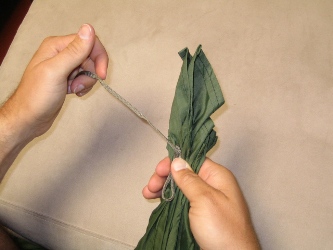
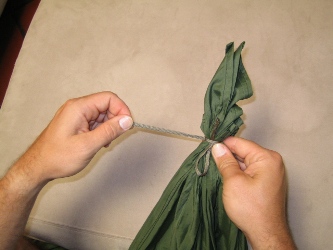
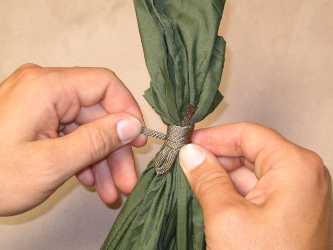
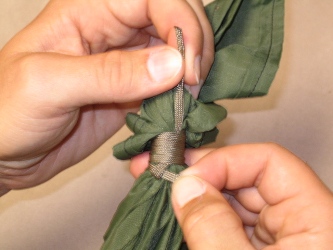
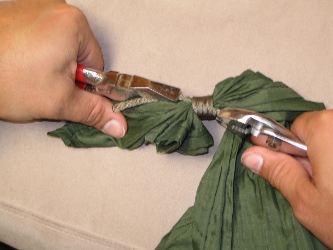
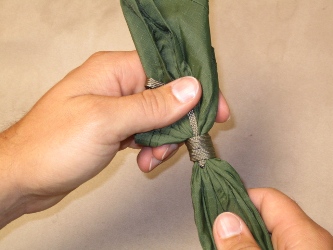
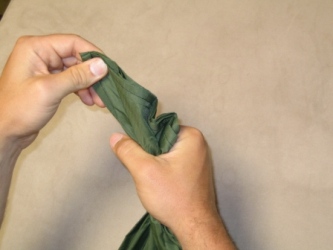
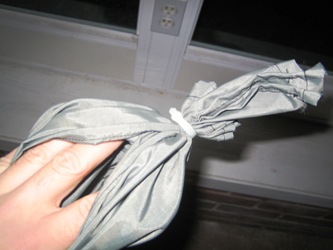
This page shows how to gather and whip a hammock, instead of tying a knot in the end like Ed Speer suggests in his Hammock Camping book. That way works fine, but whipping isn't as bulky, uses less material, and I can take my hammock apart to reconfigure how the ends are folded (by tightening up the hammock's long edges, for example). It's really just personal preference...both ways work.

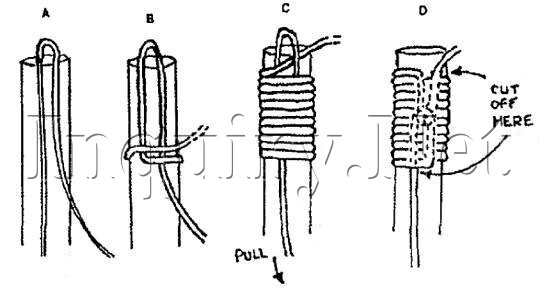
If you're not familiar with whipping, start with this picture from this page to get an idea of how whipping works, then follow the steps below.

Standard Whipping
First, prepare the hammock end just like Ed describes in Hammock Camping:

Fold the hammock in half, right side in. (In other words, fold it so you'll be laying in the inside.)

In this picture, the long edges of the hammock are on the left, and the centerline of the hammock is on the right.

Begin gathering the hammock in one hand, starting from the center of the hammock.
When the end is gathered, pull the long edges out a few inches.

This will cause the hammock's long edges to remain taut when you lay in the hammock. If you don't pull these ends out a bit, the long edges will be floppy when you lay in the hammock - may or may not be a problem for you if you skip this step.

With a cord about the length of a shoe string, form a bight like this.
Wrap the working end around the hammock while keeping the bight in place. The wraps should start at the top of bight and work the way down.

This is the trickiest part because pulling on the wrap causes the bight to come undone. It might be easier to start the first wrap loosely, then tighten it after you get the second wrap in place.

Complete five or six more wraps...as tightly as you can.

Make sure you leave a small loop at the bottom. It's better for this loop to be too big rather than too small because you'll tighten it up soon anyway.

Insert the working end into the small loop at the bottom. Ideally, you want the working end to be longer than in this picture so you have more to work with, but this cord was already trimmed since I'm reusing it.

Next, pull the end at the top of the whipping tightly...this will pull the working end (inside the loop at the bottom) into the center of the wraps, forming interlocked loops.

When the loops are interlocked in the middle of the wraps, pull both ends as tightly as you can. Pliers work well here. Be sure to keep the loops centered in the wraps.
The finished knot should look something like this. If the ends are too long, you can trim them after the whipping is complete.

"W" Whipping
On some of my hammocks, I've found that the above way makes my knees sore and it's hard to sleep on my side. I needed a way to make the centerline of the hammock sit up higher, creating a "pocket" on either side of the centerline...my head goes on one side and my feet go on the other. When I'm diagonal, this also provides a little bit of support for my knees.
Fold the hammock in half, just like step one above. Hold onto the exact center of that end of the hammock (my right hand in this picture).
Bring the center to your left hand, and put it between the corners.
This picture isn't a step, but just to show that the purpose of the Step 2 is to make a "W". The center of the "W" is the centerline of the hammock.
Hold the hammock and get ready to gather. In this picture, the corners and centerline are in my left hand, and the "bottom of the W" is in my right hand.
Gather the end, and pull the long edges out. Then continue whipping as described above.

Using Zip-Ties Instead of Whipping
Gather the ends as described above, then zip-tie it. I kinda rounded the cut when I trimmed the extra off so it doesn't catch the fabric.

Since the supports hold the hammock pretty tightly, they don't stress the zip-tie at all. I think this will work well and it's much easier than whipping. I'll see how it holds up in the field.

Back to Hammock Camping

Back to Homemade Gear

Top of Page | Site Map | Privacy Policy
© 2005 to Present | Email Me