| Calculating the Materials Needed |
The quilt is made with an outer shell of a down proof fabric. This can be 1.1 oz DWR ripstop nylon or Momentun90 available at www.thru-hiker.com as used in this project. The outer shell is chosen to be a lighter color to keep radiant heat loss to a minimum, and the inner shell material is chosen to be black to help absorb your radiant heat.
The length of this quilt is 78" long, which comes out to 6'6" long. I am 6'4" tall. The drawstring that is used to close the foot end takes away a little bit of the length. When the quilt is closed the quilt comes up to my mouth. That works well since you need to keep your mouth outside the quilt when using it. If you sleep with your mouth inside, all of the moisture from you breath will be absorbed by the quilt. I chose a width of 48" for this quilt.
Using the dimensions of 78" long by 48" wide, now the seam allowances need to be added it. A roll seam is used on all edges. Each fold is 1" wide. This means that each seam uses 3 inches, or 6 inches extra for the length and width. The total size of the fabric needed is now 84" long by 54" wide.
The baffles are made from noseeum netting. The purpose of the baffles is to keep the down from shifting around. On this quilt to save weight I used nanoseeum from www.thru-hiker.com. To seal off the baffles I made them 50" long, with 1" extra on each side. This helps to keep the down from shifting between baffles. The nanoseeum that I used would stretch over each through sewing. This allowed me to use the 48" wide nanoseeum.
If you are unsure about the dimensions to use, cut out a piece of cheap fabric to size and see how it works for you. Given the price of the quilt, this is a good idea to do anyway. $1 a yard Wal-Mart fabric works well for this. When you are testing this, gather the foot end like it is closed with a drawstring. This will account for the loss in length using this method. I found that as long as the quilt is a couple inches longer than I am tall, it will work as an underquilt. If you are unsure about the length as an underquilt, you can test this out also.
There are different types of down available. 750 fill grey goose down was used for this quilt. The fill power is how many cubic inches of volume 1 ounce of power will fill. This means that for this quilt 1 ounce will fill 750 cubic inches. The total amount of down is calculated by
Volume of Quilt = (Length in inches) x (Width in inches) x (loft in inches)
Total Down Used = [(Volume of Quilt) / (Down Fill Power)] x (Percentage of Overstuff)
This quilt was made to get a total loft of 2.5". The baffles are made to be 2" tall. The extra half inch of loft comes from the over stuff. For this quilt I overstuffed each baffle by 15%. That means the equation above comes to:
Volume of Quilt = (78") x (48") x (2") = 7488 cubic inches
Total Down Used = [ 7488 / 750 ] x (.15) = 15 oz
I chose an equal spacing on the baffles. I made 10 baffled compartments every 7.8". This means that the quilt needs to have 9 baffles. The following equation is used to determine the amount of material needed for the baffles.
Total baffle length = (Number of baffles)*[baffle height + 1.5"]
The factor of 1.5" was used to account for the roll seam that is used to sew the baffle to the shell material. This will be explained more in detail later.
Total baffle length = (9)*[2" + 1.5"] = 31.5 inches
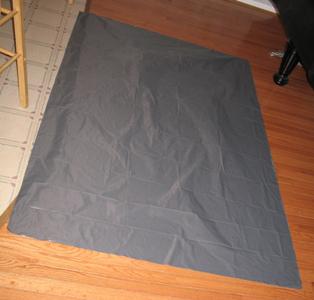
Two quilts were made while putting together these directions. The pictures I used for the directions are going to show either a grey/black or a red/black quilt.
During the sewing steps the color of thread used in both the top thread and the bobbin are frequently changed. The first paragraph of each sewing steps tells the color of thread needed in top thread and the bobbin.
| Step 1 - Cut Out the Outer Shell |
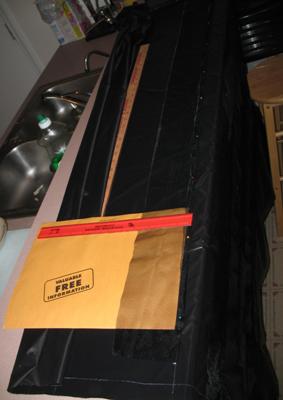
Lay out the outer shell material. For this I do not use the edges of the material. The ends are never cut straight and I do not like using the salvage edge. Draw out the 86" x 54" rectangle. I always mark on the wrong, or inside, side of the shell material. This way any left over marks will not be visible on the finished quilt. I also always test out the color of the mark to make sure it does not show through. I use the tape measure and straight edge to get a good rectangle.
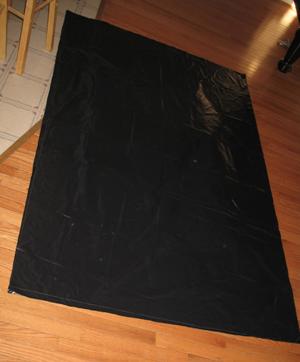
| Step 2 - Cut Out the Inner Shell |
Cut out the inner shell material the same way and size as the outer shell.
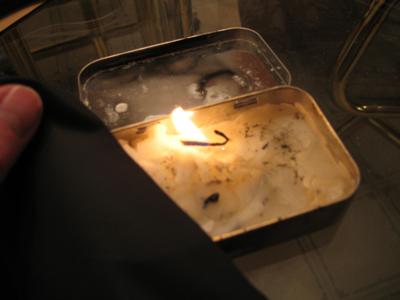
| Step 3 - Heat Seal the Shells |
The raw edges of a DWR ripstop material fray, to stop this the edges of the material needs to be heat sealed. To do this I have a candle that I pass the material over the top of. This is a step that you will want to try out on a scrap piece of material if you have not done it before. The material will melt or catch on fire really quickly if you are not careful. When I heat seal the ends, I pass of edge overtop of the flame but not in the flame. The heat raising is enough to melt the edges.
This step is done for all 4 sides on both the outer and inner shell material.
| Step 4 - Mark Out the Baffles |
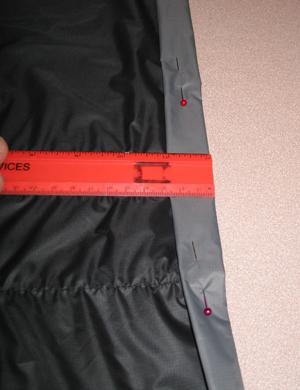
I placed 2 strips of 2 sided tape onto a countertop, this really helps hold the material in place. This quilt has baffles every 7.8 inches. The head and foot end have end seams using 3 inches of material. Onto the wrong side of the outer shell material measure down 10.8 inches on one edge and place a mark. Next, measure down and mark 10.8 inches on the opposite edge from the first mark. Use the straight edge to connect the points. This will be the first baffle. Place a mark 2 inches in on the line from each edge. This will be where the baffle will start.
Then measure down 7.8 inches and place a mark on each edge of the material. Draw a line connecting them and the mark 2 inches in on each side. This will be the second baffle. Repeat this process until all the baffles are marked. A good check is to measure down from the last baffle to the bottom edge of the material. It should come out to 10.8 inches.
Repeat this process for the inner shell material.
| Step 5 Measure and Cut Out the Baffles |
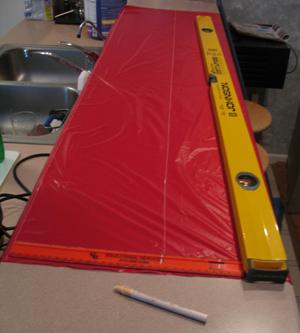
This quilt needs 9 baffles. The nanoseeum used is 48" long. The baffle material needs to be 3.5 inches wide. This is done in a similar way to how the baffles were marked on the shell material. I placed 2 strips of 2 sided tape onto a countertop, this really helps hold the material in place. Then I drew a straight line close to the top edge. This serves as a straight edge in which to measure all of the other baffles. Then measure down and mark 3.5 inches on each edge. Draw a line connecting each mark using the straight edge.
Measure down and mark 3.5 inches on each edge from the new line and then draw another line using the straight edge to connect the marks. Repeat this process until 9 baffles are marked out.
After all of the baffles are measured out, cut out each baffle.
| Step 6 - Sew the Baffles onto the Inner Shell |
For this set I used thread the color of the inner shell on both the top thread and the bobbin. This way you will only see one color of thread on the finished seam even if some of the top thread got pulled through. For the pictures below I used black thread on both.
The inner shell was chosen to sew the baffles on first. It will not affect the completed quilt if you sew onto the outer shell first. I chose the inner shell since it would be hidden when I am using it. This along with the black material would hide any mistakes I made while learning how to sew them on.
The baffles are sewn onto the quilt using a roll seam. The edge of the material is folded over once. You will be able to see the raw edge of the netting on top. Then sew in the middle of the folded material. This way there are 2 layers of material underneath the seam. The roll seam is .5 inches wide. This uses up 1 inch of the baffle material. The seams on both the top and bottom edge will then use up 2 inches of material. This leaves 1.5 left for the baffle. However, with the seam sewn into the middle of the fold, half of the material used in the fold is not attached and will add to the height of the baffle. This means that each seam will add .25 of an inch, or .5 inches total. This takes the total height of the baffle back up to 2 inches.
When sewing the baffle onto the shell material I sew all of the seams folded in the same direction. I do not think this has an effect of the completed quilt. It did however make it easier in construction to have all of the baffles lay the same direction.
To sew the baffle on, roll up the inner shell leaving the first baffle line showing. Roll the edge of the baffle material to the .5 inch roll seam. Pin the baffle onto the inner shell on the line you placed in step 4 starting at the mark you placed 2 inches in from the edge. Sew on the baffle.
The pin holes made sewing on the baffles do not need to be seam sealed. On both quilts that I made I did not notice any down leakage. Either through the material or through any pin holes. Even seams where I had to rip out the stitches and did not sew a new seam over did not leak any down.
The nanoseeum that I used for the quilt would stretch about 2-3 inches while sewing. This is why I was able to get away with using 48 inches wide material to cover 50 inches. Regular noseeum will not stretch this much. Therefore 50 inch wide material is needed.
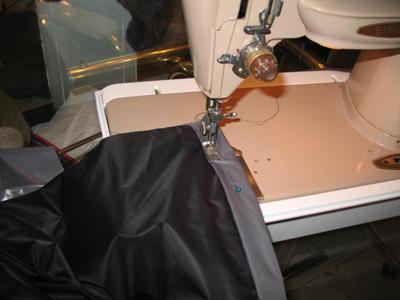
The picture below shows the second baffle pinned onto the inner shell.
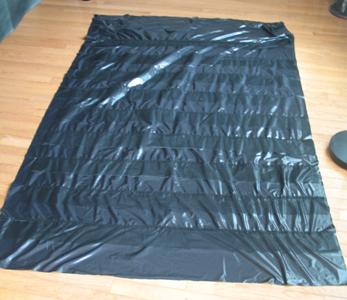
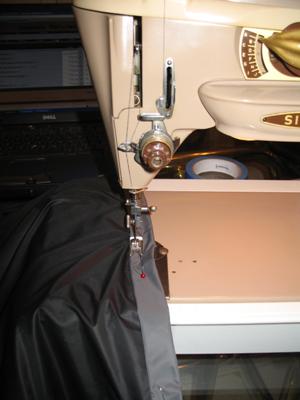
Repeat this process for the other 8 baffles. As you are pinning and sewing the baffles, keep the material on each side of the baffle rolled up. This makes it easier when feeding it through the machine. The picture below shows the inner shell with all 9 baffles sewn onto it.
| Step 7 - Sew the Baffles onto the Outer Shell |
For this set I used thread the color of the outer shell on both the top thread and the bobbin. This way you will only see one color of thread on the finished seam even if some of the top thread got pulled through. For the pictures below I used grey thread on both.
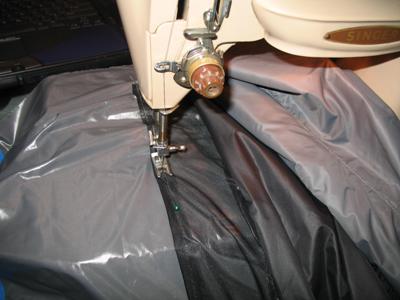
Place the inner shell on the floor or large table as shown in the picture above. Then place the outer shell on top of it with the right side facing out. Roll up the 2 shells together leaving the first baffle exposed.
Roll the edge of the baffle material to the .5 inch roll seam. Pin the baffle onto the inner shell on the line marked out for the baffle starting at the mark placed 2 inches in from the edge. It is easiest to sew if you keep the material on both sides of the baffle rolled up. Below is a picture of one of the center baffles pinned onto the outer shell.
Then sew on the baffle. Repeat this Process until all 9 baffles are sewn onto the outer shell material.
| Step 8 - Sew Stitch Line in the Head and Foot End |
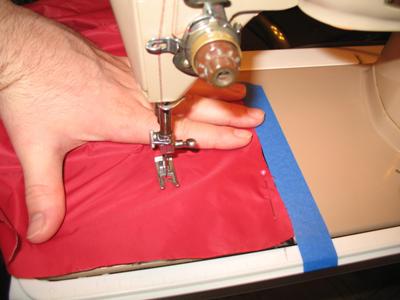
For this step I placed the outer shell color thread as the top thread and the inner shell color as the bobbin. For the picture below it is red as the top thread and black as the bobbin. I placed a piece of masking tape 3 inched from the needle. I used this as a guide in order to get a straight seam without placing a mark on the material.
In order for the down not to come out of the head and foot ends when it is being stuffed, the ends of the quilt need to be closed off. To do this place a seam 3 inches from the top and bottom edge. In addition to keeping the down in place while stuffing, this seam will keep it out of the drawstring area. This will make the drawstring area easier to sew on later and look cleaner.
In this step make sure to hold the edges together. The baffles will give the ends a lot of movement if you are not careful.
Repeat this step for the opposite end.
| Step 9 - Sew First Side Seam |
For this step use the outer shell color on both the top thread and the bobbin. For the pictures below that is grey for both the top and bobbin thread.
This seam is going to be the first finished and exposed seam sewn onto the quilt. The easiest way to pin this seam is to spread out the entire quilt onto a table or the floor. Roll seam the edges of the quilt so that only the outer shell material is shown. Use a ruler to get a consistent 1 inch seam. Pin the seam into place.
Roll up the quilt until only the edge seam is left. Sew two stitch lines into the seam. For this I did one lining up the edge of my foot on the left side of the seam, and the second lining up the opposite edge to the right side of the seam.
On this step make sure to seam feeds in even into the machine. It is easy on this type of material for the seam to move a little and cause issues with the seam. If it does move it is only going to be a cosmetic issue and not affect the overall performance of the quilt.
A side note when working with down. It gets everywhere. Just take your time. Do not worry too much about losing a little bit of down. You will soon realize when you start stuffing and measuring that it takes a lot of down to amount to anything. I think between stuffing 2 quilts I probably only lost about .2oz of down.
I first placed the long edge without a seam on top of a counter top. I placed weights on each side to keep it from moving.
Use the following equation to calculate the amount of down in between each baffle:
Down per Compartment = (Total Down Needed) / (Number of Compartments)
For this quilt the equation above comes out to:
Down per Compartment = (15 oz) / 10 = 1.5 oz per Compartment
This step is where the real fun begins. There are different methods for stuffing the down. I setup in an area with a tile and wood floor to make it easier to sweep up. I also put a drop cloth on the floor. I placed the open box on the scale and zero-ed out the reading. Then I just used my hands to remove the down from the box and stuff the baffle. With this method go slow, the faster you move the more down can get away from you. When I grabbed a handful of down I compressed it in my hand the best I could. Then I put my hand as far into the baffle as I could before I let it go.
Continue to do this until the reading on the scale reads 1.5 oz. This means that 1.5 oz of down were stuffed into each baffle. After the correct amount of down is added to the baffle, pin the rolled seam the same way as Step 9. Only pin until the baffle you just stuffed is pinned. This will keep the down from escaping while you stuff the rest of the quilt.
Repeat this process until all of the baffles are stuffed and the edge seam is completely pinned.
After the seam is pinned, take your quilt outside and clean off the down stuck to the outside. Then take the lint roller and clean rest of the down off of you and the quilt.
Check out Just Jeff's advice on How to Stuff Down a little easier.
| Step 11 - Sew Second Side Seam |
For this step use the outer shell color on both the top thread and the bobbin. For the pictures below that is grey for both the top and bobbin thread.
On this step make sure the seam feeds in evenly into the machine. It is easy on this type of material for the seam to move a little and cause issues with the seam. If it does move it is only going to be a cosmetic issue and not affect the overall performance of the quilt.
The easiest way to sew this is to have the quilt on the left side of the machine. Sew two stitch lines into the seam. For this I did one lining up the edge of my foot on the left side of the seam, and the second lining up the opposite edge to the right side of the seam.
For this step use the outer shell color on both the top thread and the bobbin. For the pictures below that is grey for both the top and bobbin thread. I used grey thread overtop of the black gross gain ribbon in order to tell if there is any stress on the seams overtime. I can visually inspect it a lot easier in the field with a different color thread.
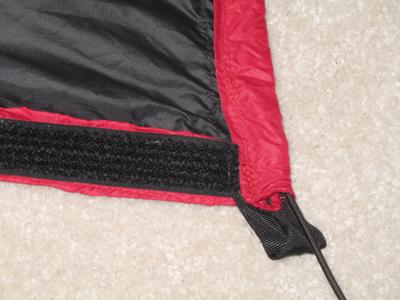
Cut 4 pieces of gross gain ribbon 4 inches long. Then heat seal the ends just as in step 3 for the shell material. This will keep the ends from unraveling. For these I used a box with an "X" in it to attach the gross gain ribbon onto the quilt. I only added one; if you are concerned with stress you can add a second one. If you are adding a second one, cut the ribbon to 5 inches long.
The picture below shows the gross gain ribbon loop sewn below the seam added to hold the down on the end baffle. Sew the loop half above the seam and half below. This will look cleaner. Make sure that when you line it up, you do not go more than 1 inch above the seam. Past that and you will affect the width of the end seam.
Repeat this for the 3 other tie-outs.
| Step 13 - Sew End Seam in the Head and Foot Ends |
For this step use the outer shell color on both the top thread and the bobbin. For the pictures below that is grey for both the top and bobbin thread.
These seams are similar to the seam sewn in steps 9 and 11. The biggest difference is that these seams are also going to be the chamber that the drawstring goes through. You need to fit 2 stitch lines in the 1 inch seam and allow for room for the drawstring. If there is not enough room left, you will not get a good seal on the foot end. On my 2 quilts I did not have any problems with this. I think the area will have to be pretty small. But this is something that needs to be taken into account.
Roll the material to a 1 inch seam so that the outer shell material is showing. Pin this in place. This part is the same as in steps 9 and 11. This step differs in the location of the stitches, for this step line up the first stitch line close to the left edge of the seam. On mine I lined it up for half of the distance from the needle to the left edge of the presser foot on the sewing machine. I started the seam so that it would sew through the gross gain ribbon tie-outs. This provided a little added strength to them.
When starting and finishing the seam, you are going to be sewing through 12 layers of shell material and 2 layers of gross gain ribbon. Your machine may get bogged down. If this happens simply turn the handle wheel a little to help the machine gets started.
Add a second stitch line about half the distance from the needle to the left edge of the first stitch line.
Repeat this process for the opposite end.
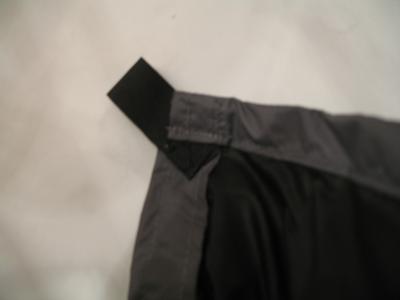
| Step 14 - Sew on the No Snag Velcro |
For this step I placed the black as the top thread and the outer shell color as the bobbin. For the picture below it is black as the top thread and red as the bobbin.
This is the step where you determine the head from the foot end. Take a second and look over the quilt. If you made a mistake anyplace, make that the foot end. You will look at it less and the closed foot box will help hide it.
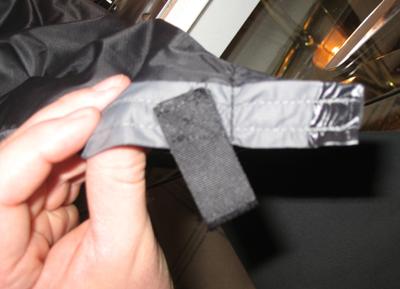
Cut 2 pieces of No Snag Velcro 24 inches long. Then heat seal the ends similar to the way you heat sealed the ends of the gross gain ribbon in step 12.
Pin the Velcro starting at the bottom edge of the drawstring chamber on the long side seam. Make sure not to pin it into the drawstring chamber. This would close it off and make it hard to use a drawstring.
Sew 2 stitch lines, 1 along each long edge of the Velcro. Also add one along the top and bottom short edges. The finished stitch pattern will be a rectangle just smaller than the strip of Velcro. The will give you a stitch line perpendicular to the force and help keep the Velcro from pulling off.
Repeat for the opposite side.
Congratulations on the finishing the final sewing step.
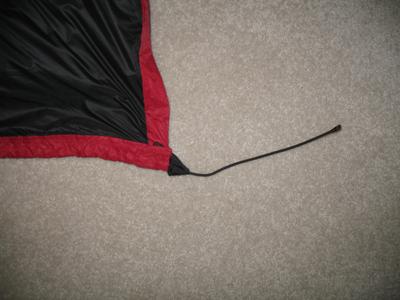
| Step 15 - Add the Draw Cord |
Feed the shock cord through the drawstring chambers on the head and foot end made in step 13. Cut it so that there to 5 inches on each side of the quilt. Heat seal the ends like in the previous steps.
Repeat for the opposite end.
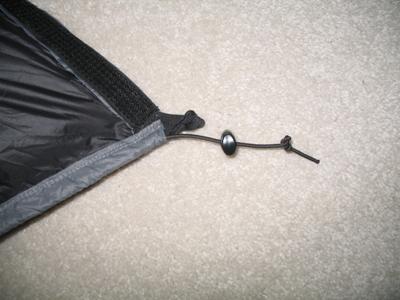
| Step 16 - Add the Cord Locks |
Lay out the quilt so the head end lays flat. Add the cord to the end of the shock cord. Place the cord lock on the shock cord such that it is about an inch for the edge of the quilt. Tie a knot on the end of the shock cord just so that the cord lock will not come off of the end.
Repeat for the other 3 drawstring ends.
Congratulations on finishing your quilt!
Back to HomemadeGear
Back to HammockCampingWarm