Dry the Surface Completely
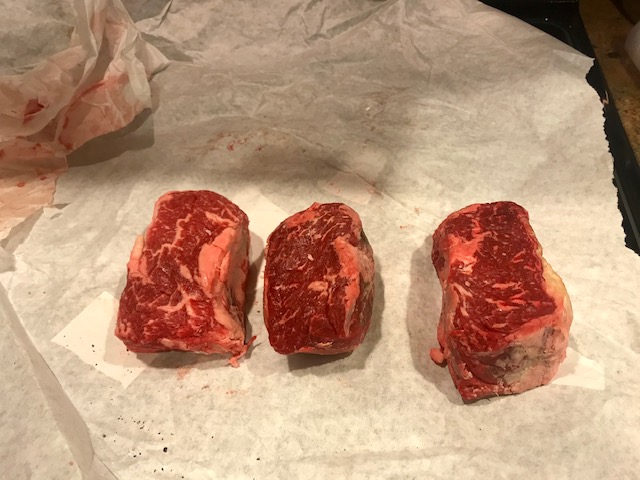
Step 1: Choose a good cut of meat. I prefer ribeyes. One way to ensure a flavorful steak is to choose extra fatty ones, and then just don't eat the fat if you want to be a little more health conscious. (But that's kind of hard to do if it's heavily marbled...which is what adds the most flavor.)
Step 2: Pat the steak dry with paper towels. To get a good crust during the sear, the meat should be completely dry. Any surface moisture will evaporate when exposed to high heat, which will begin steaming the meat. This will inhibit formation of the tasty crust, and will raise the internal temperature meat more than we'd like. (I.e., it will increase the temperature gradient inside the steak, which is the gray strip between the crust and the pink. You want to minimize the size of the gray strip because that part of the steak is overcooked.) So start by patting the steaks dry with paper towels. Some people let the meat sit overnight in the fridge so moisture can evaporate.
Step 3: Season it. I just use salt and pepper grinders, and sometimes some cumin or a little garlic powder...but if you get the sear right, salt and pepper are enough.
Preparing for Sous Vide
Step 4: Bring it to the desired internal temperature. This might be the most important step for this method. When you bring the whole steak to the desired temperature, you don't have to worry about doneness when you begin the sear. Knowing your steak is already "cooked" means you can focus your full attention on building a good crust during the searing step.
The two best ways to do this are Sous Vide and the Reverse Sear Method. I don't think one is necessarily better than the other--just different tradeoffs. Use whichever you like.
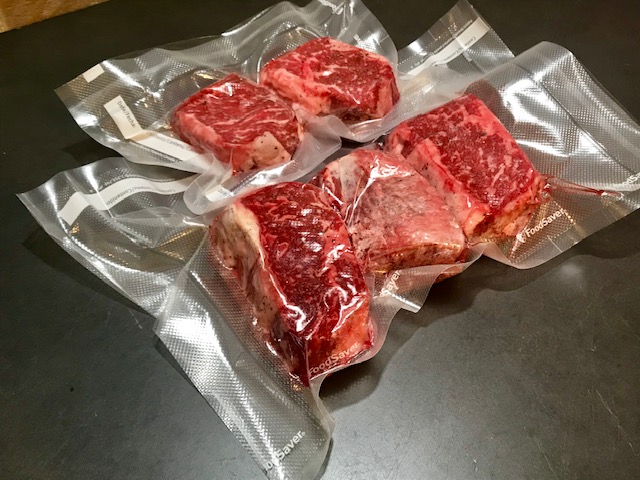
I use sous vide; this pic shows them vacuum sealed in the FoodSaver bags and ready to go into the pot. I bring the steaks to 141F for the heathens in the house, and 131F for the cultured ones.
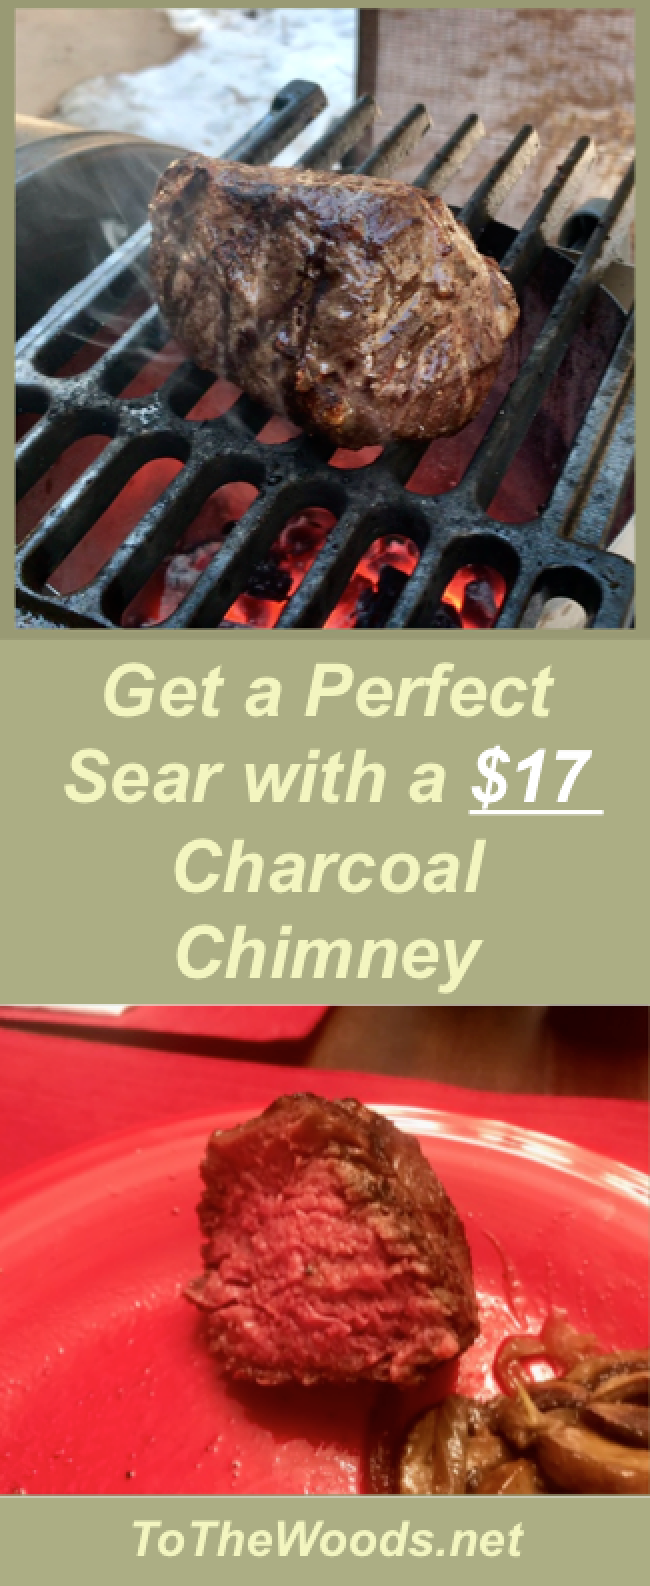
| Prepare the Charcoal Chimney |
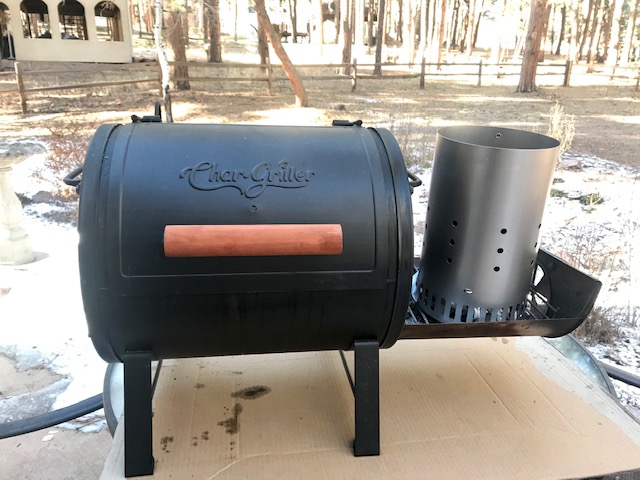
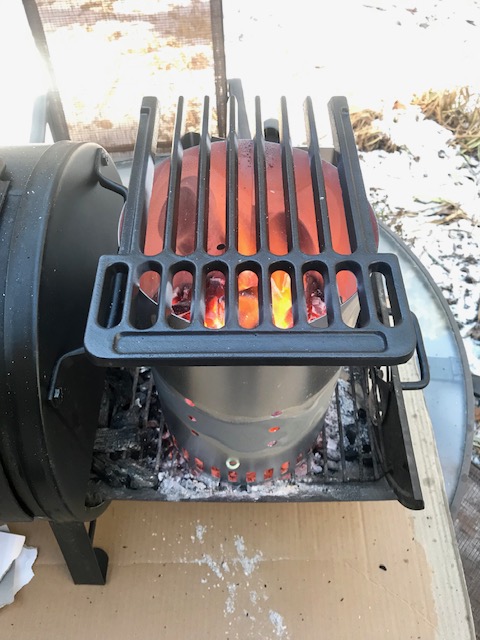
Step 5: Prepare the grill. While the meat is coming up to temperature, get the coals screaming hot. As hot as you can get them. Remember, the meat will already be cooked to the desired internal temperature when you put it on the grill, so your only concern is a good strong sear...and that requires A LOT of heat. (For comparison, Ruth's Chris steakhouse broils their steaks at a whopping 1800 degrees! But their broilers are over $1000 each and my total investment here is about $150 including the grill.)
Using a charcoal chimney focuses all the charcoal's heat into a small area (and it's more efficient because it uses less charcoal to get to a given temperature. I bought a slightly bigger chimney so I could fit two normal-sized steaks on there at the same time--or one huge steak.
Safety: You don't need to do this on a grill, but the area under the chimney will also get very hot so be sure to use a area safe for fires, like a bed of gravel or a fire pit.
When the coals are ready, put the cooking grate on top and bring it up to temp. Any cooking grate will do here but bigger grates mean more mass to heat before it's ready to sear, and increased risk of a stupid-hot grate falling over because it's less stable. So I spent a few bucks on an adustable cast iron grate just for this purpose. When I only use half the adjustable grate, it's just the right size and it sits very stably on the chimney.
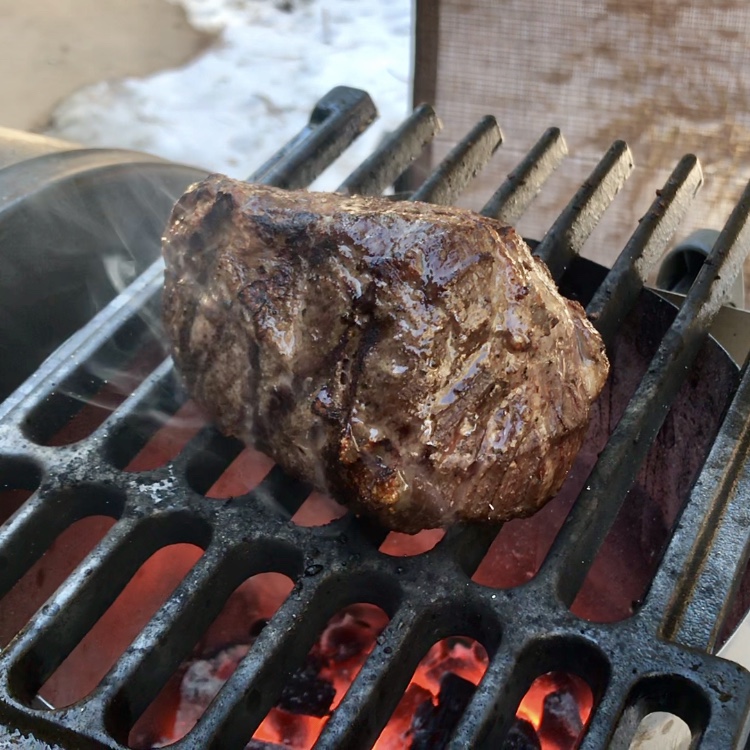
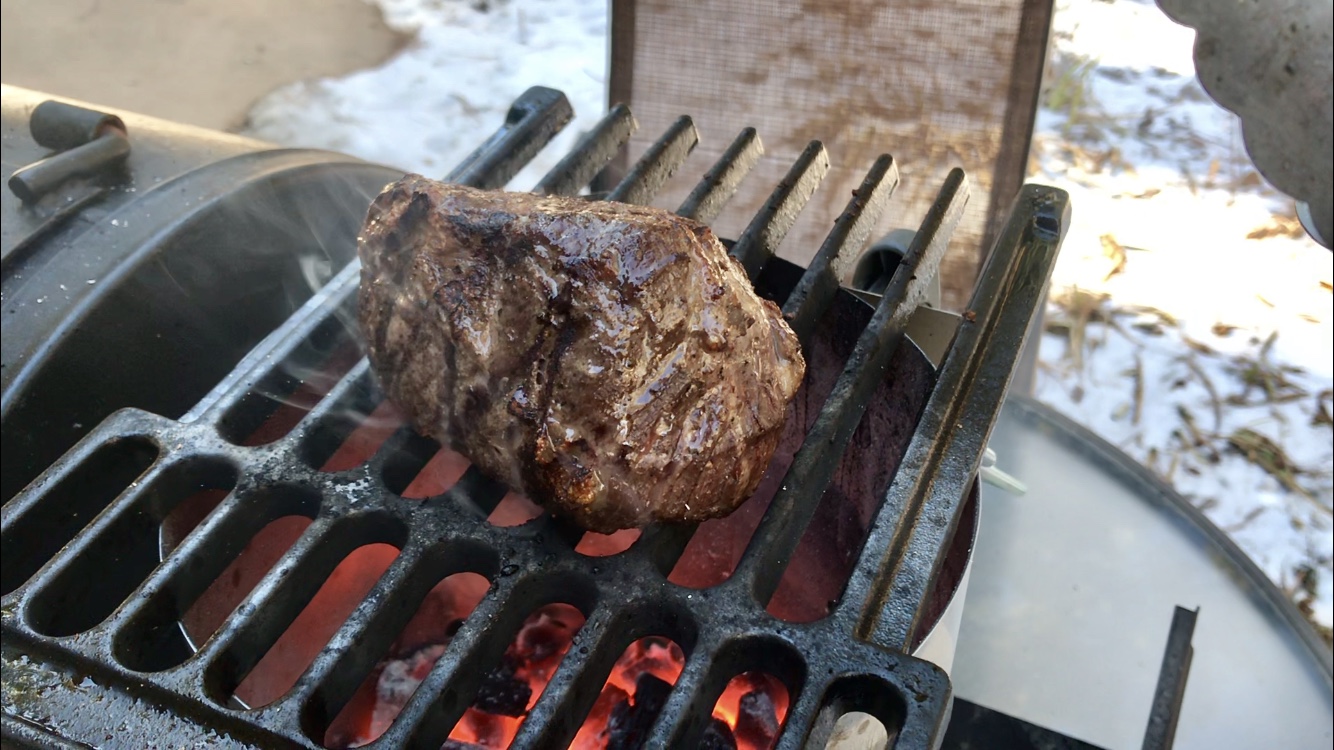
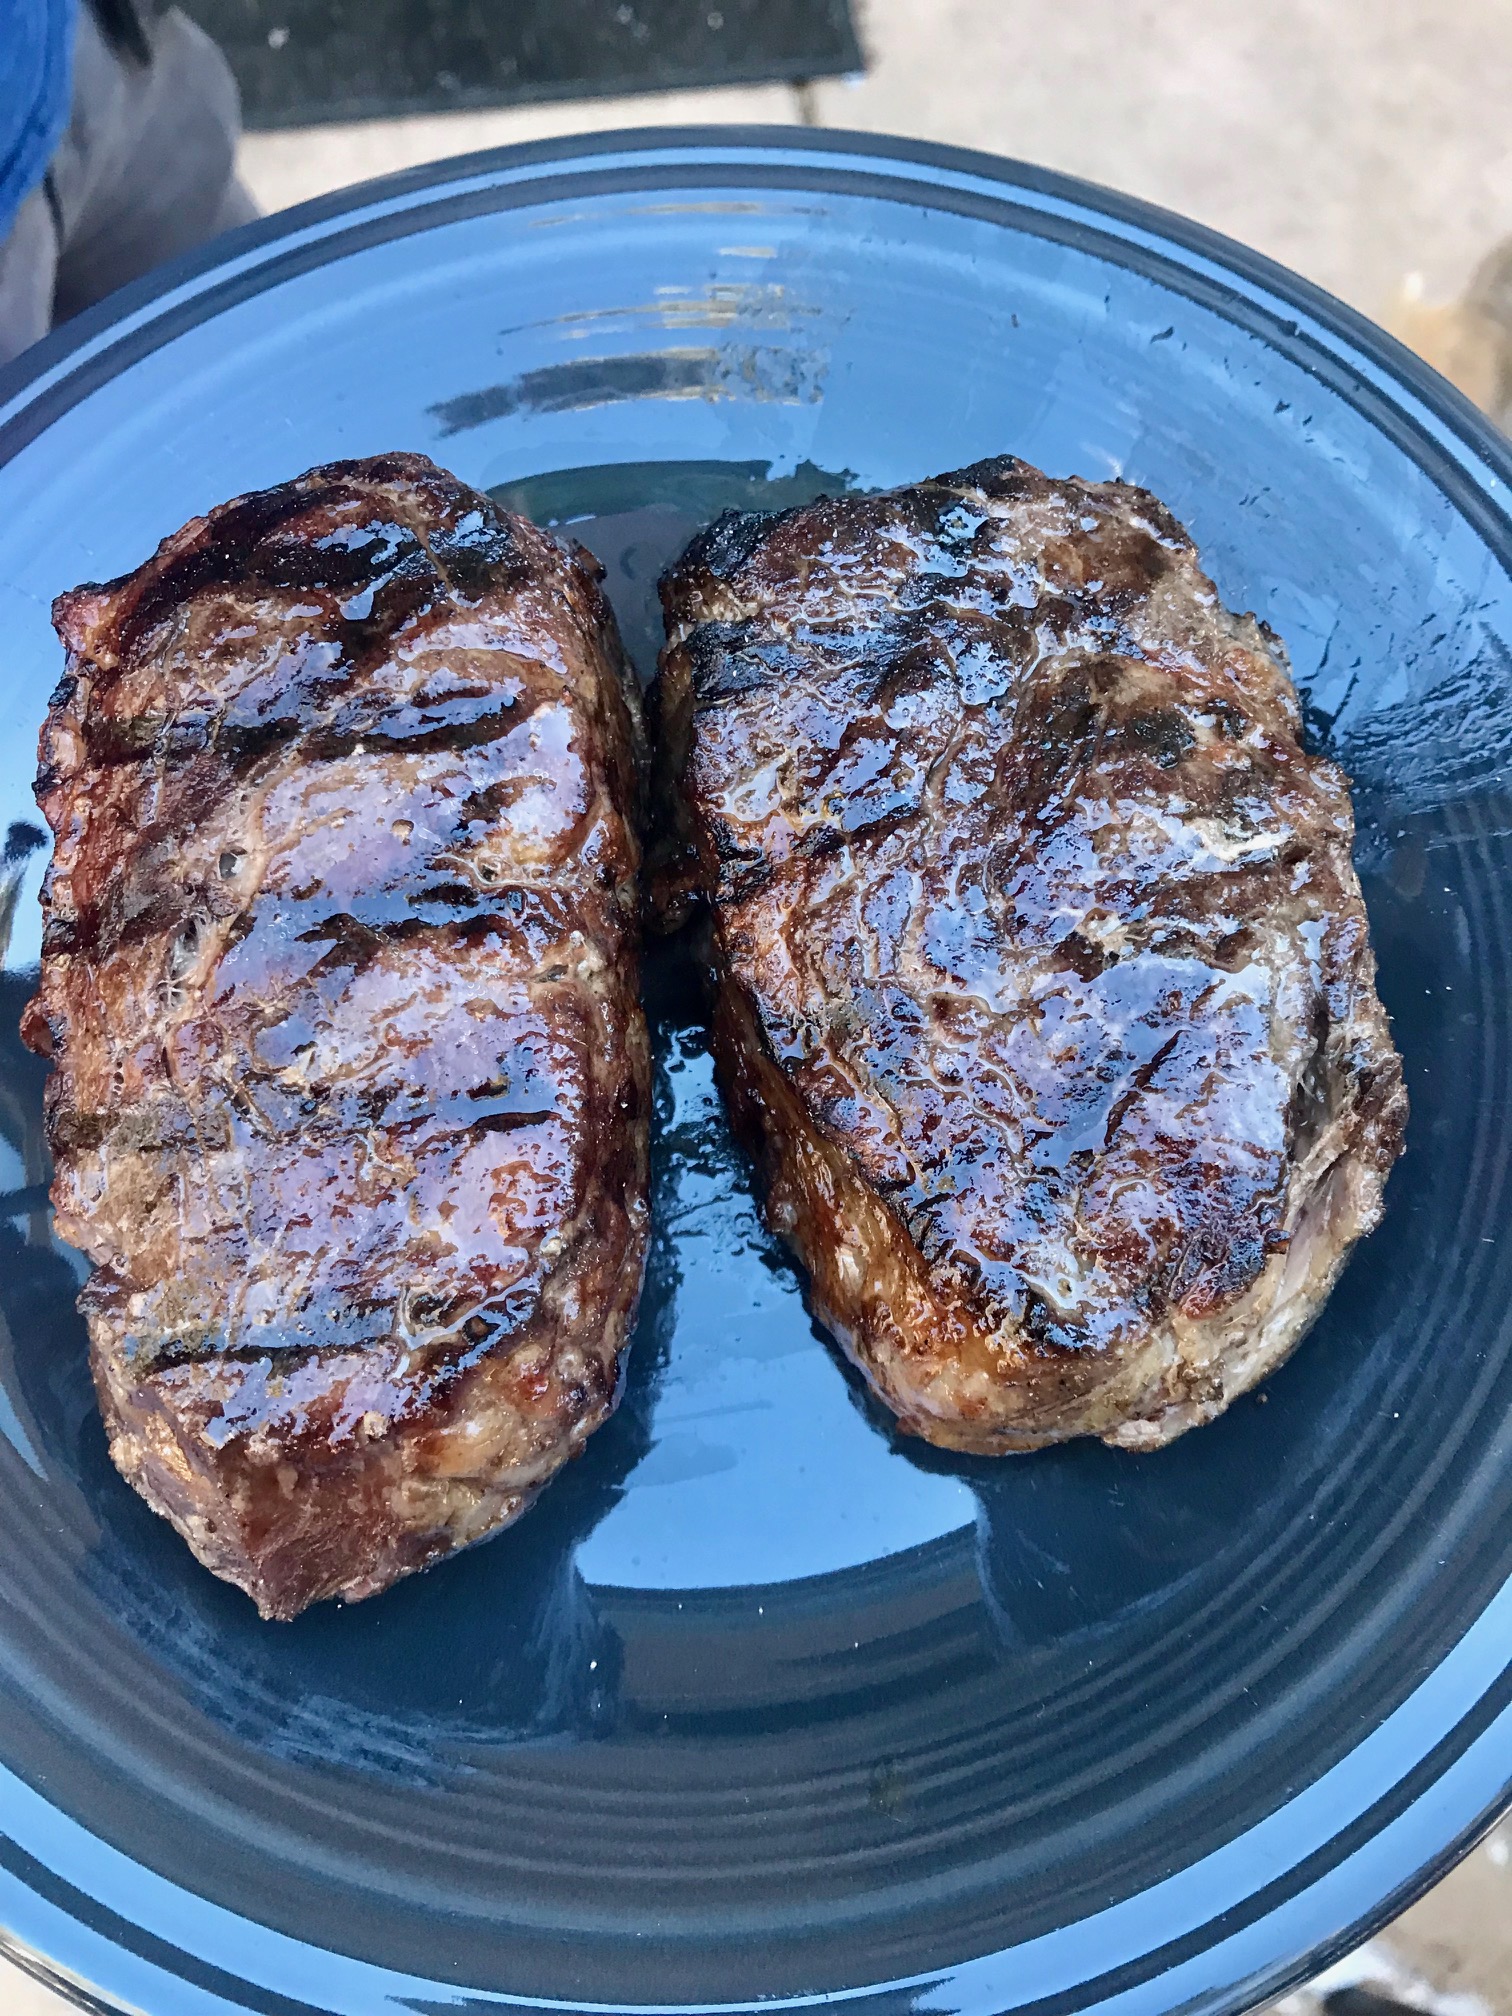
Step 6: Sear it Screaming Hot! When the meat is at your desired internal temperature and the charcoal is ready, put that sucker on the heat and listen to it sizzle! (19.57MB) It should only take a few minutes to get a good sear. Don't fondle the meat too much while it's cooking...just flip it every 30-ish seconds so the sear doesn't turn into a burn.
Don't forget to use tongs to sear the sides of the steak enough to render the fat there, too. Serving unrendered fat on an otherwise perfect steak is bad form.
And there's no need to smash the steak into the grill. A little pressure is ok to ensure good contact with the grate, but be sure you don't squish the juices out!
That brings up another safety note, and a good pre-planning idea for cooking. With this much heat and all the juices dripping out, be ready for flame-ups. Plan for a safe place to set the steak while the flames die down. Because of this, searing requires your full attention for the 2-3 minutes the meat is on the grill. Walking away for 30 seconds at the wrong time might ruin your meal!
Serve It on a Warmed Plate!
Now sit down and enjoy your work! There's no need to let meat rest when it's cooked this way, but a few minutes won't make much difference either way. (Again, for comparison, Ruth's Chris brings their steaks to the table while they're still sizzling hot on the serving dish. No resting there.)
Remember when I mentioned reducing the size of the temperature gradient? Notice how thin the gray strip is on these steaks. The inside is cooked exactly to the temperature I wanted (131F) and there's a good sear on the outside--and nothing in between. No gray cardboard meat to detract from the taste and texture I wanted.
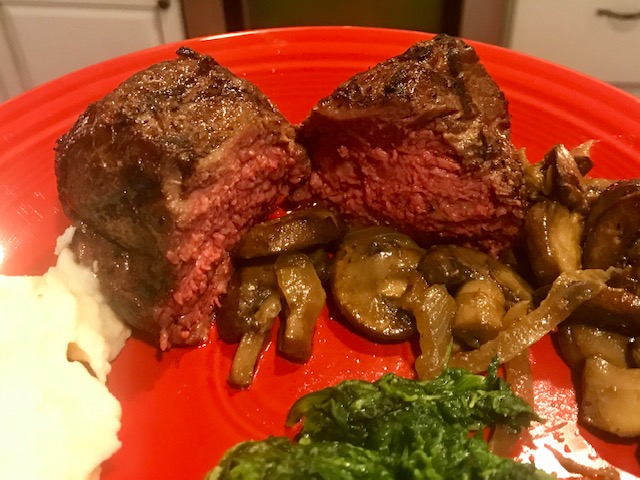
No Temperature Gradient
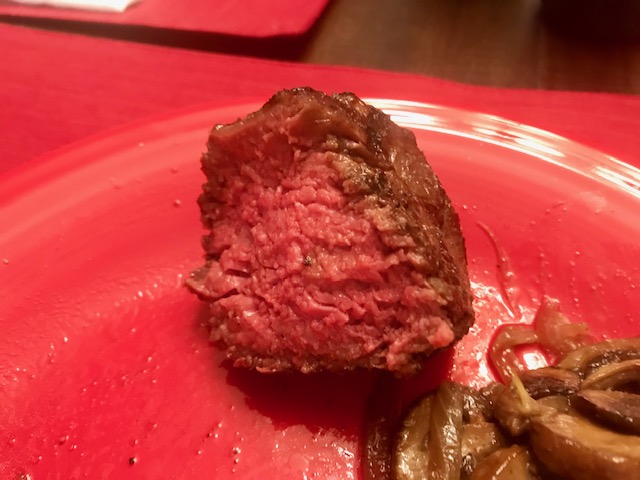
No Temperature Gradient
Please email me with any questions about this post and I'll try to answer them!
Back to the Cast Iron Homepage