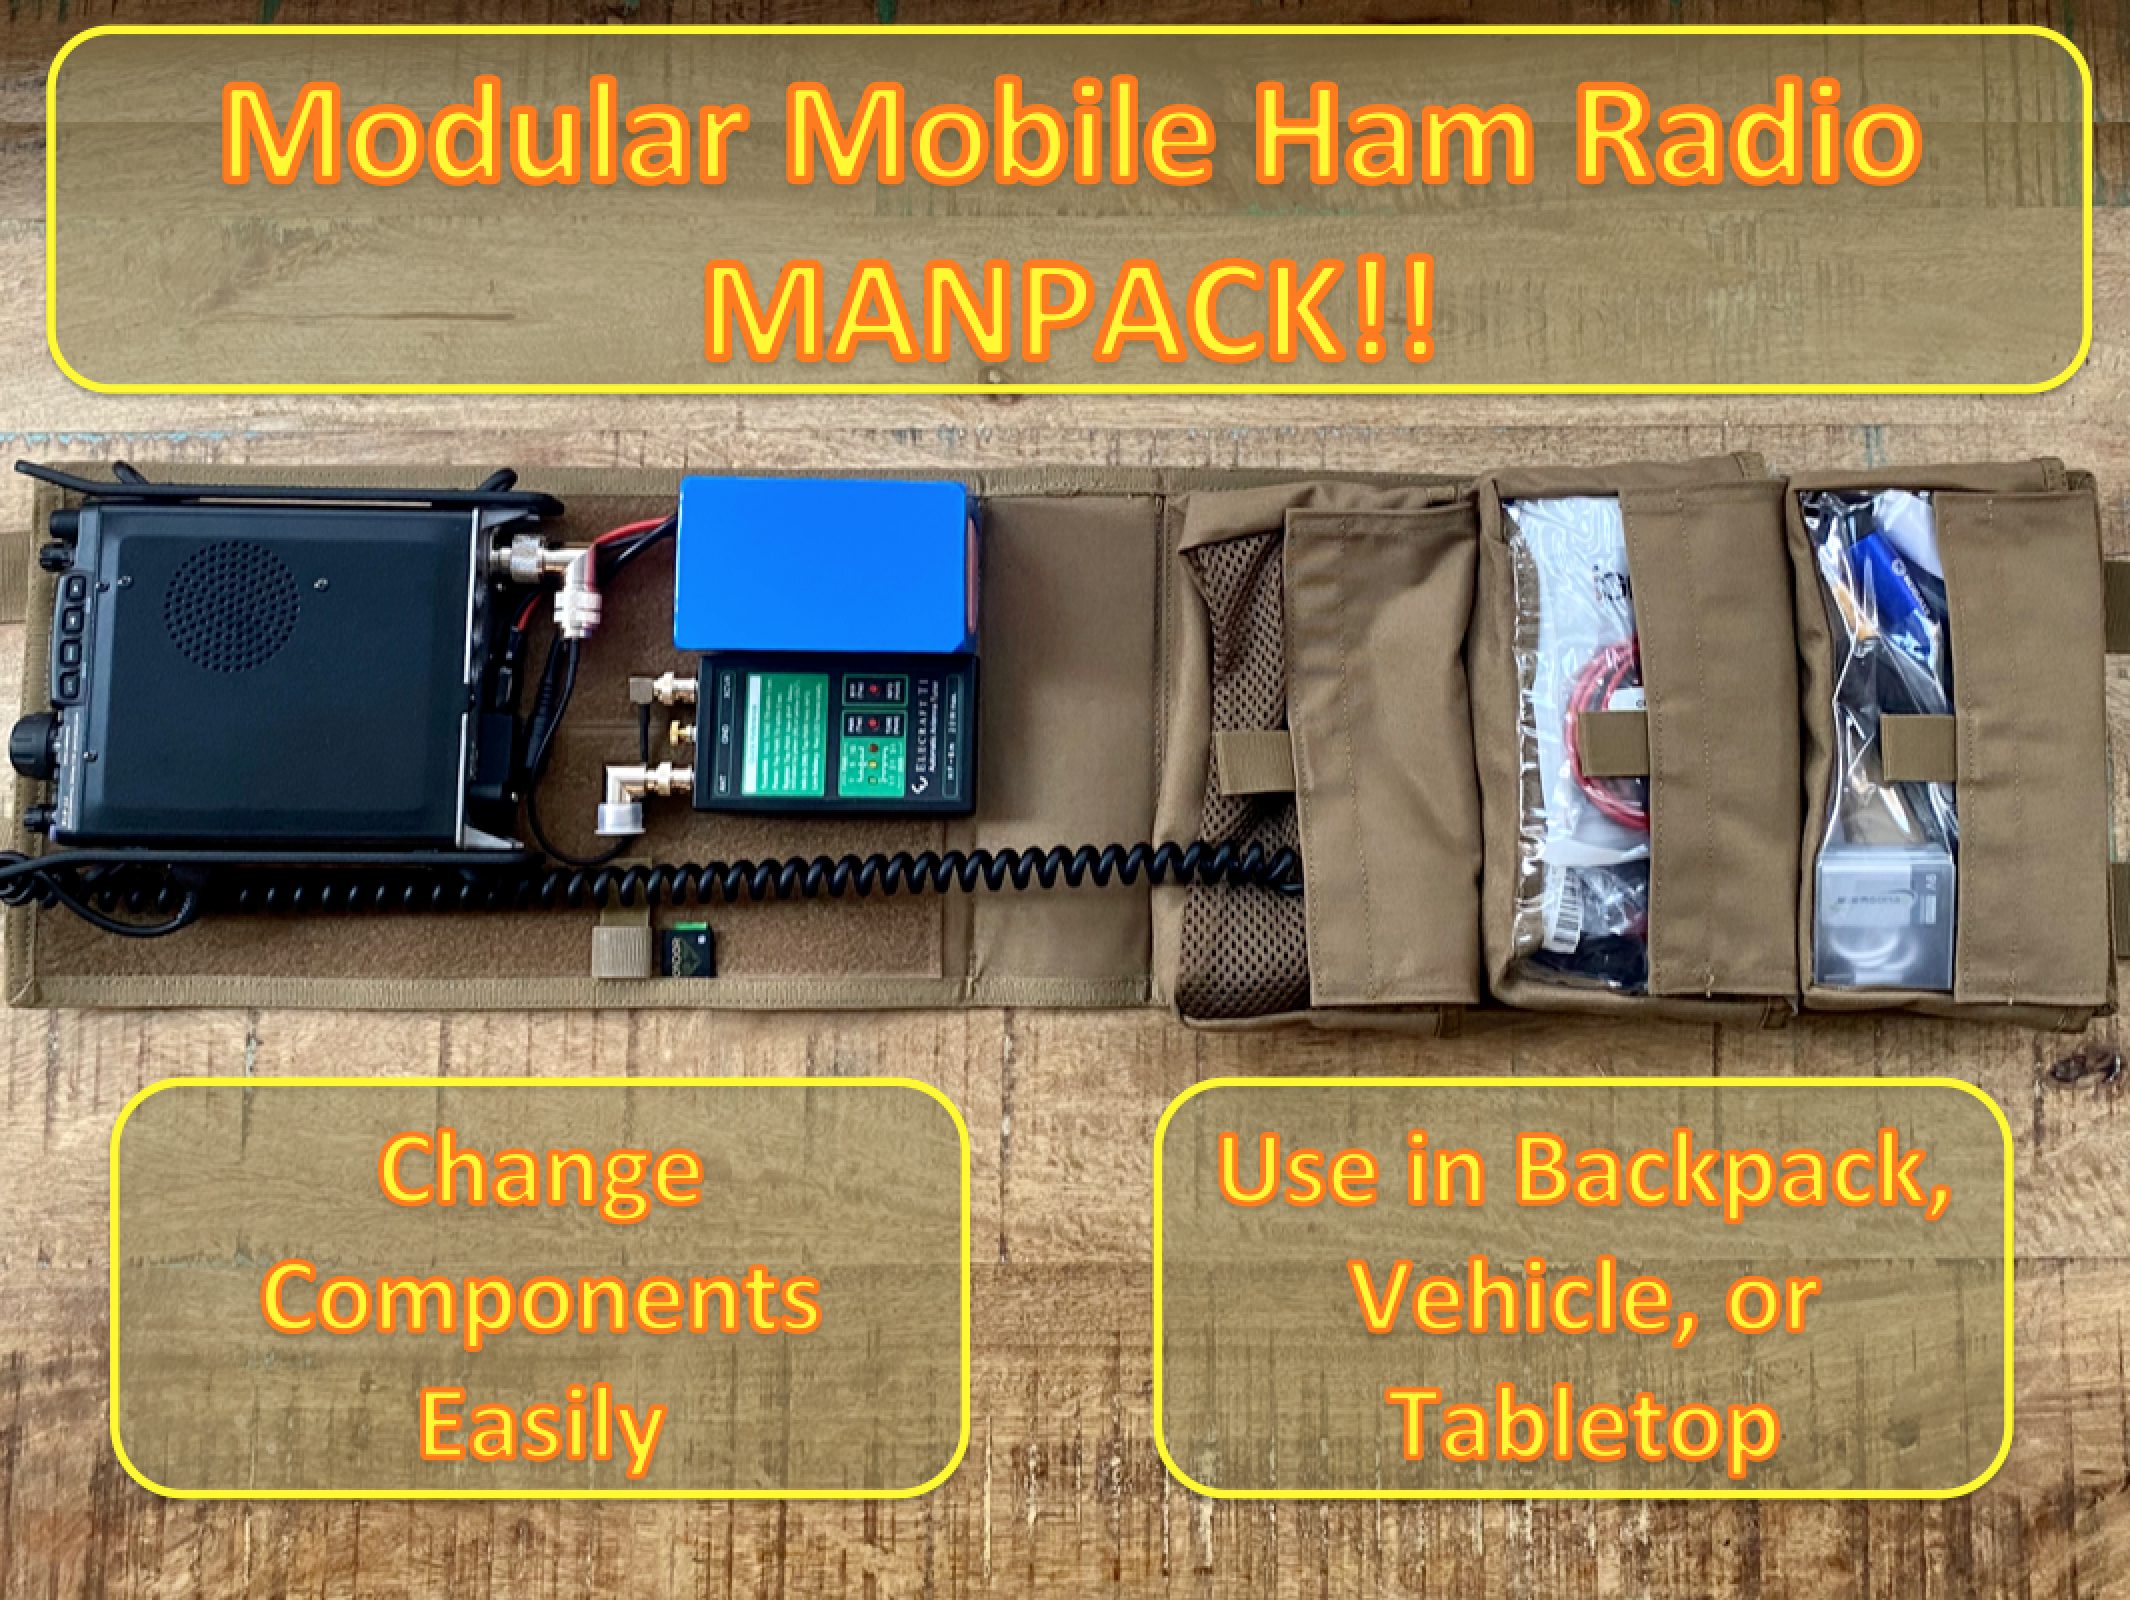
Like I said on the Condor Manpack Insert page, some people enjoy operating amateurs radio from a ham shack but I prefer to be mobile--in a vehicle or on foot--and my equipment must support this lifestyle. I haven't found a manpack kit for sale that I liked though, so I built my own that allowed me to keep a ready-to-use kit (or almost ready, if I need to set up an HF antenna) on the shelf, waiting for deployment to a backpack, vehicle, or disaster response operation.
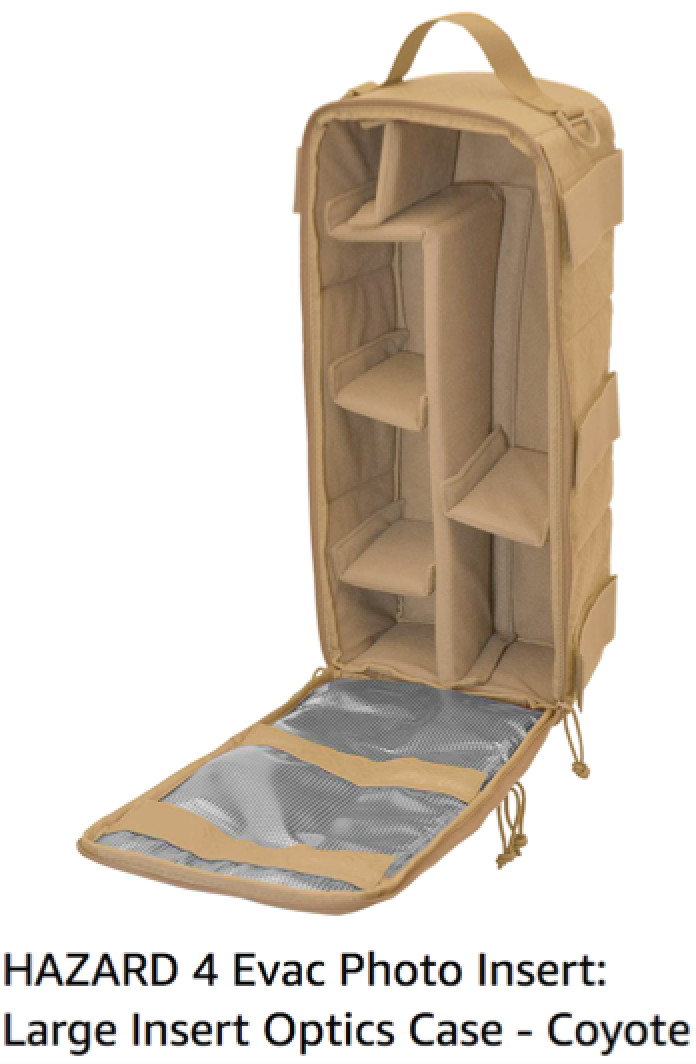
But I also enjoy photography on the move, and I have similar requirements for my photo gear...and I need a kit that supports both hobbies but doesn't make me duplicate my base gear or repack it into a different go-bag. I found what I wanted in the Hazard 4 Evac Photo Insert and Plan C Slim Daypack.
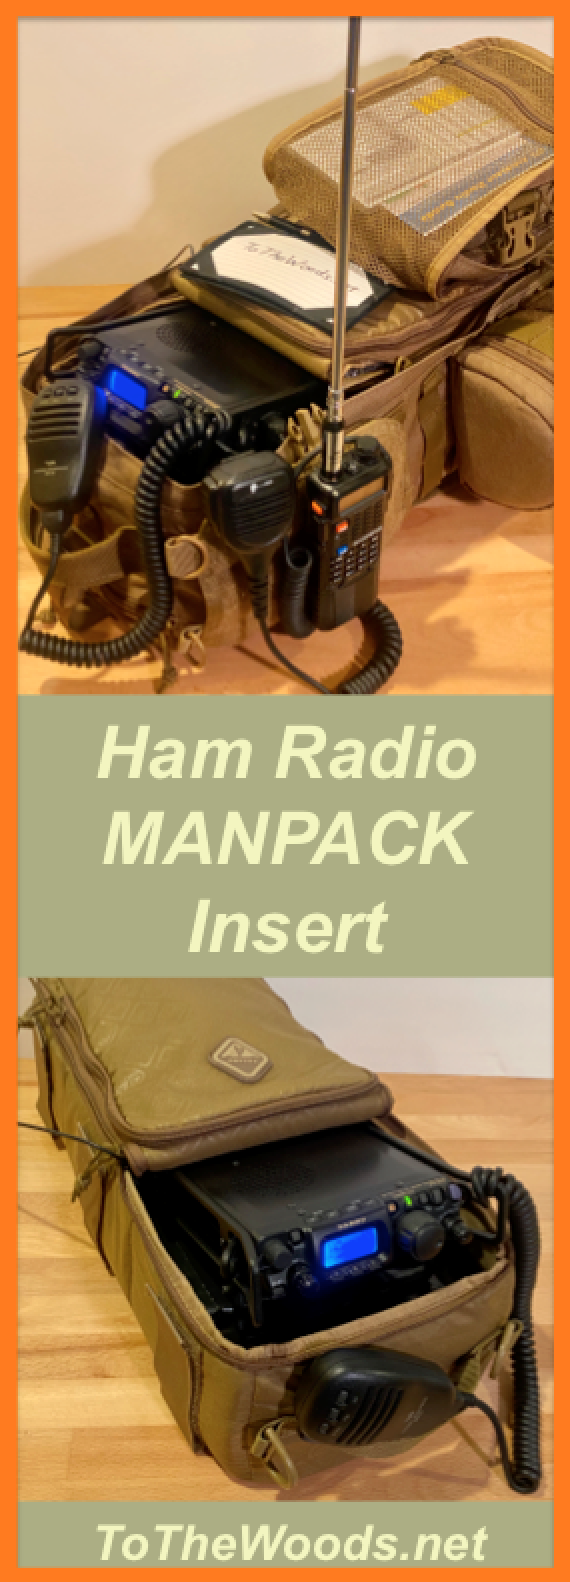
So this manpack is both a photography and ham radio go-box, but without the box.
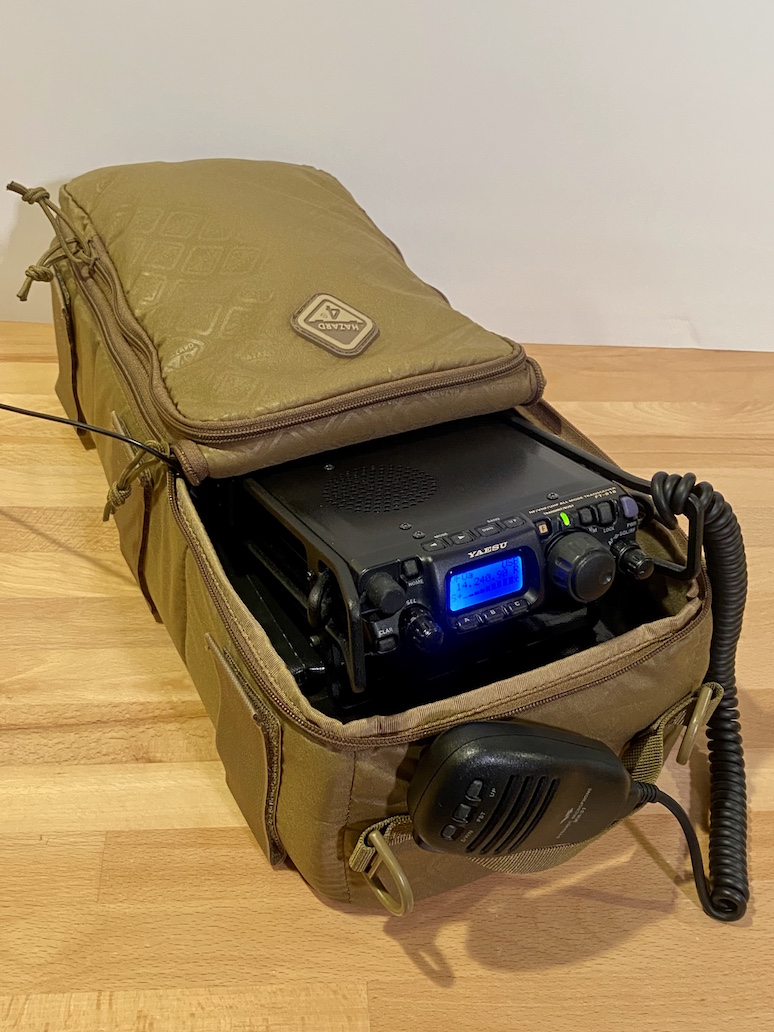
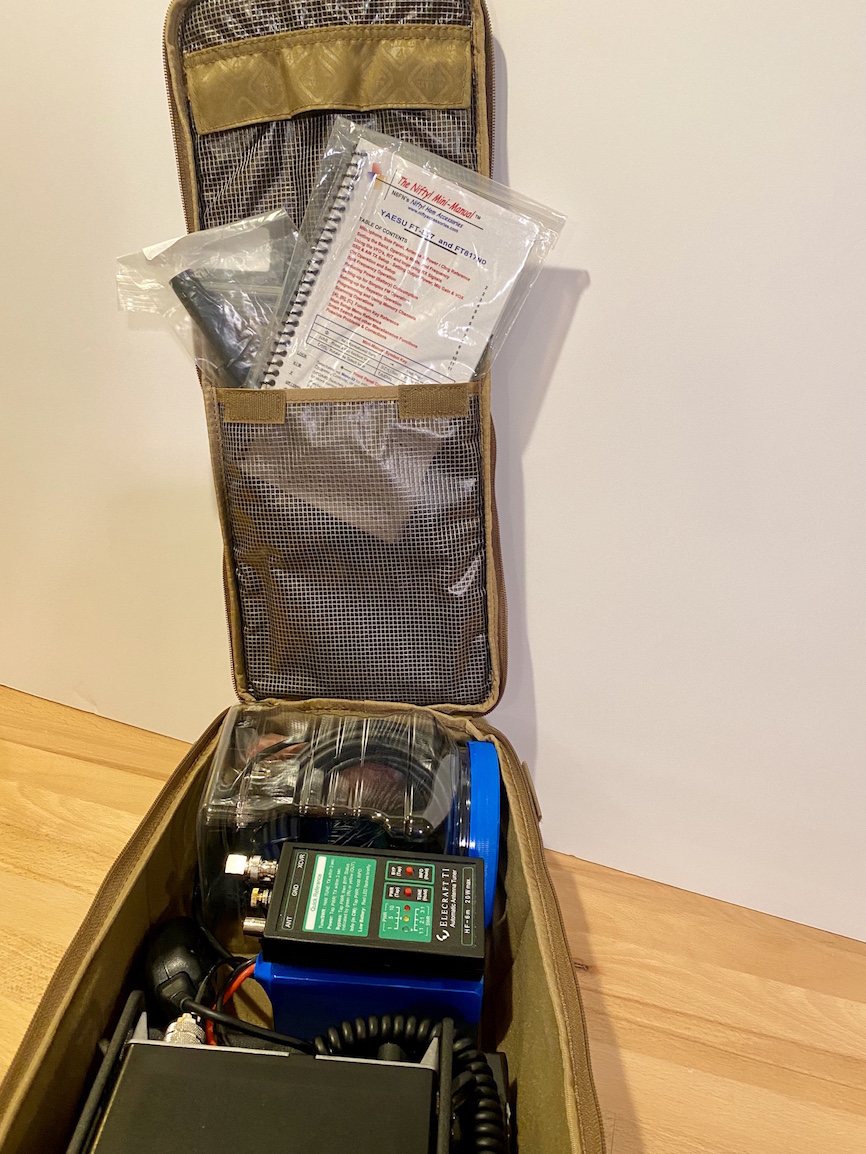
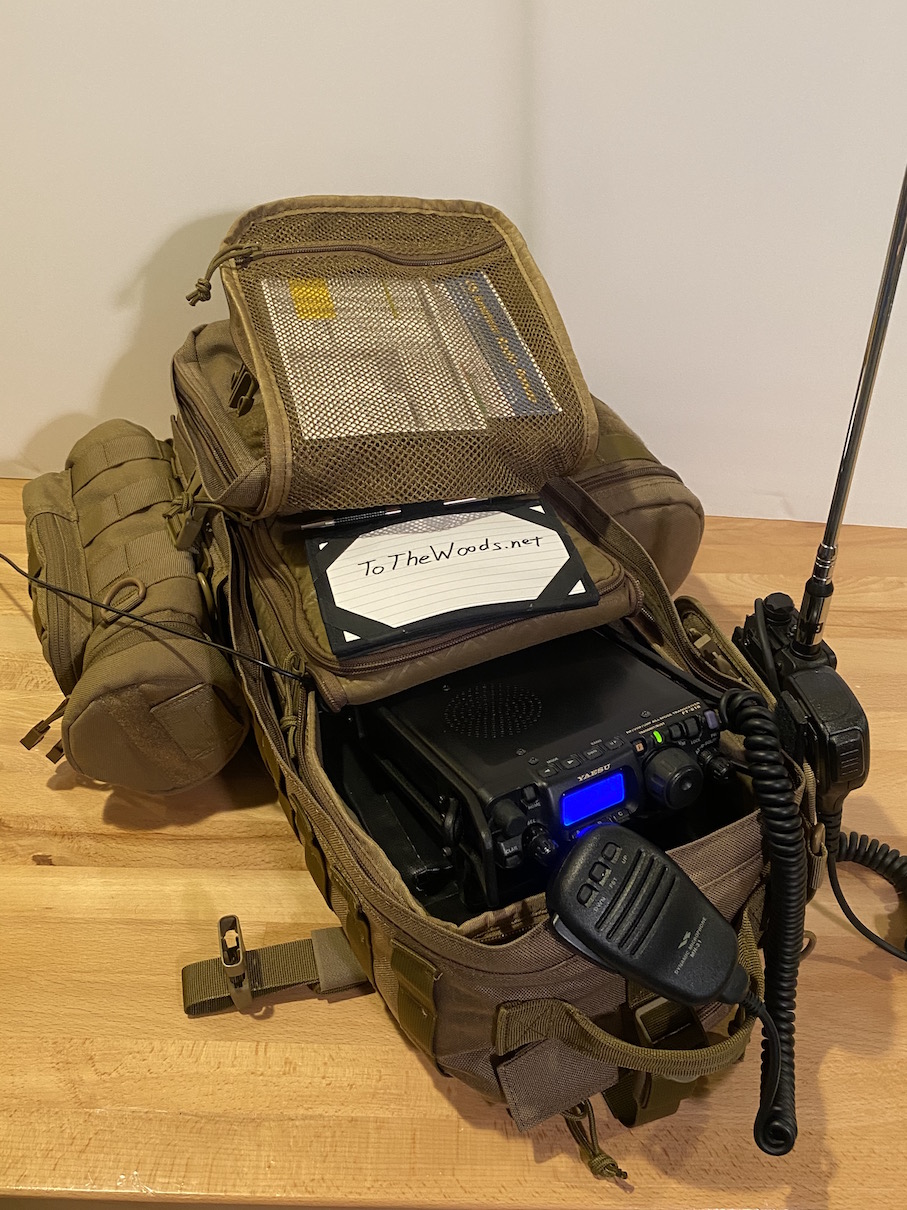
Insert In Use
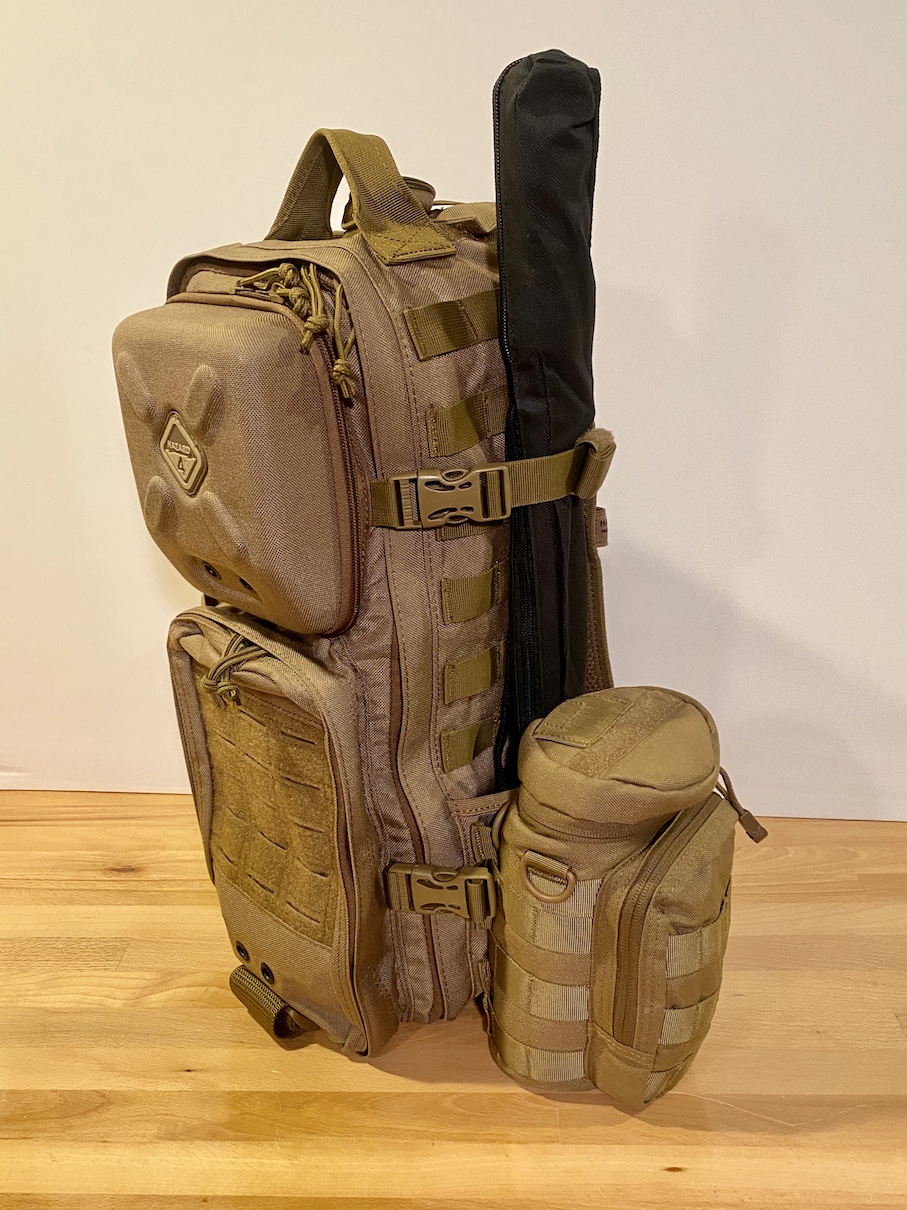
In Use with Pack
Design Criteria
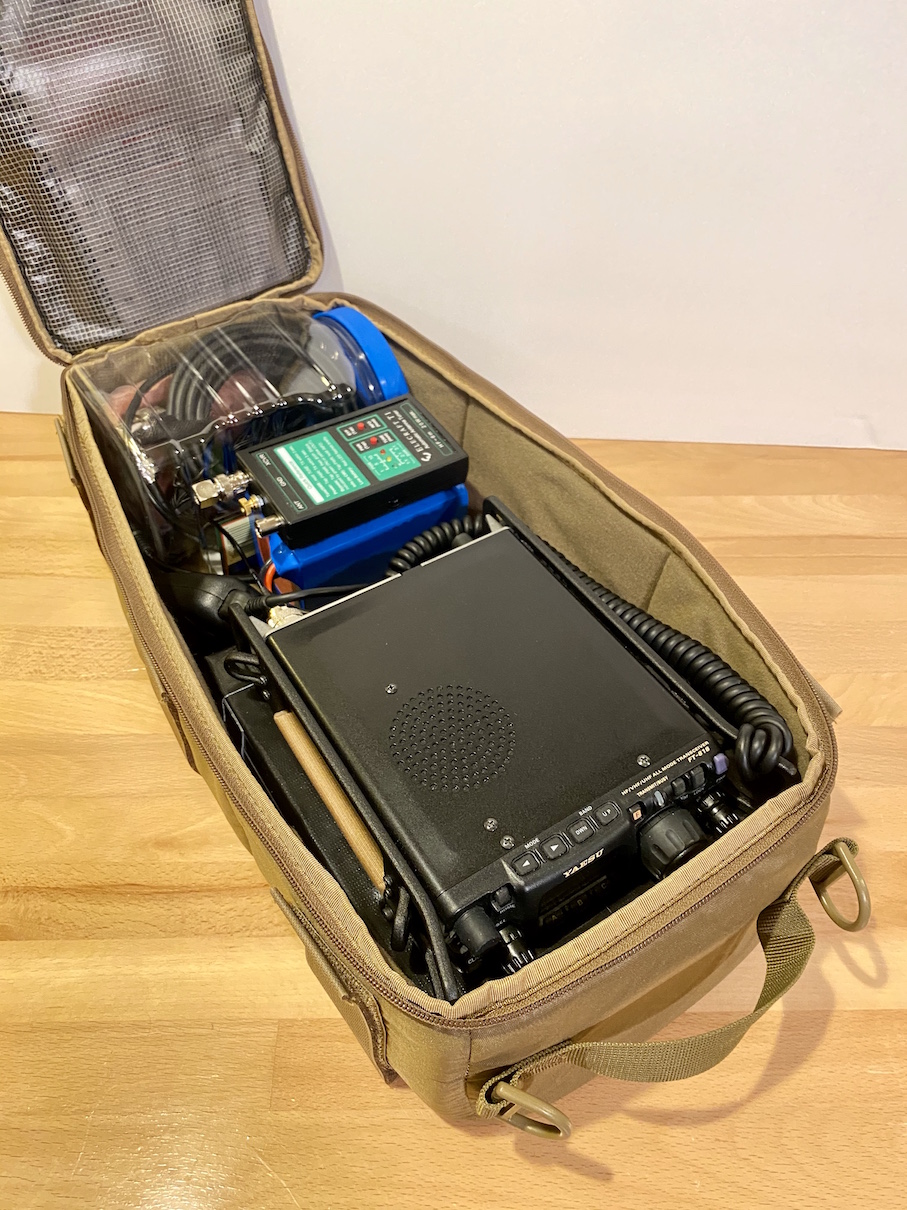
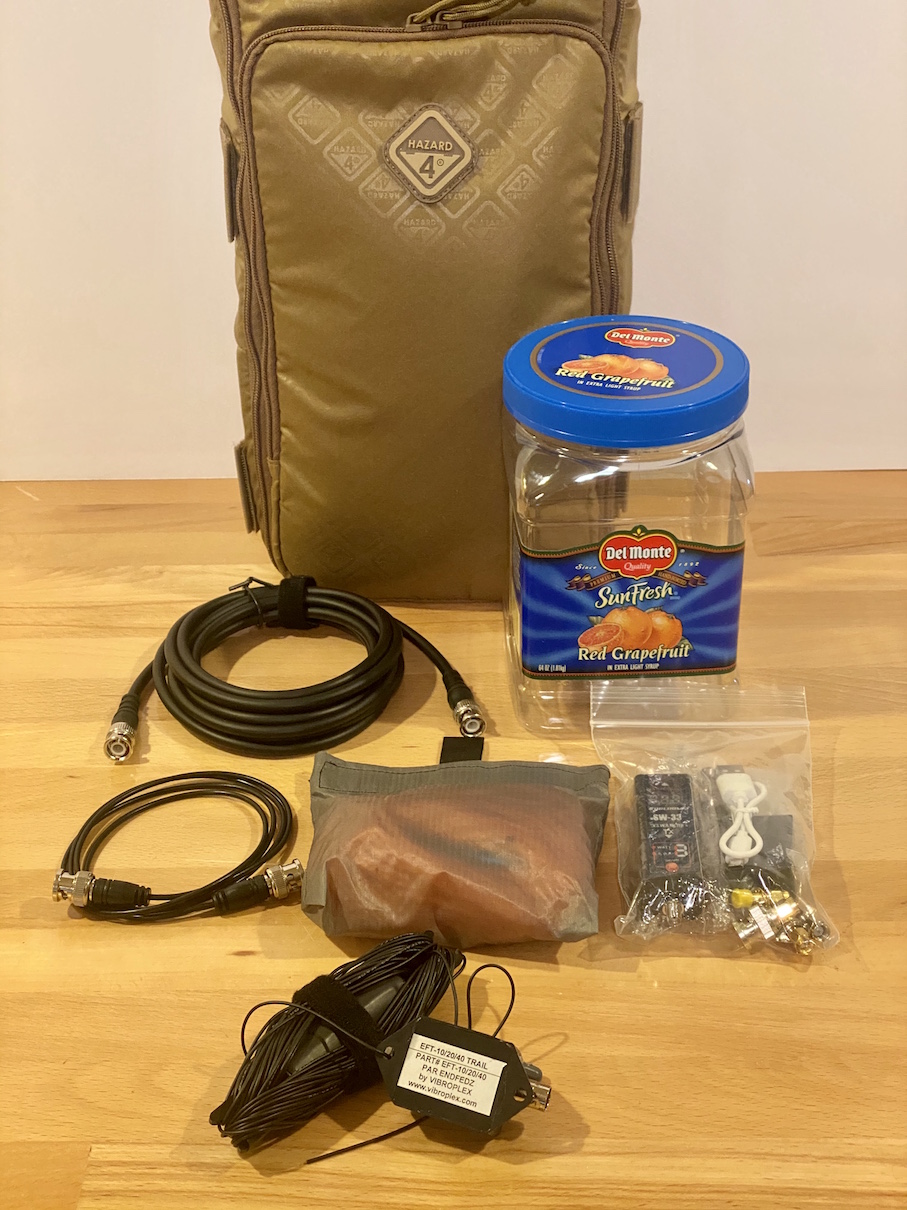
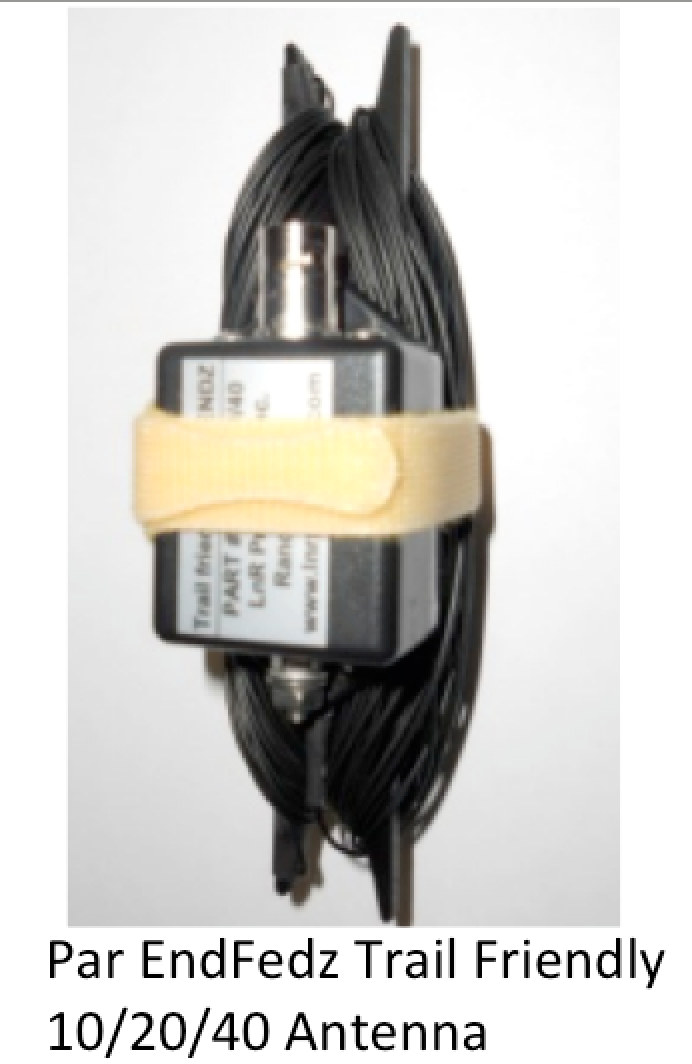
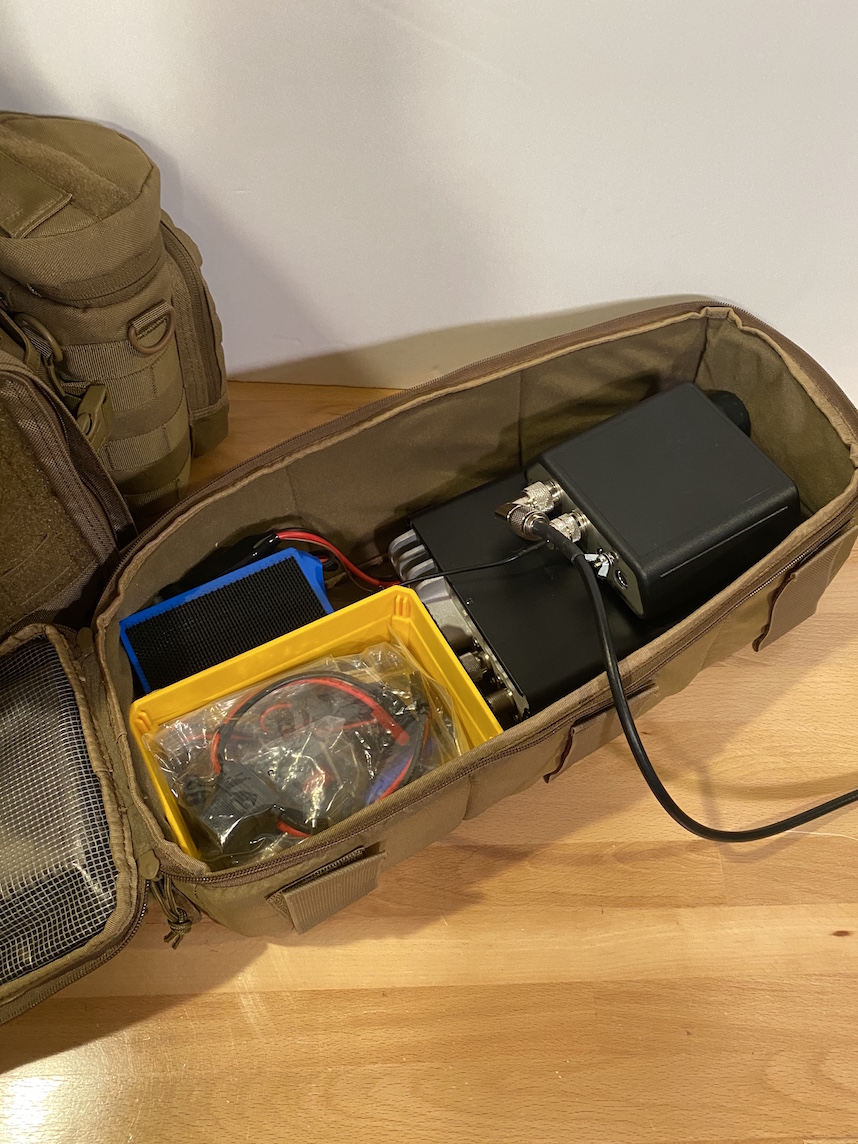
Complete package, including radio, antenna tuner, LiFePO4 battery and charger, admin (manuals, paper, pens), etc., in one easy grab-and-go kit. Antenna may or may not be part of the kit depending on the goal, but for this build I used the Par EndFedz EFT-10/20/40 Trail Friendly.
Convenient. Pack must hold base gear--rain gear, first aid kit, water/snacks, flashlight, etc.--in the main bag without needing to be repacked before trips, and swapping the inserts must be very simple.
Modular package that's ready-to-use in different configurations--including at a table, in a vehicle, or out of a backpack--with very little setup. When not in the pack, inserts must be capable of storing gear in an organized and usable manner.
Durable enough of a package to put it in a backpack or vehicle for travel. I'm willing to trade some durability for mobility, so a Pelican case or similar is more than I want.
Minimal Setup. I want a complete package that I can use on VHF/UHF from the pack, on the move, because it's already set up. And be able to use it on HF frequencies simply by setting up the antenna, without taking the Insert completely out of the pack. For vehicle operations, I should be able to use it simply by connecting the appropriate antenna.
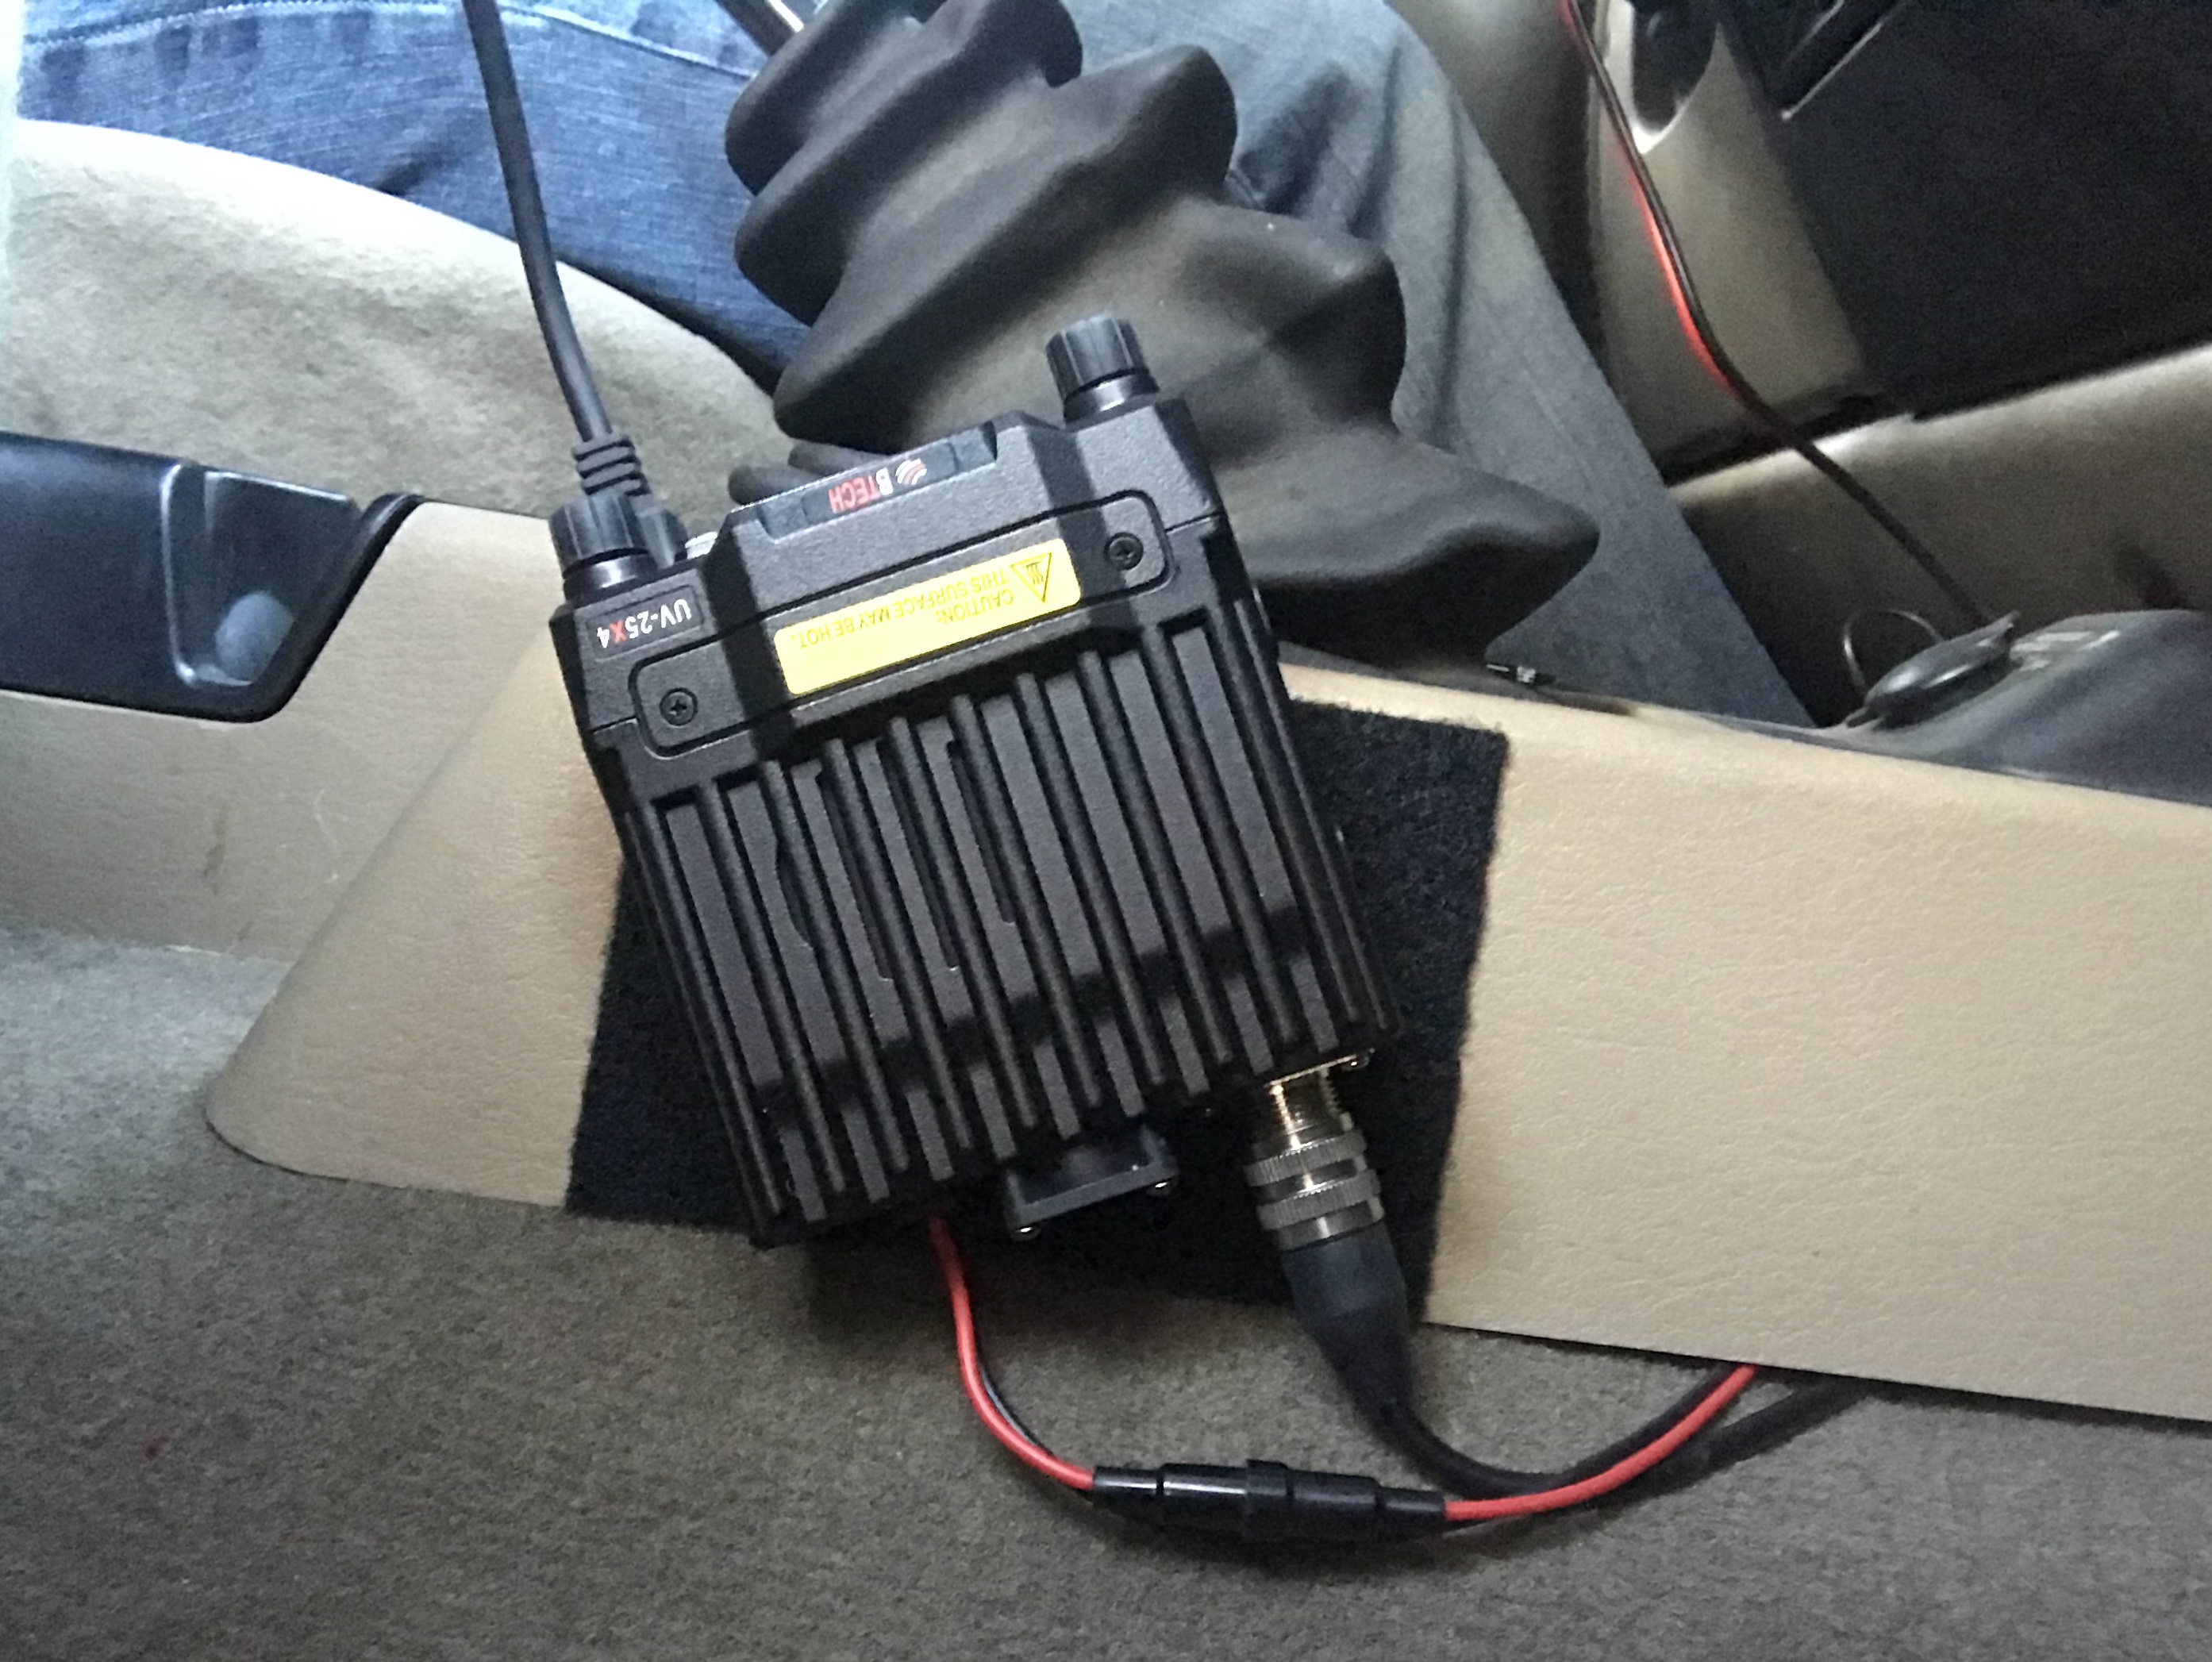
Flexible components, so I can trade out the FT-818ND with the 25W UV-25X4 (see my install) for a more powerful VHF/UHF option, or trade out the Bioenno battery with the Pyramid 50W power supply for use inside.
With Photo Insert
With Photo Insert
With Photo Insert
So keep reading and check out the details...it's a pretty simple project with no permanent modifications. Like my other projects, there's a full parts list, and links with pics at the end of the instructions. For transparency, sometimes links like the Amazon and eBay ones are affiliate links, meaning I'll earn a small fee if you buy something from there...but it doesn't change your costs at all because it comes from their advertizing budgets. It helps pay overhead costs for the page, and I appreciate your support.
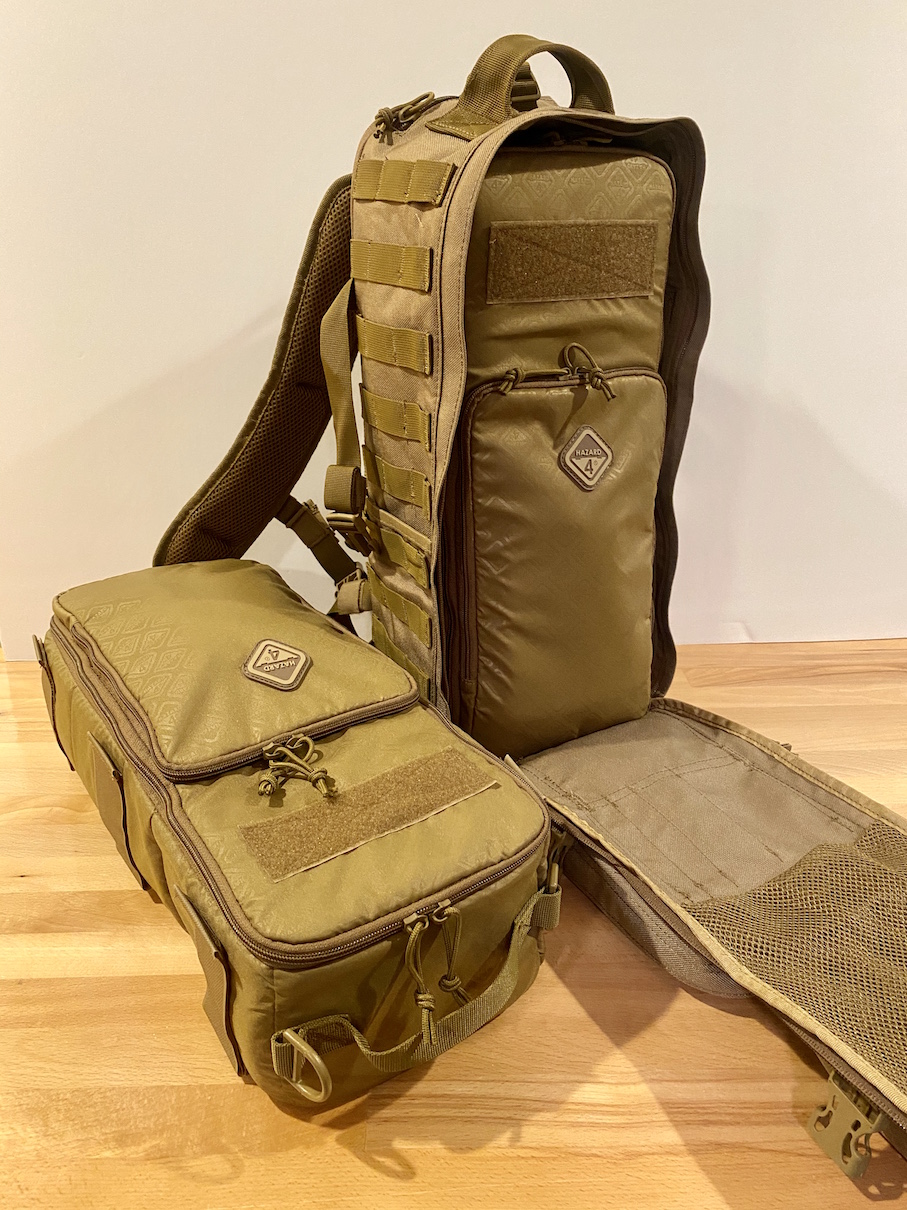
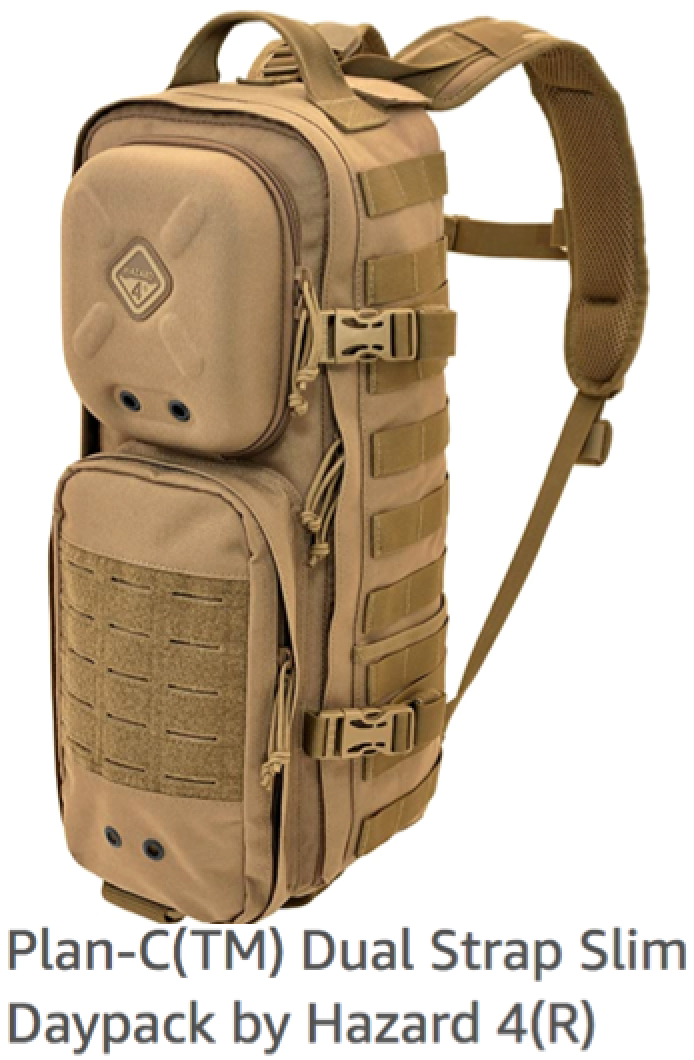
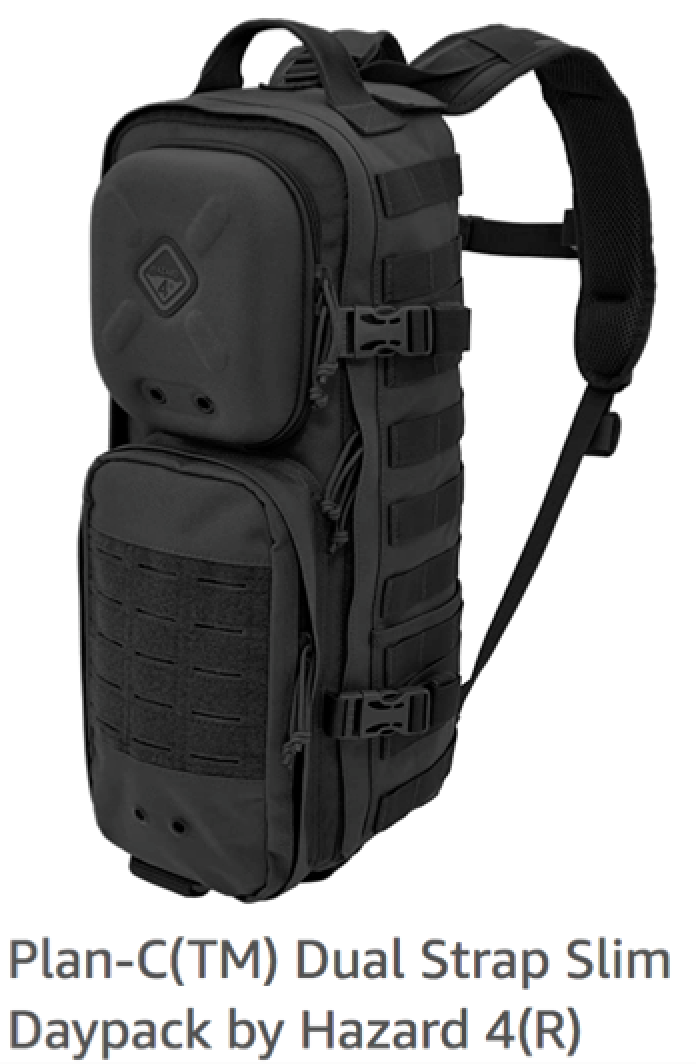
Plan C Slim Daypack, designed to accept the padded electronics inserts. It can also be used without the inserts, as a normal daypack. (It also comes in black and gray if you're not a fan of coyote.)
Extreme Outdoor Velcro (4"x2" Strips) to stick the battery and the Riser Box to the Hazard 4 Insert, and to stick the Elecraft tuner to the battery if you have that one. Or get the 10'x1" Roll because it costs about the same and you'll have plenty left over for other projects.
Riser Box, heavy duty, 2.5"-3" high (6.4-7.6 cm) by about 7" (17.8 cm) wide. Depth depends on how you want to mount the radio. If you velcro it to the box, about 7"-9" should work. Or something like the Outdoor Products Watertight Box (small) will work if you turn it sideways. This would accommodate the stand on the Portable Zero Escort Rails, and leave some space in the front to hold the microphone.
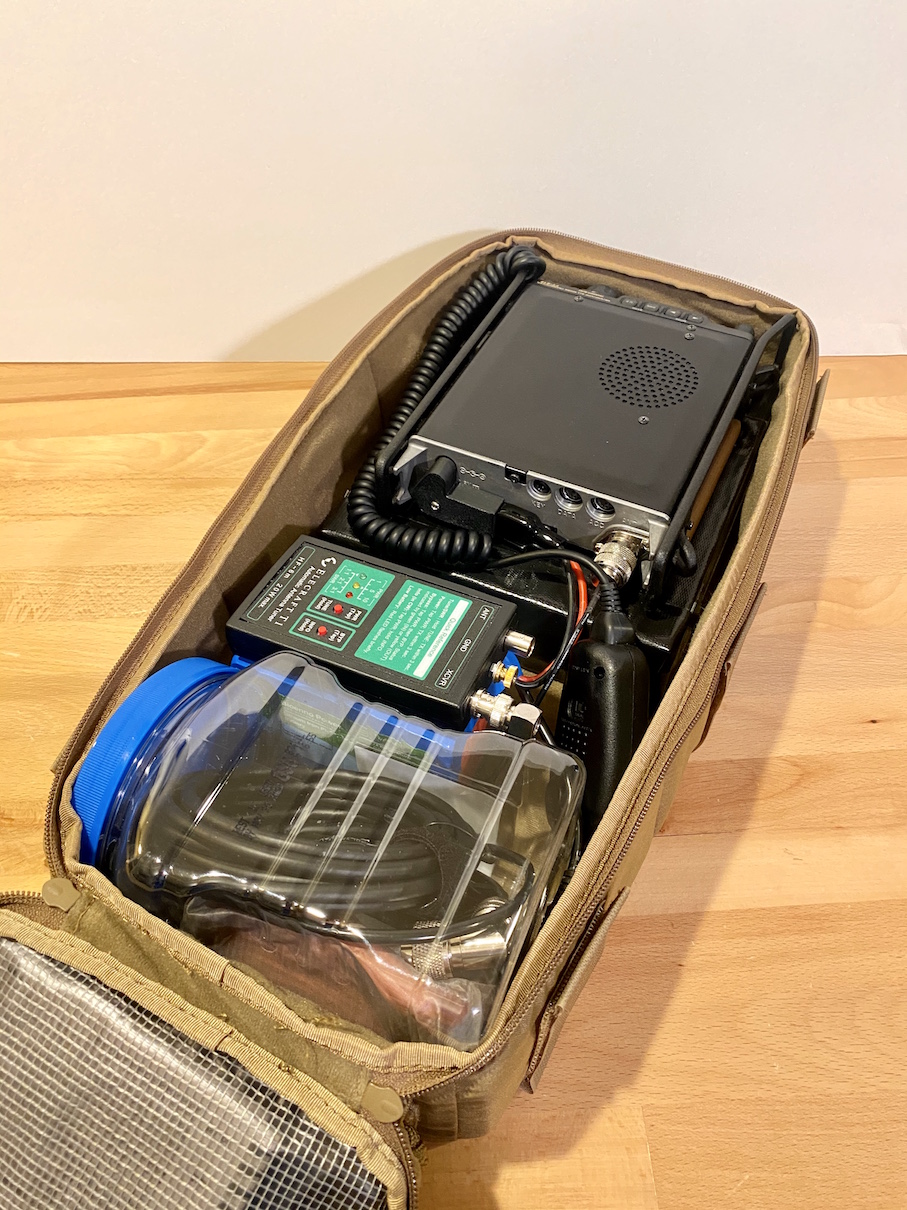
Rear Container. Any container that fits in this area and holds whatever accessories you need to to hold. For best results, it should be rigid and fill the entire space so it gives enough structure to the insert that the pack will stand up on its own. I used a plastic 64 oz Del Monte Red Grapefruit jar from Costco that measures 4.5" x 4.5" by 6.75" (11.4cm x 11.5 cm x 17.1 cm).
I actually started with a large yellow container from a Dewalt Deep Pro Organizer, velcroed on the bottom and sides. It fit perfectly but I liked the form factor of the grapefruit container better.
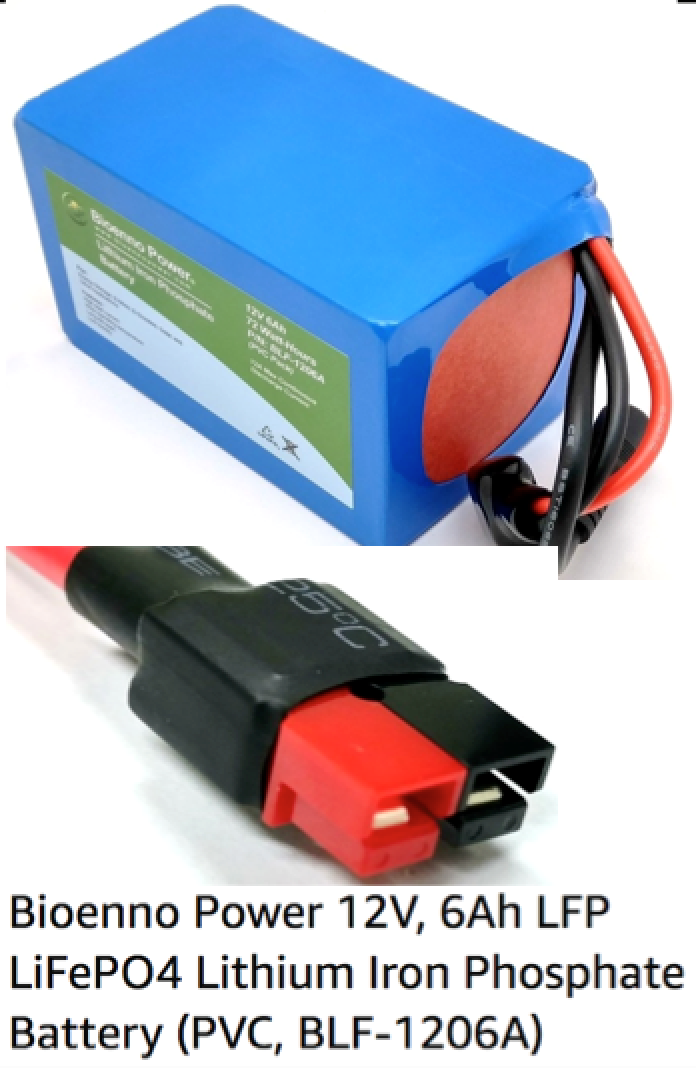
Bioenno 6Ah LiFePO4 Battery is a great size for this project. It is big enough for the velcro to get a solid purchase on the insert to hold the rear container in place, but small enough to leave some space for other items. I put the microphone in that space. Their 4.5Ah battery will also fit and it's a little cheaper. You might want to put velcro on the bottom and wall side if you use the smaller battery.
Antenna of choice. I used the Par EndFedz EFT-10/20/40 Trail Friendly because it's light, small, and capable. It fits in the grapefruit container with all cables and accessories--but it comes with tradeoffs.
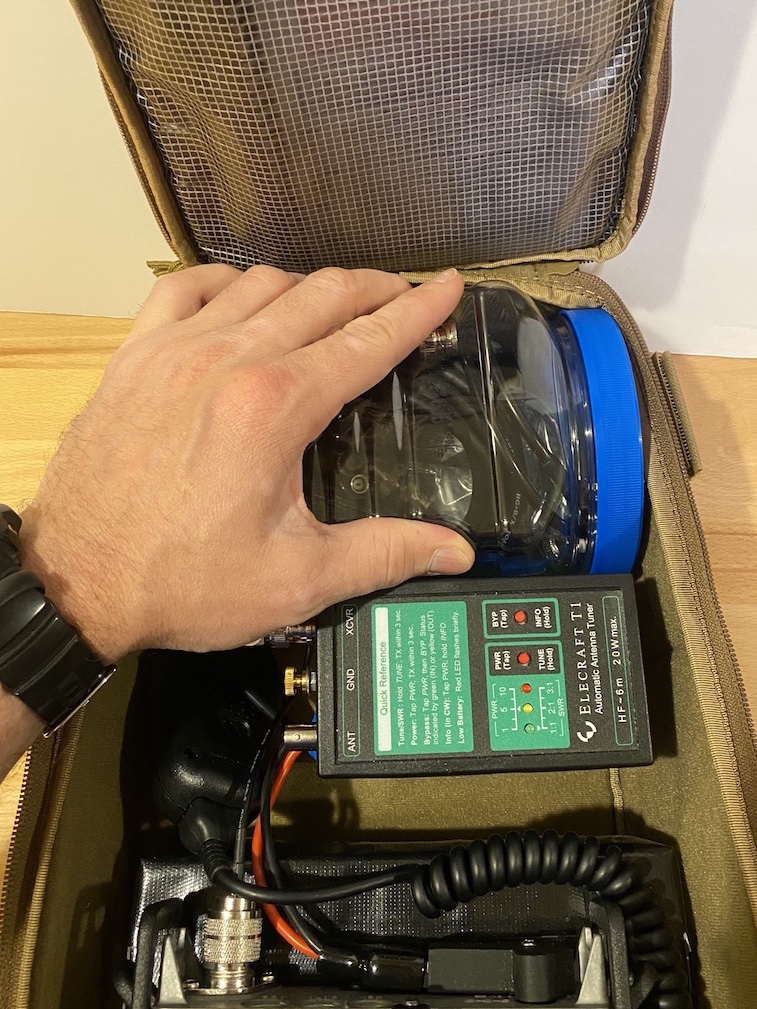
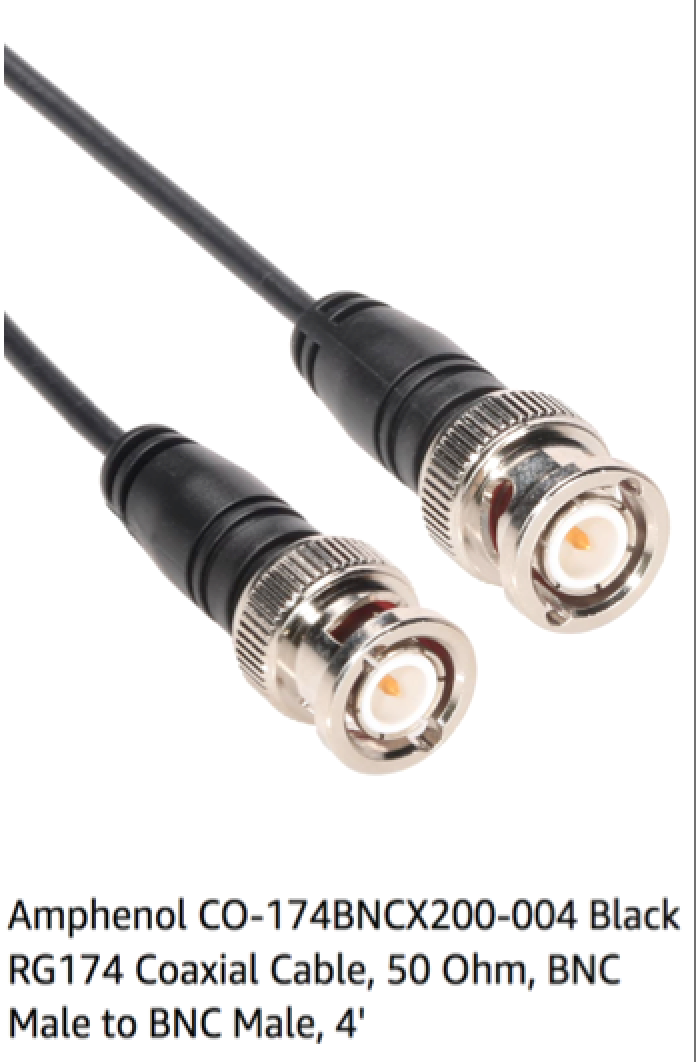
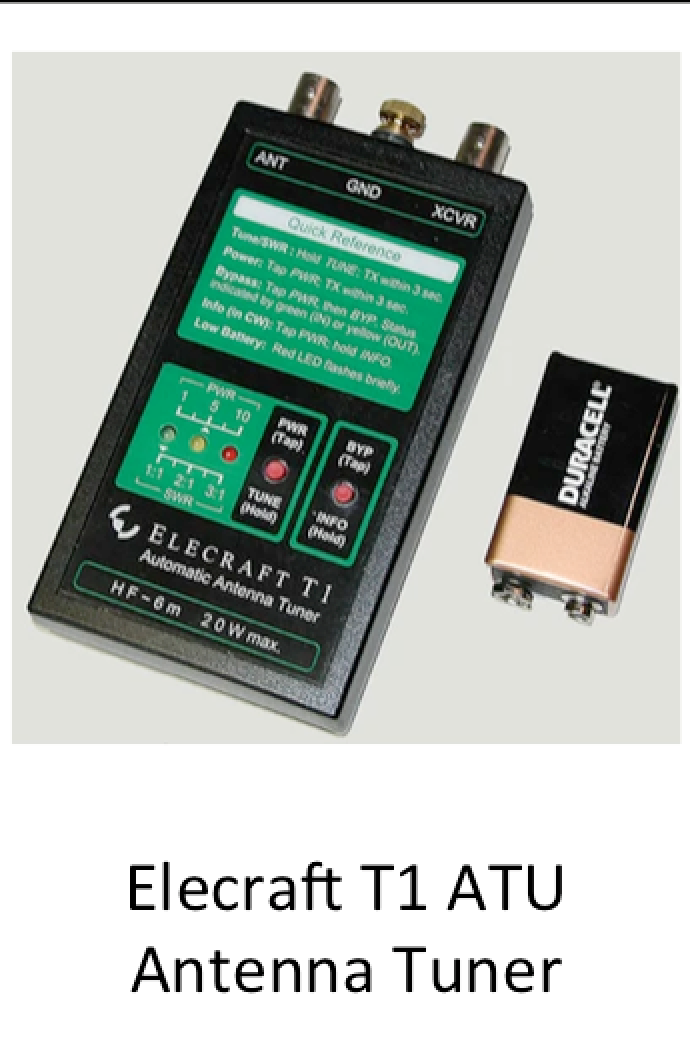
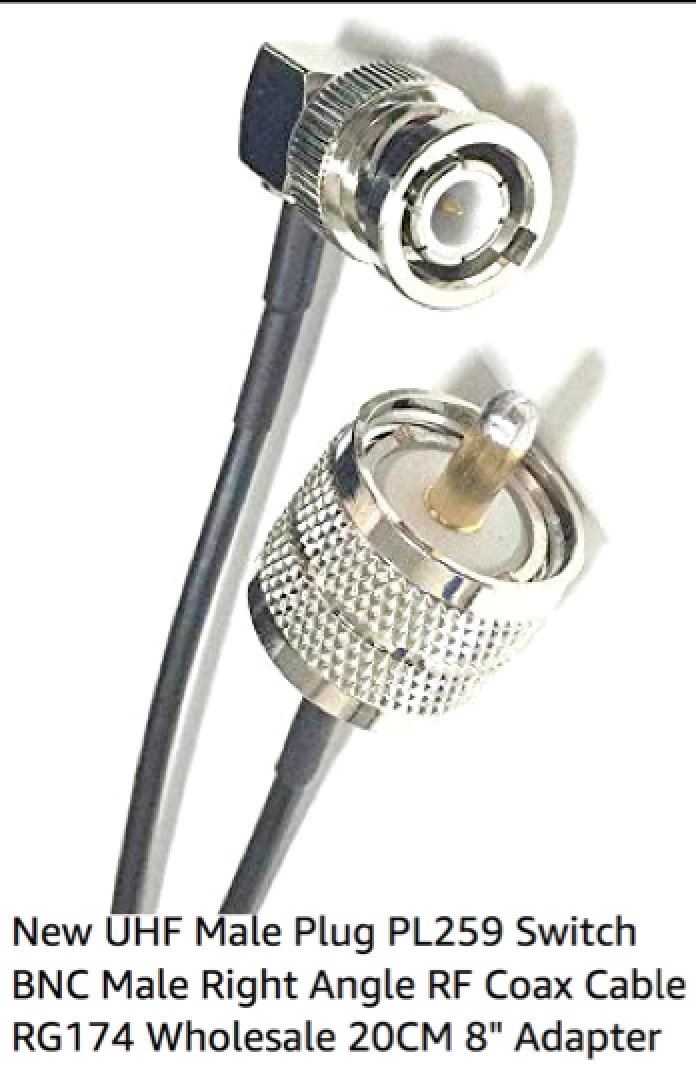
Antenna tuner, if desired. I chose the Elecraft T1 Automatic Antenna Tuner (ATU) to keep the size and weight down. Not only is it smaller than the LDG Z-817 Tuner, but it uses smaller and lighter BNC connectors instead of UHF connectors.
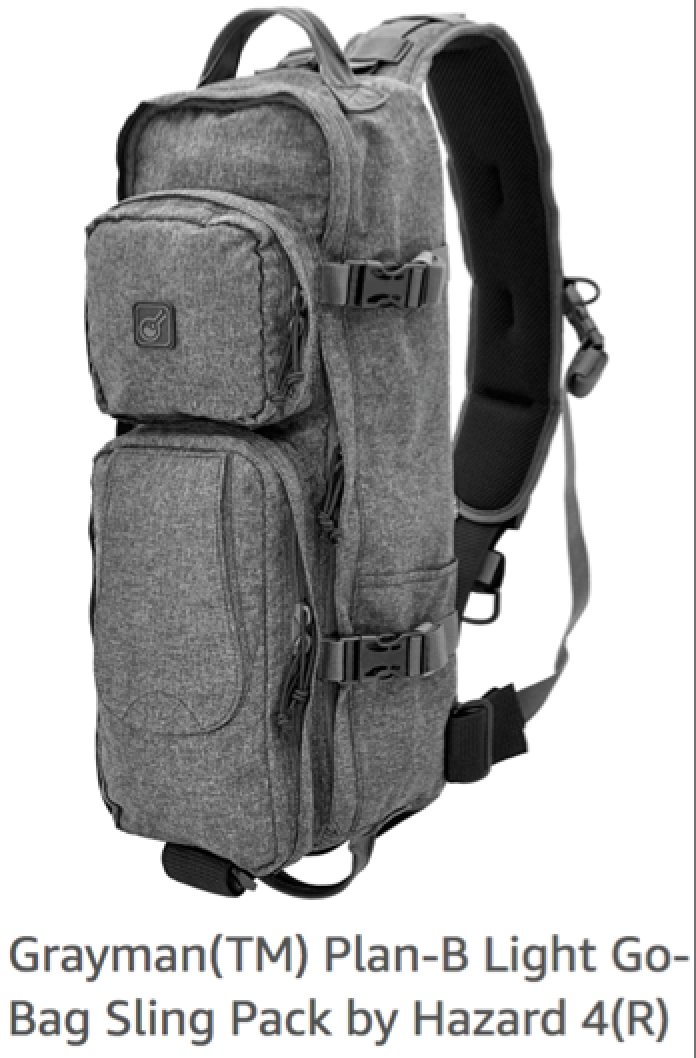
If you're not into the coyote color or the military look, Hazard 4 offers some other options. This product line started with sling packs that come in different colors, including the gray one below that's a little more stylish. Note that since it's a sling, it doesn't have two backpack straps like the Plan C does. But the Plan C also comes in black.
The first step is to plan how you will organize your components. Some things to consider:
Easy access to the radio and tuner so you can manipulate the buttons. If you want to minimize setup time, this probably means positioning the radio at the front and raising it off the bottom panel. That's why I built a riser box. (Details below.)
Method of securing equipment. I used heavy duty velcro on some the box and battery, and I used the battery to hold the grapefruit container in place. If I had a different type of rear container, I might want to velcro it in place, too.
Heat management. My battery placement leaves space between the radio/box and the wall to dissipate heat. I'll keep an eye on the antenna tuner because heat rises, and the velcro will act as insulation.
Cable management is pretty easy with this build, but it's important to ensure there's no strain on the connectors.
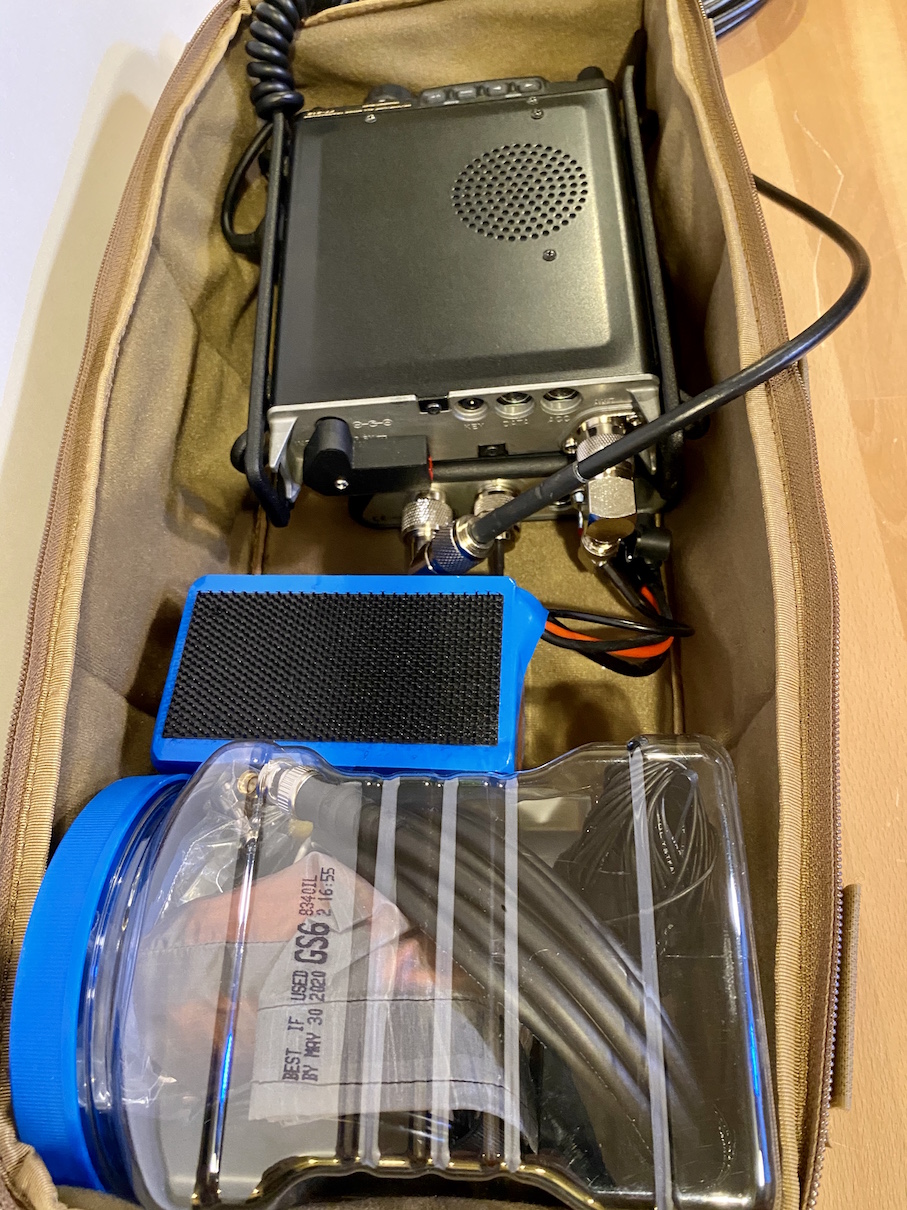
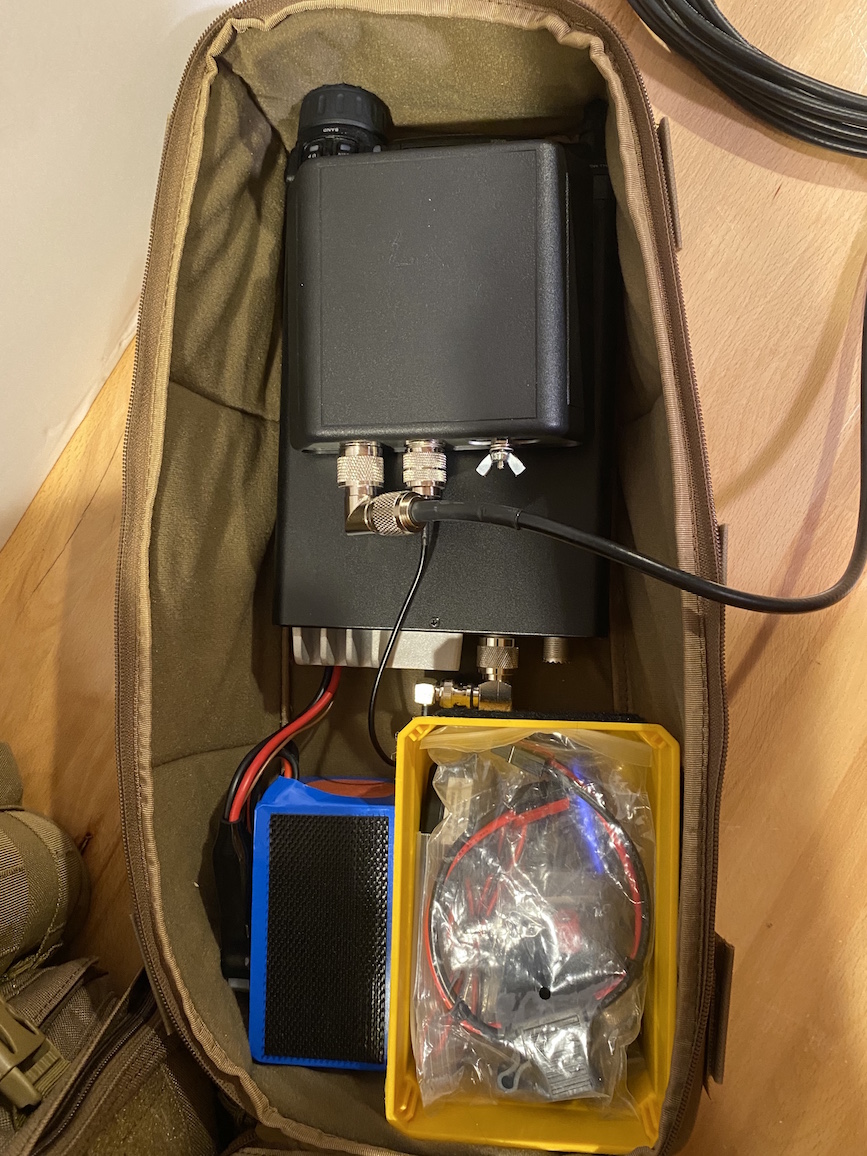
I chose to put the battery near the radio so I didn't need to use an additional power cable, and so I could use the rear container to provide structural support to the insert.
Layout
Layout
If you use a riser box that opens like mine, be sure to leave a gap between the box and battery so there's room for it to open.
The Evac Insert comes with several dividers that velcro to the walls to provide organization and structural integrity, but I didn't use them for this project. You can see them in the photo insert for comparison.
Step Two: Place the Radio
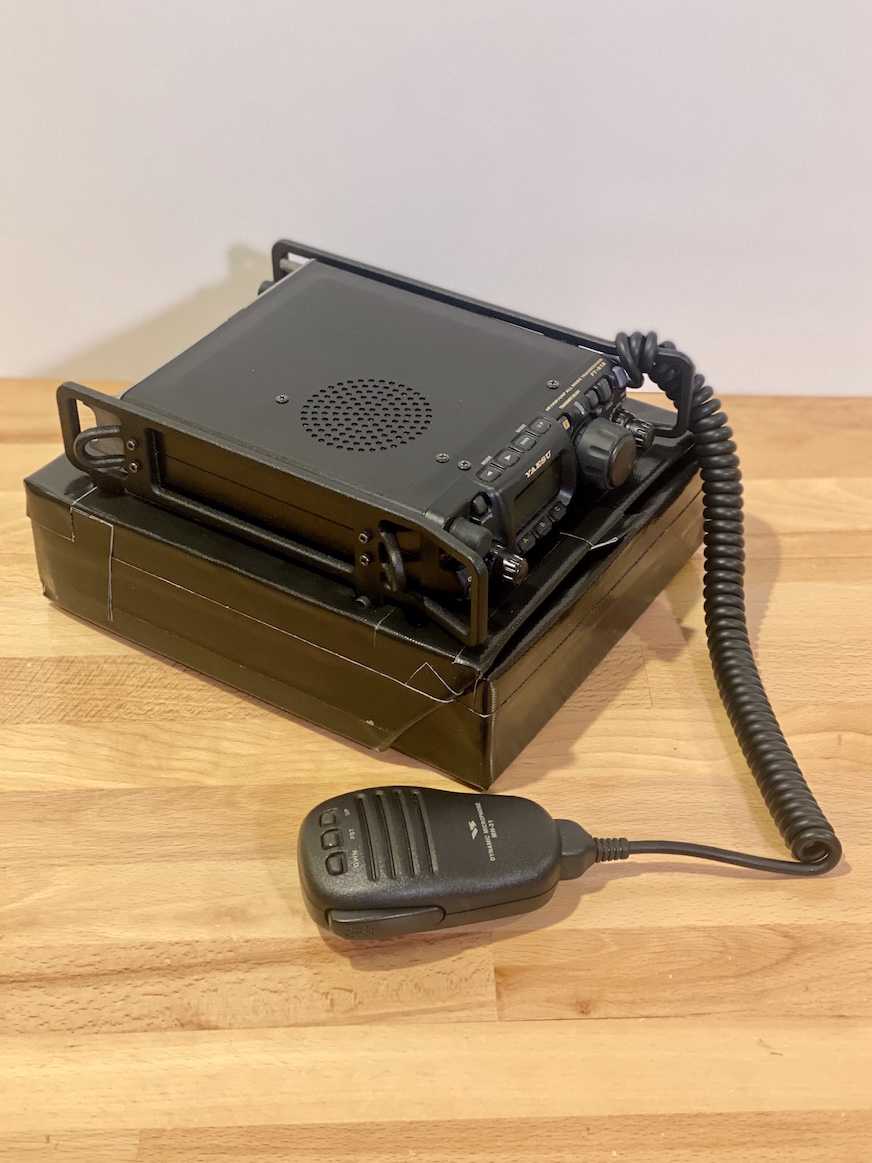
The riser box not only needs to support the radio from bottom, but for best protection it should snug the top of the radio against the insert's closed lid when it's packed up. This meant I needed to raise the radio about 2.5"-3". I looked around for ideas and found some acceptable ones (described in the parts list above), but decided to make a custom one out of a double-currogated cardboard box.
I started with a 12 pack Premier Protein box because it was exactly the right width, so it retained a lot of its structural integrity. I used one end of the box, cut in half length-wise so the top and bottom of that end, once separated, would fit together like a clamshell. Then I trimmed it to the right height, which required a little bit of trial and error as I trimmed a little at a time from each half.
On the bottom half, I left a flap at the back to form the hinge by taping it to the top half.
Then I reinforced the box with Gorilla Tape, used tape on the inside and outside of the hinge, and added a little tab on the front of the box to make it easier to open.
I added velcro to the bottom of the box to hold it tightly against the front of the insert, but I did not add velcro to the sides because the lid closes to the outside of the bottom's walls.
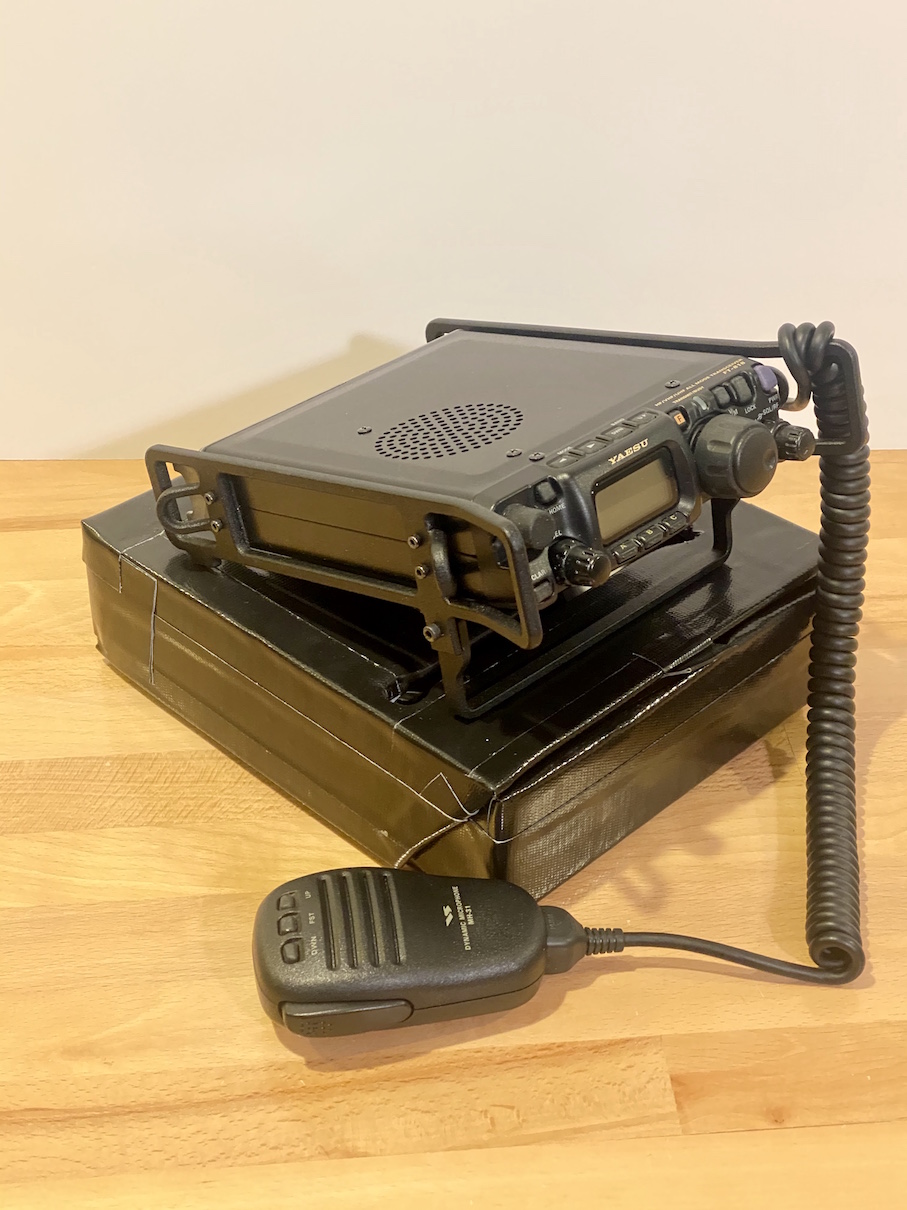
To use the radio, I just pull the Escort stand out of the box's hole and set it on top.
Radio on Riser
Radio on Riser
Riser in Insert
If you don't have the Portable Zero Escort Rails, you can just reinforce the box at this point, and apply velcro to secure the radio to the box. I wanted to keep the rails on, which meant cutting a hole in the top for the stand to fit through, allowing the radio to sit flat when stored. This also holds the radio in place so I don't need any velcro.
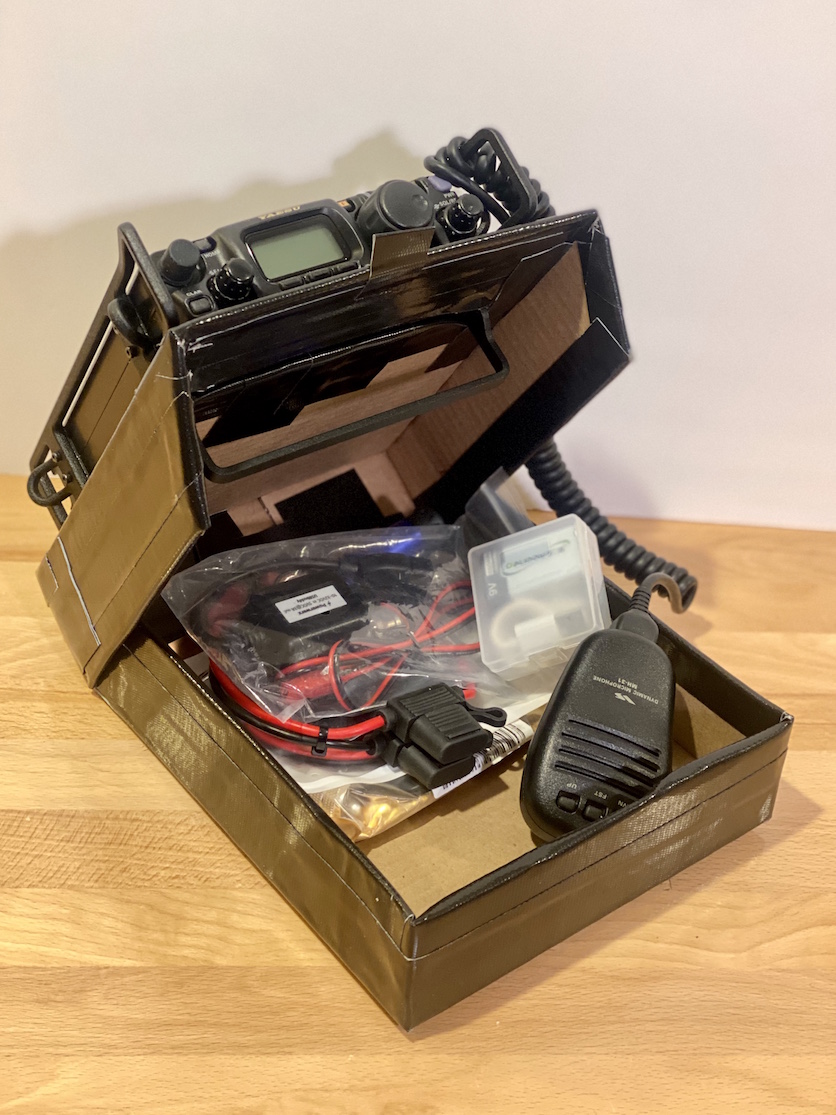
Open Riser
Open in Insert
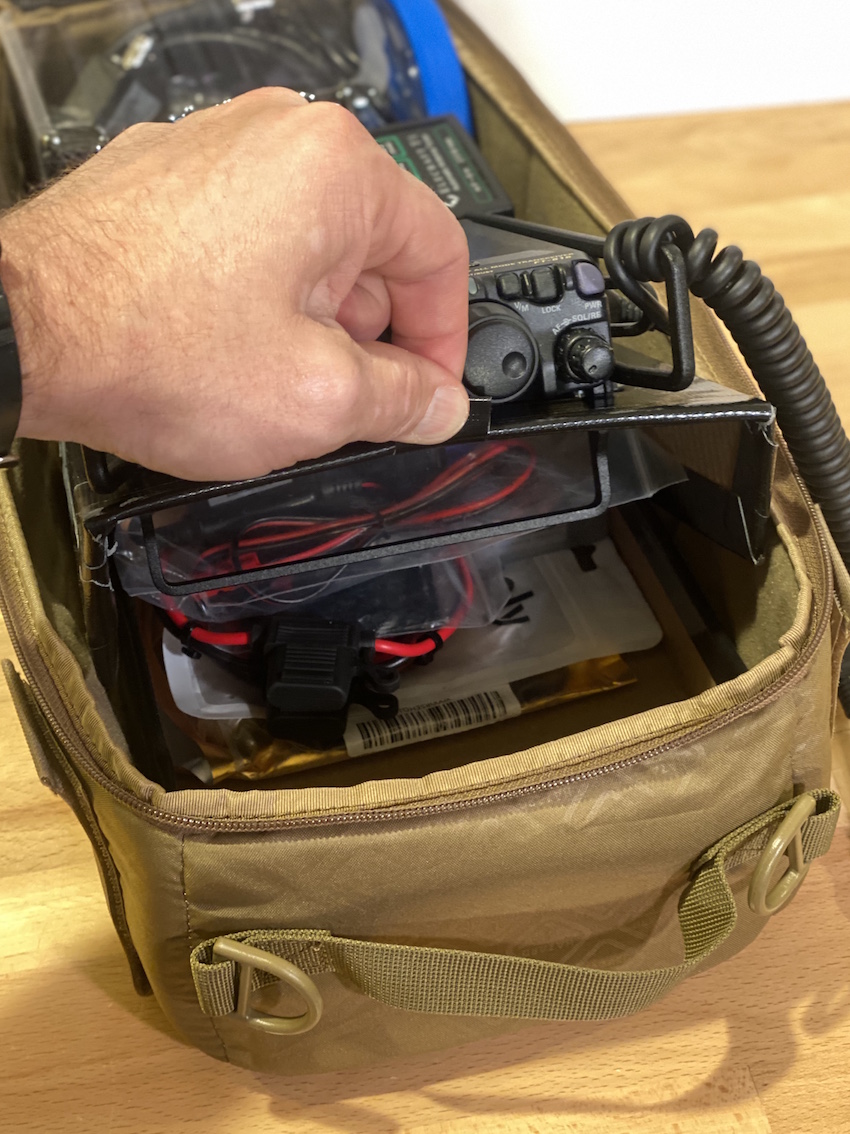
Below, you can see the small tab I made from Gorilla Tape to make the box easier to open when it's inside the insert. The next picture shows how I can access the storage with the riser box installed.
Riser Box Tab
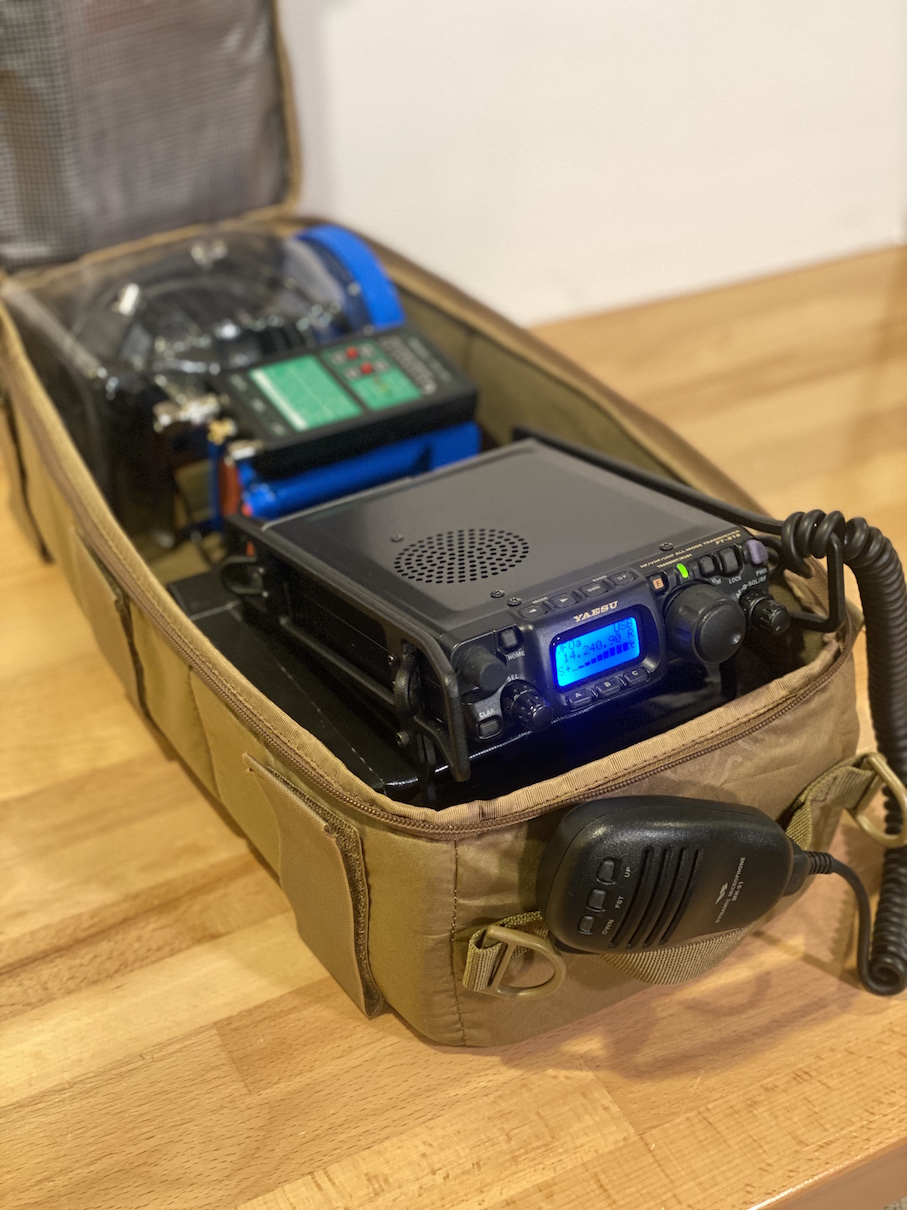
Radio in Use
Riser Box Contents
Inside this box, I store just-in-case items that I don't need to access very often.
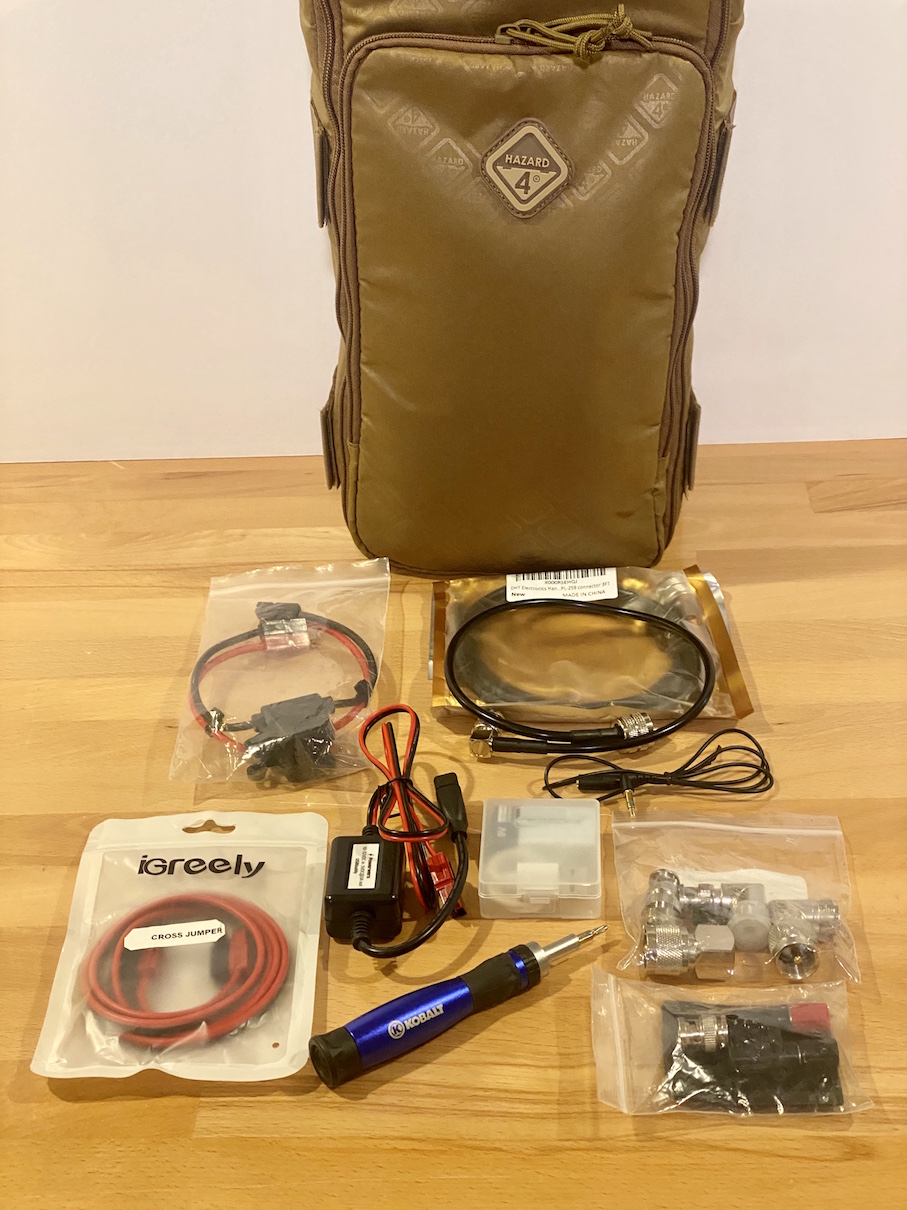
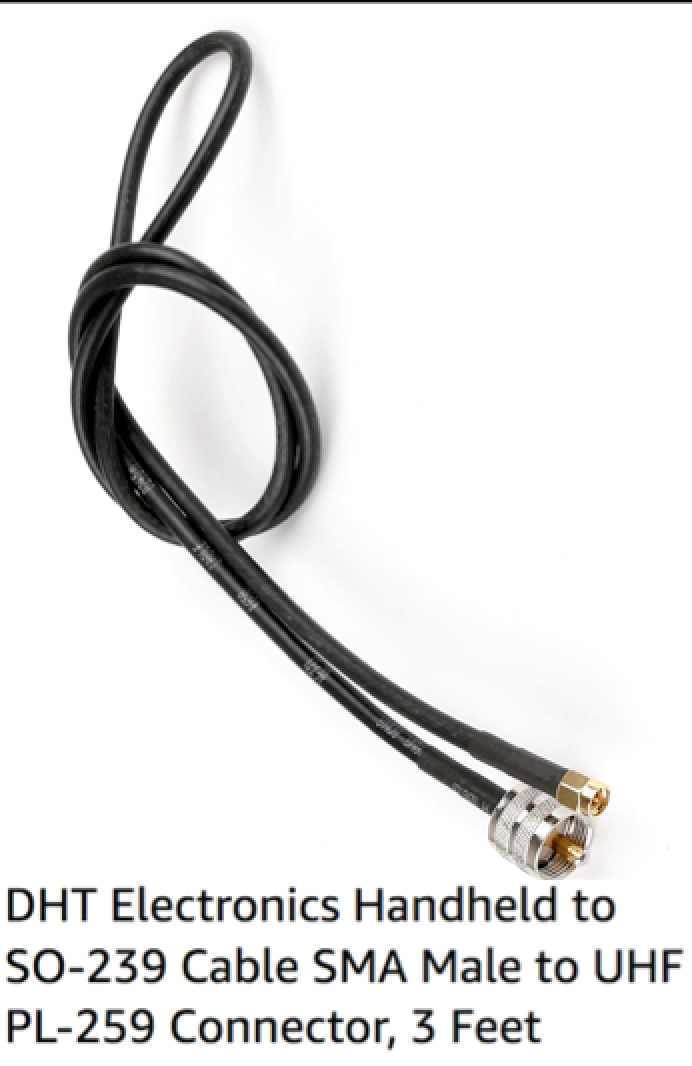
UHF Male to SMA Male Cable to connect Kenwood/Baofeng style antennas to the FT-818ND, if that's ever necessary. I have a bunch of them so I thought it was a good idea to have an adapter.
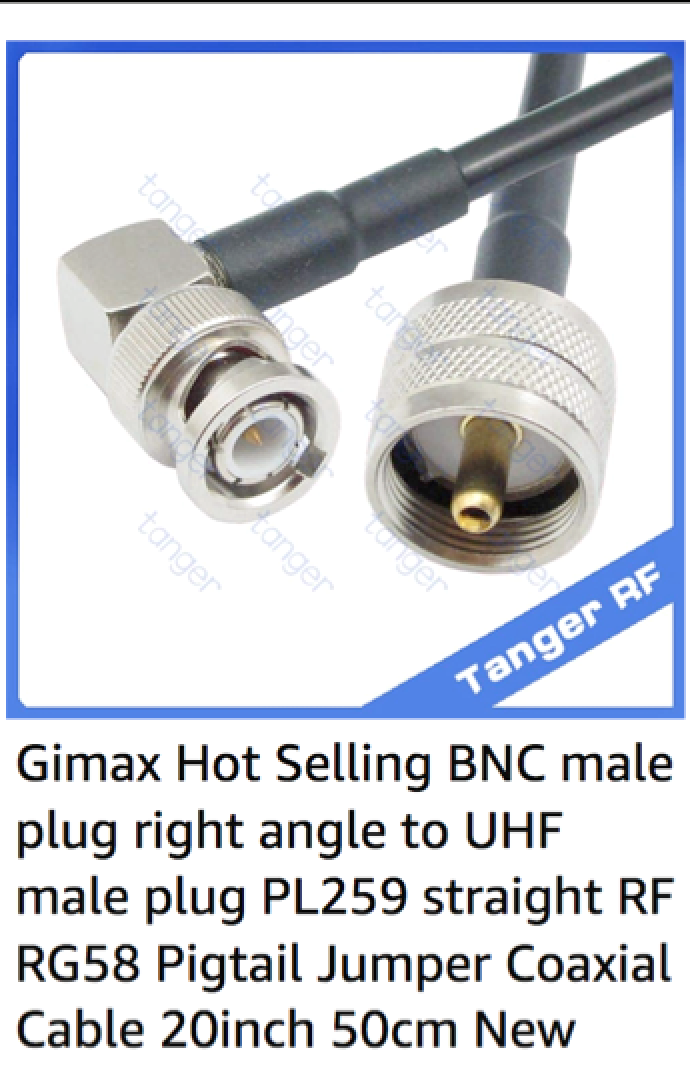
20" (50.8cm) RG-58 jumper. This is mainly a back-up to the 8" (20.3cm) RG-174 jumper that I leave connected in the kit, but it also gives me more reach if I want to remove the tuner from the insert for some reason.
PowerPole Crossjumper. This is just a jumper with the PowerPoles set up conventionally on one end and opposite on the other end, in case I need to connect to someone's equipment that has the red-black on opposite sides. It's still a pos-pos and neg-neg connection--just set up on different sides.
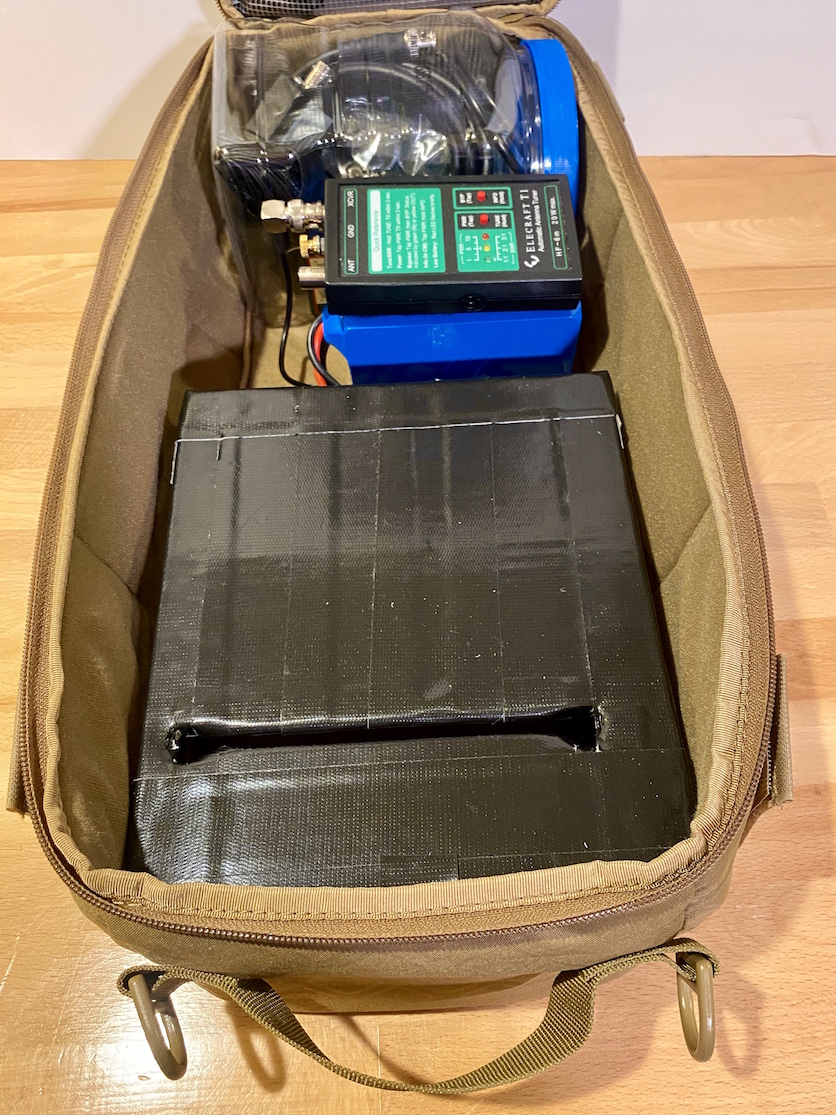
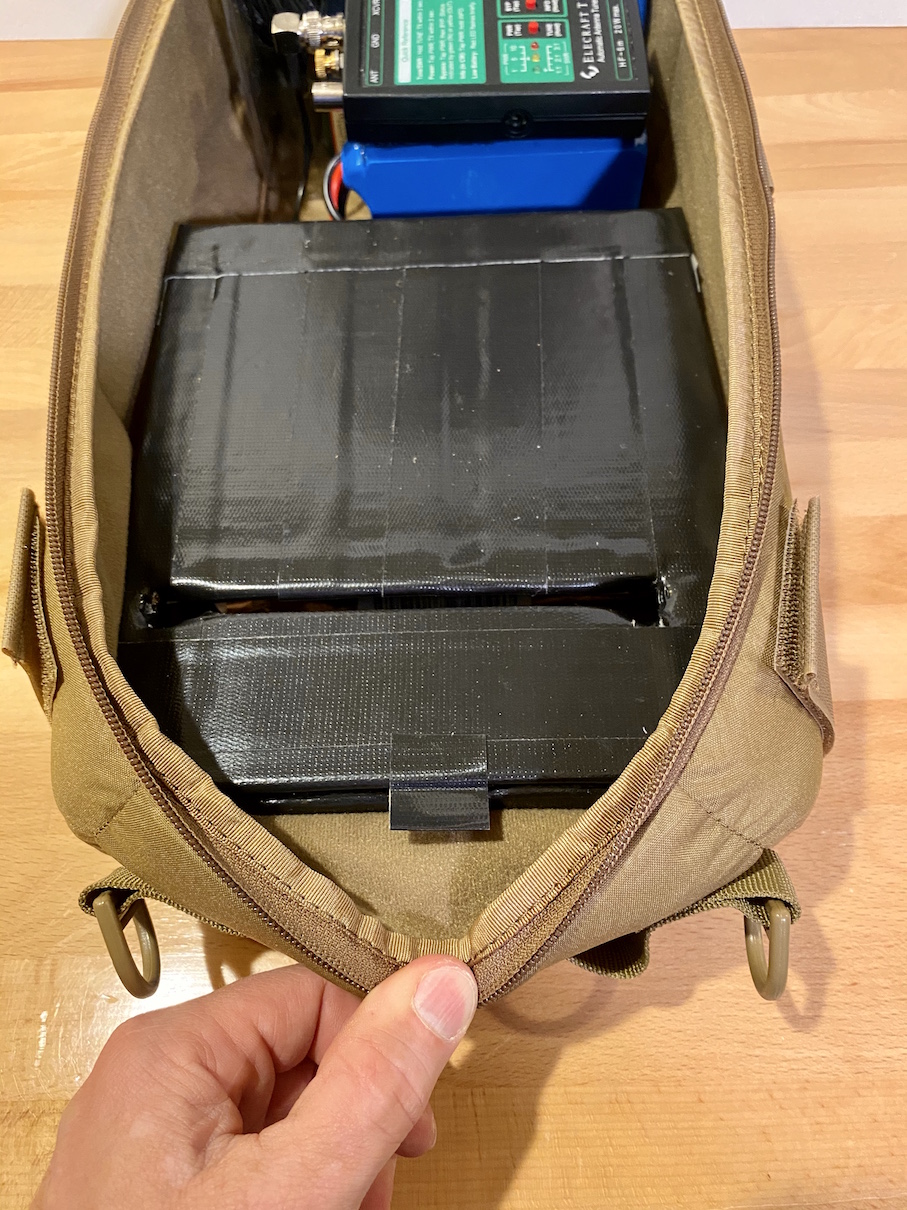
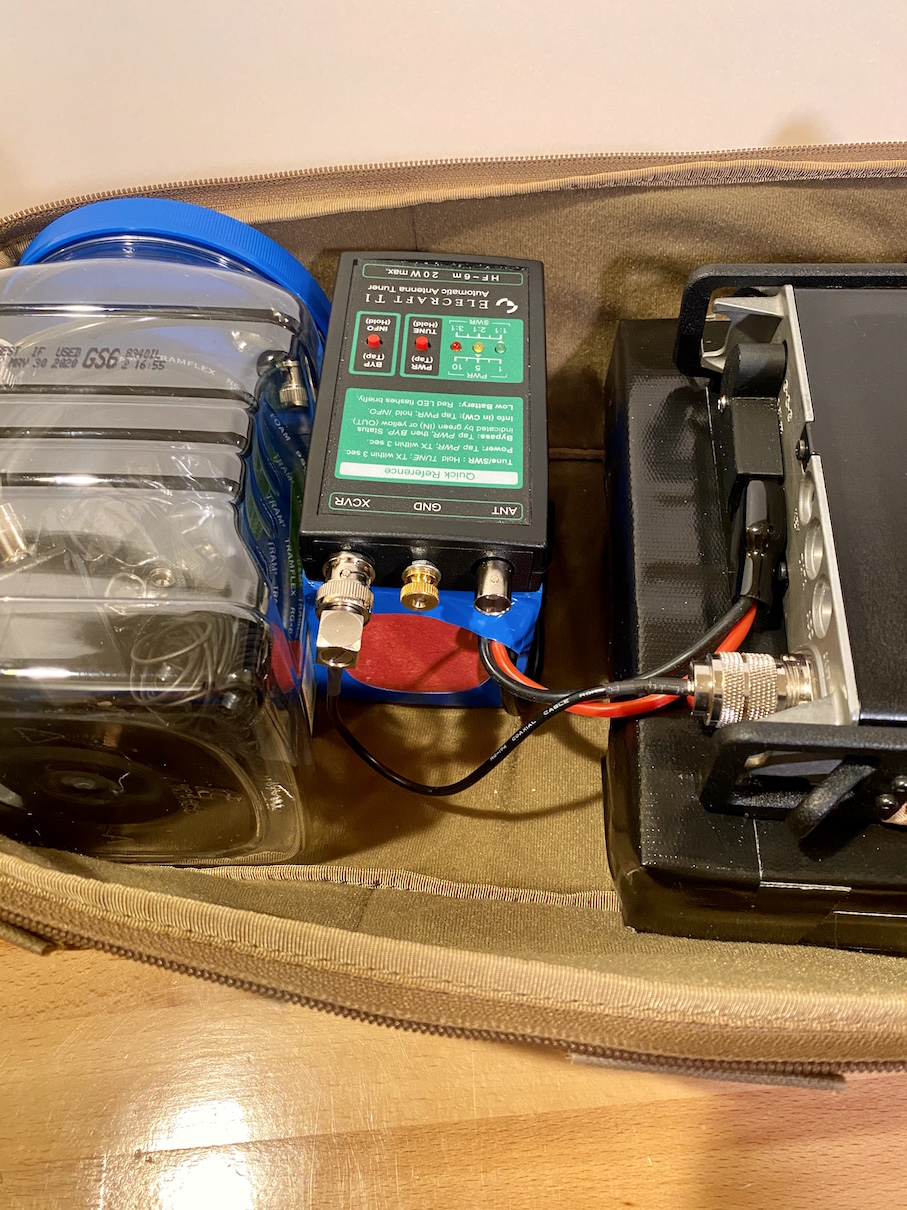
Since the battery secures the rear container, I combined this into one step. Two competing considerations here--the battery needs to be far enough to the rear to hold the container in place, and it must be close enough to the radio so another power cable is not needed. This means the size of the rear container affects the layout.
Once I confirmed the layout, I applied the male velcro to the bottom of the battery, used the battery to push the container against the rear wall, then pushed the battery onto the bottom of the insert.
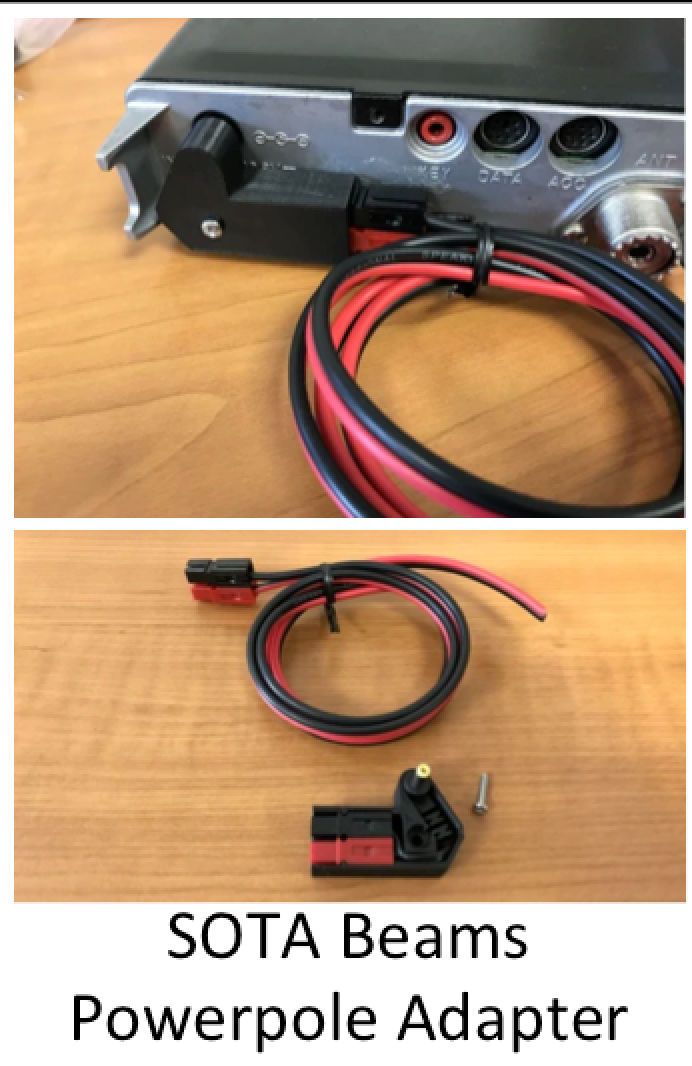
Note that I have the SOTA Beams Anderson Powerpole Adapter installed onto the Yaesu's power port. This makes the power connector much more durable and convenient.
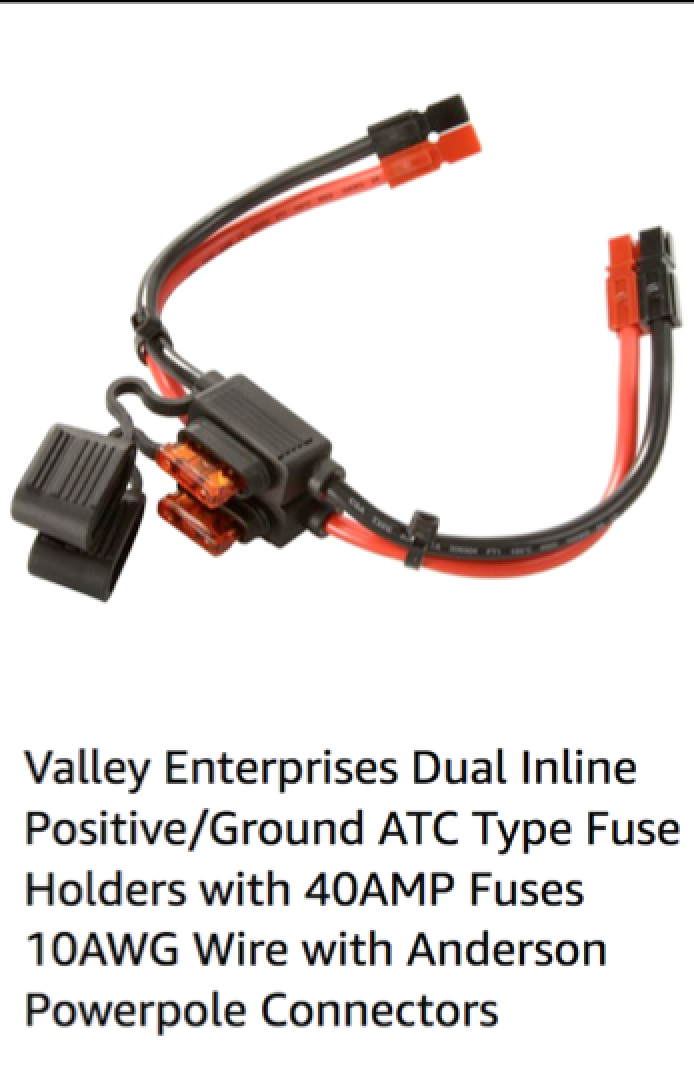
If you want a different setup, you might need to buy a powerpole extension cable. When I was first experimenting with this setup, I used the Anderson fused jumper to extend the reach. This worked ok, but I didn't need the fuses so they kind of got in the way. I keep this jumper in the riser box in case I need to use an untested power source in the field.
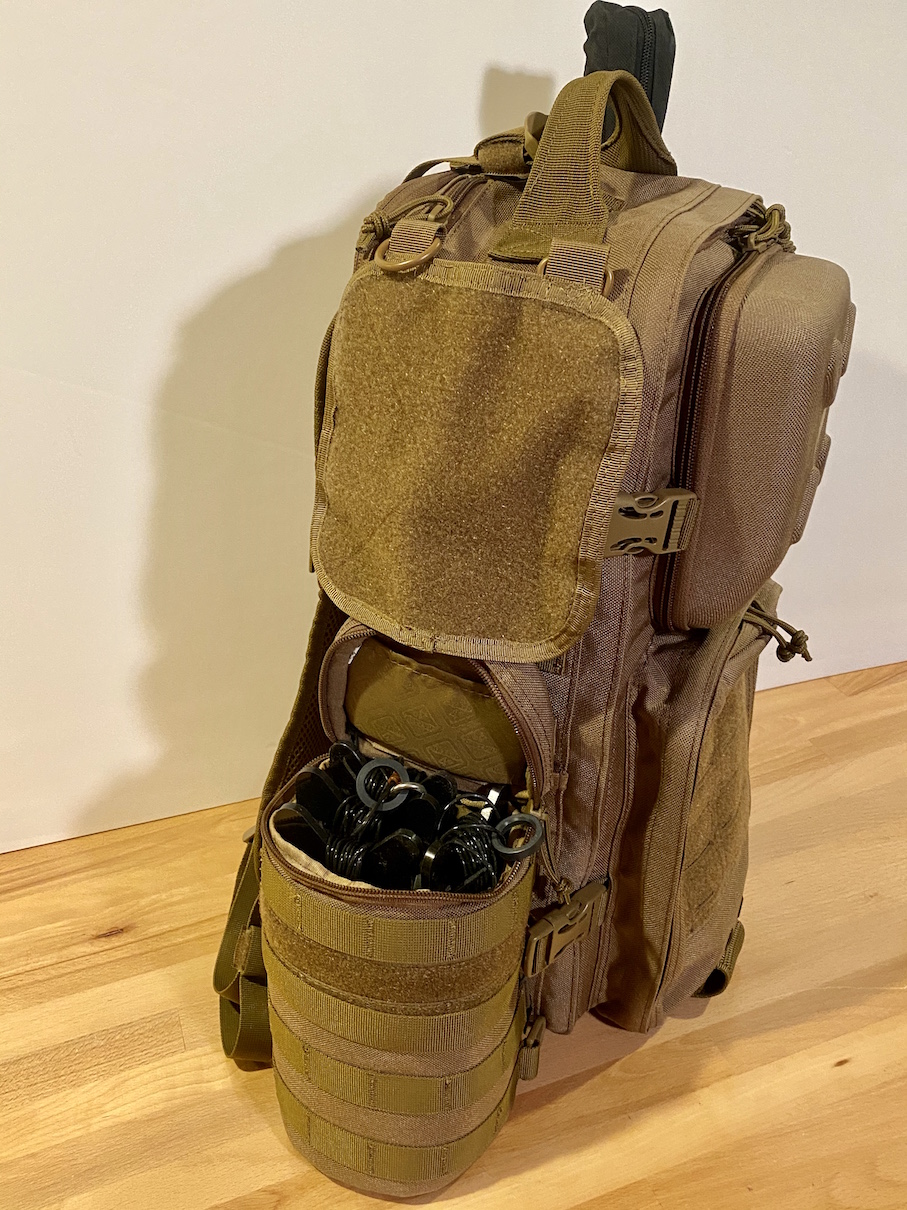
Rear Container
Grip Indentions
I chose this container partly because it's so easy to remove and replace, so it helps organize the kit for easy access to items that I use often. In my case, that's the antenna. When it's time to set up, all the components I'm likely to need to put up the antenna are in this waterproof (and somewhat protective) container. Items I use less often are in the riser box.
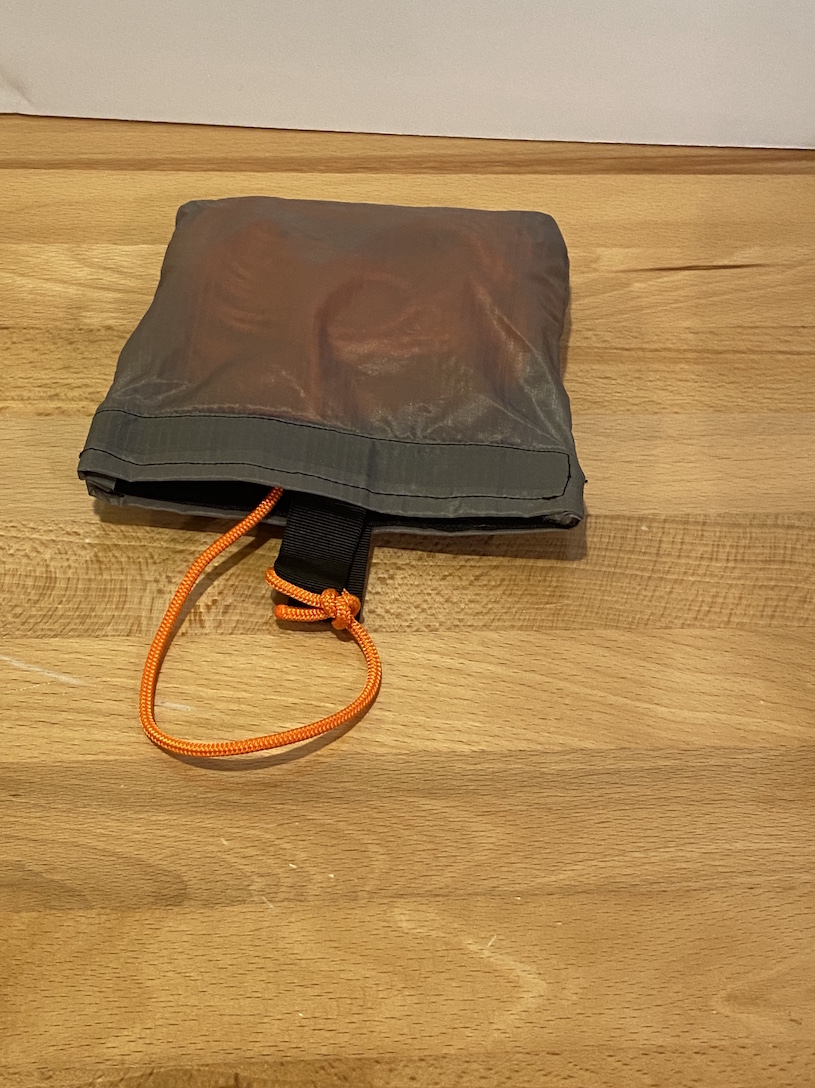
Homemade Throw Bag. I originally made this silnylon throw bag to hang my food sack when I go backpacking. It has a velcro closure to hold the line inside, and I tie one end of the line to an opening tab. At camp, or in this case where I want to throw the line over a branch to pull up the wire antenna, I can put found items like small rocks into the bag for weight. This eliminates the need to find creative ways to tie up a rock, and I don't need to use branches that might get hung up in the trees, etc.
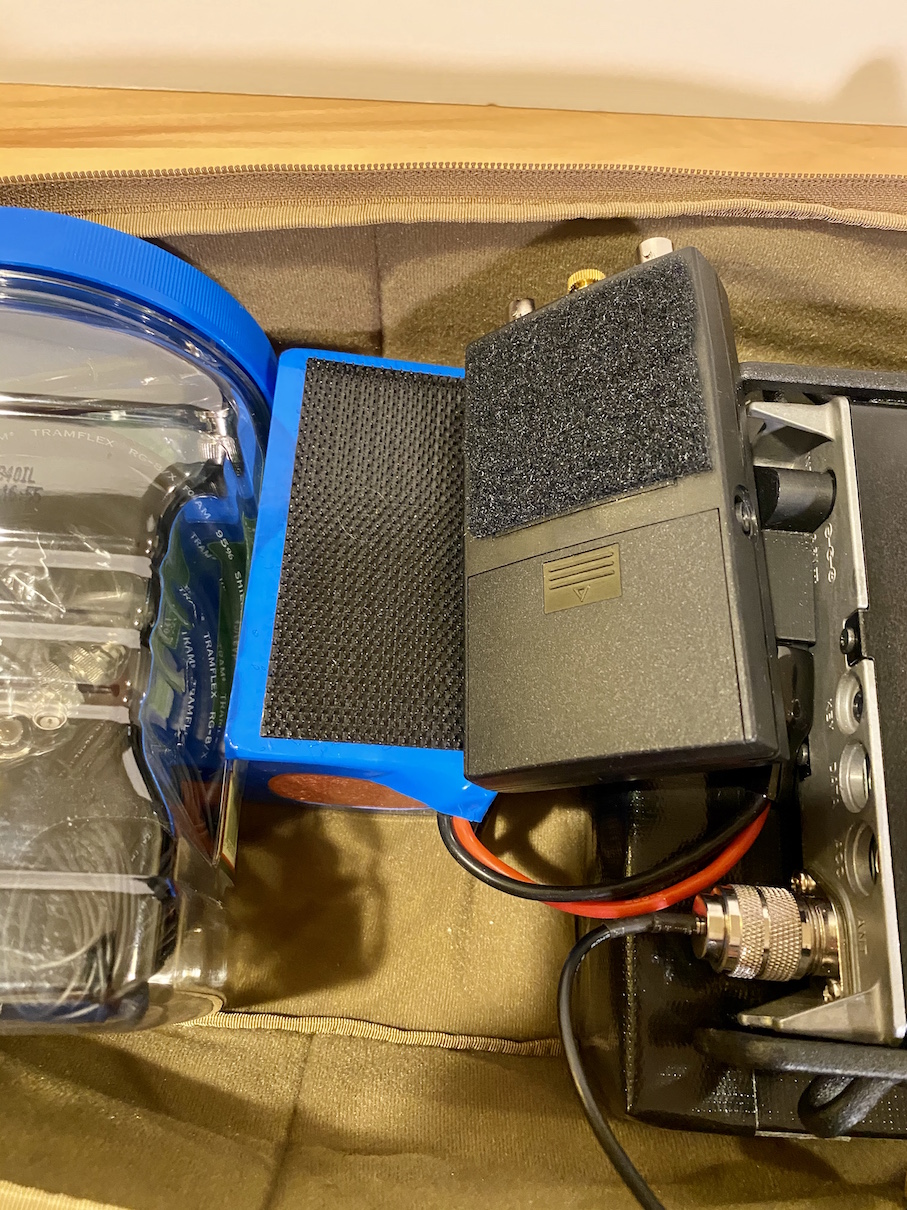
Next, stick the velcro to the Electraft antenna tuner. Be sure to leave a gap so you can change out the battery. I chose not to put any velcro on the battery cover to lessen the chance of the battery cover being damaged when I pull the tuner off the velcro.
The pic below shows a neat feature on the Electraft. The battery compartment is shaped so you can flip the 9V battery around backwards, and store it so the terminals are not connected to any circuit. No battery drainage or corrosion while in storage, and it's always right where you need it when you're ready to use it again--just flip it around and insert it correctly.
I discuss cables and adapters in the next section.
Elecraft Velcro
Elecraft Installed
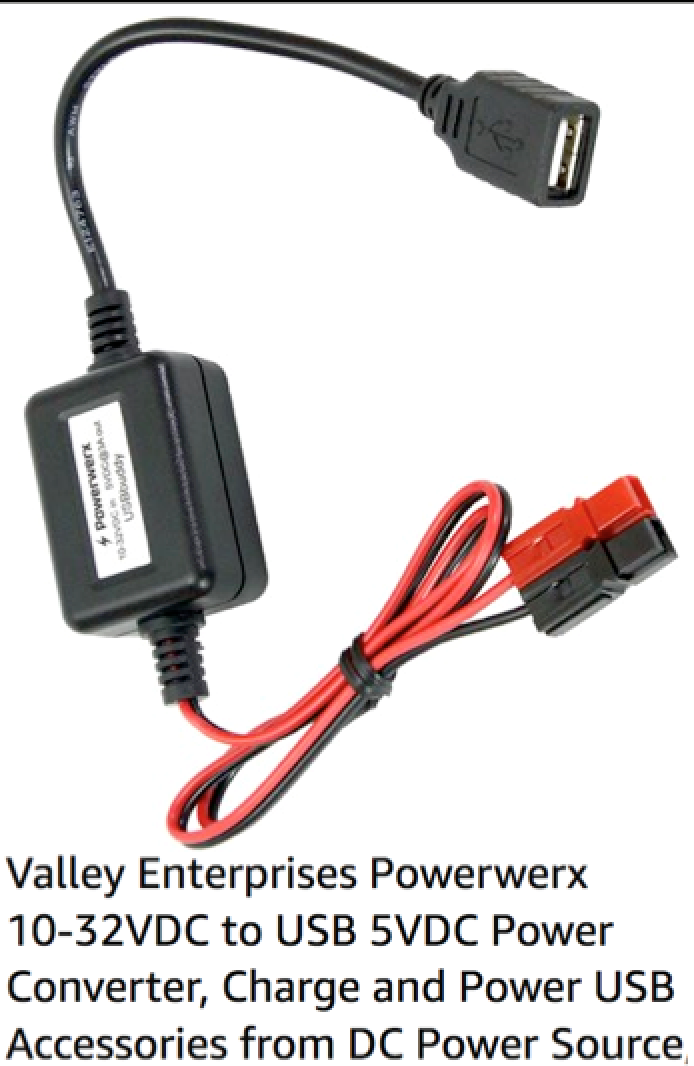
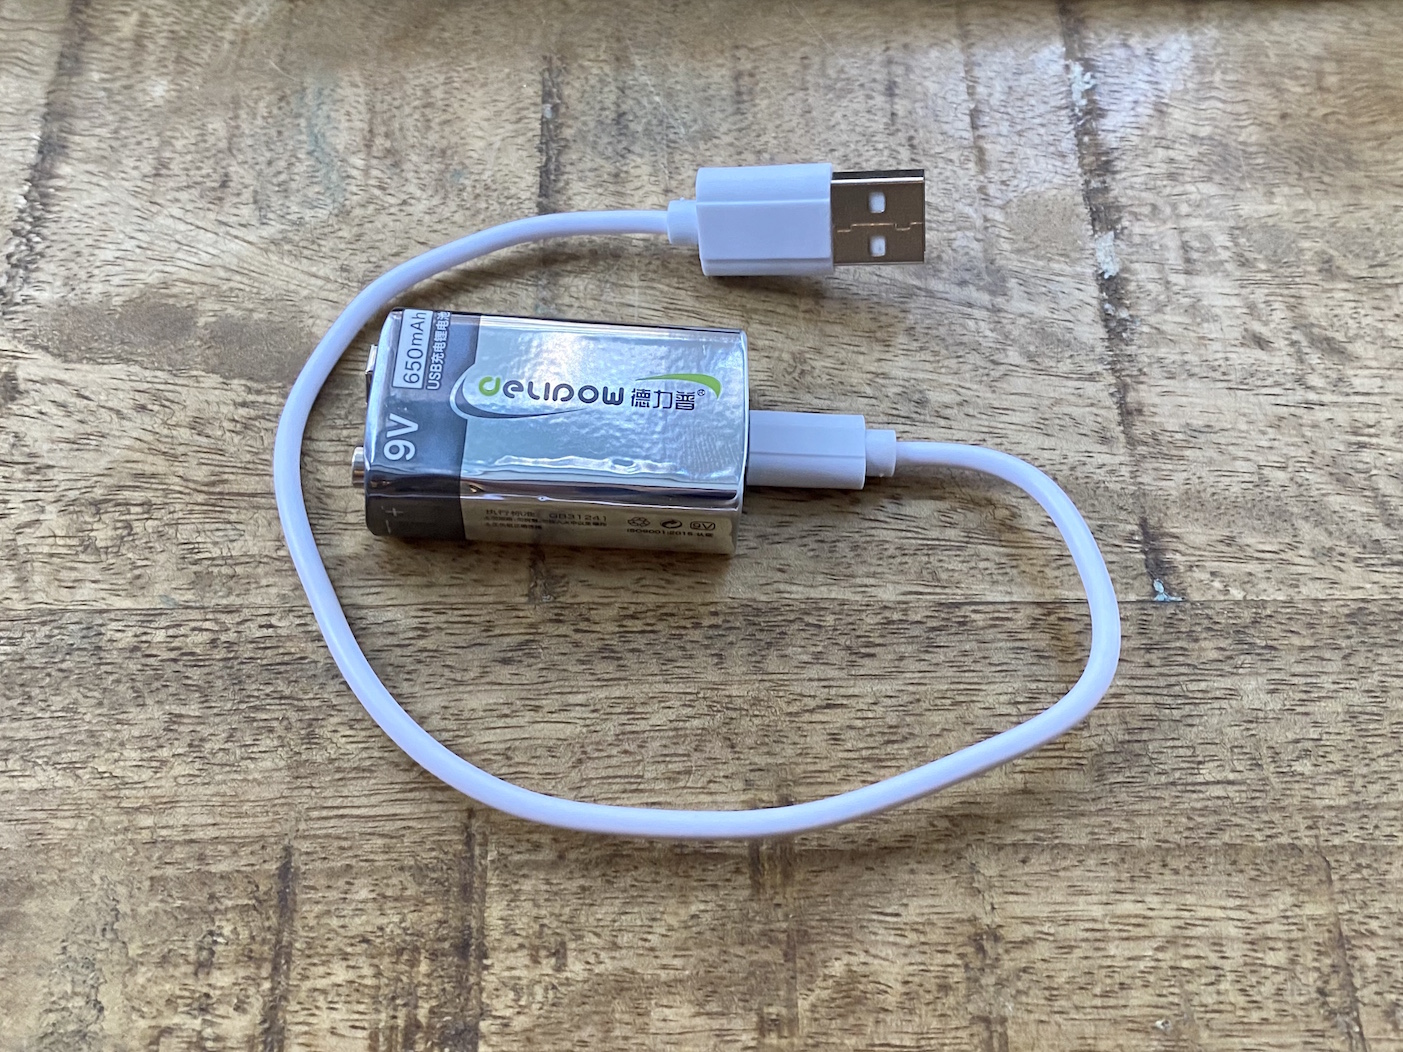
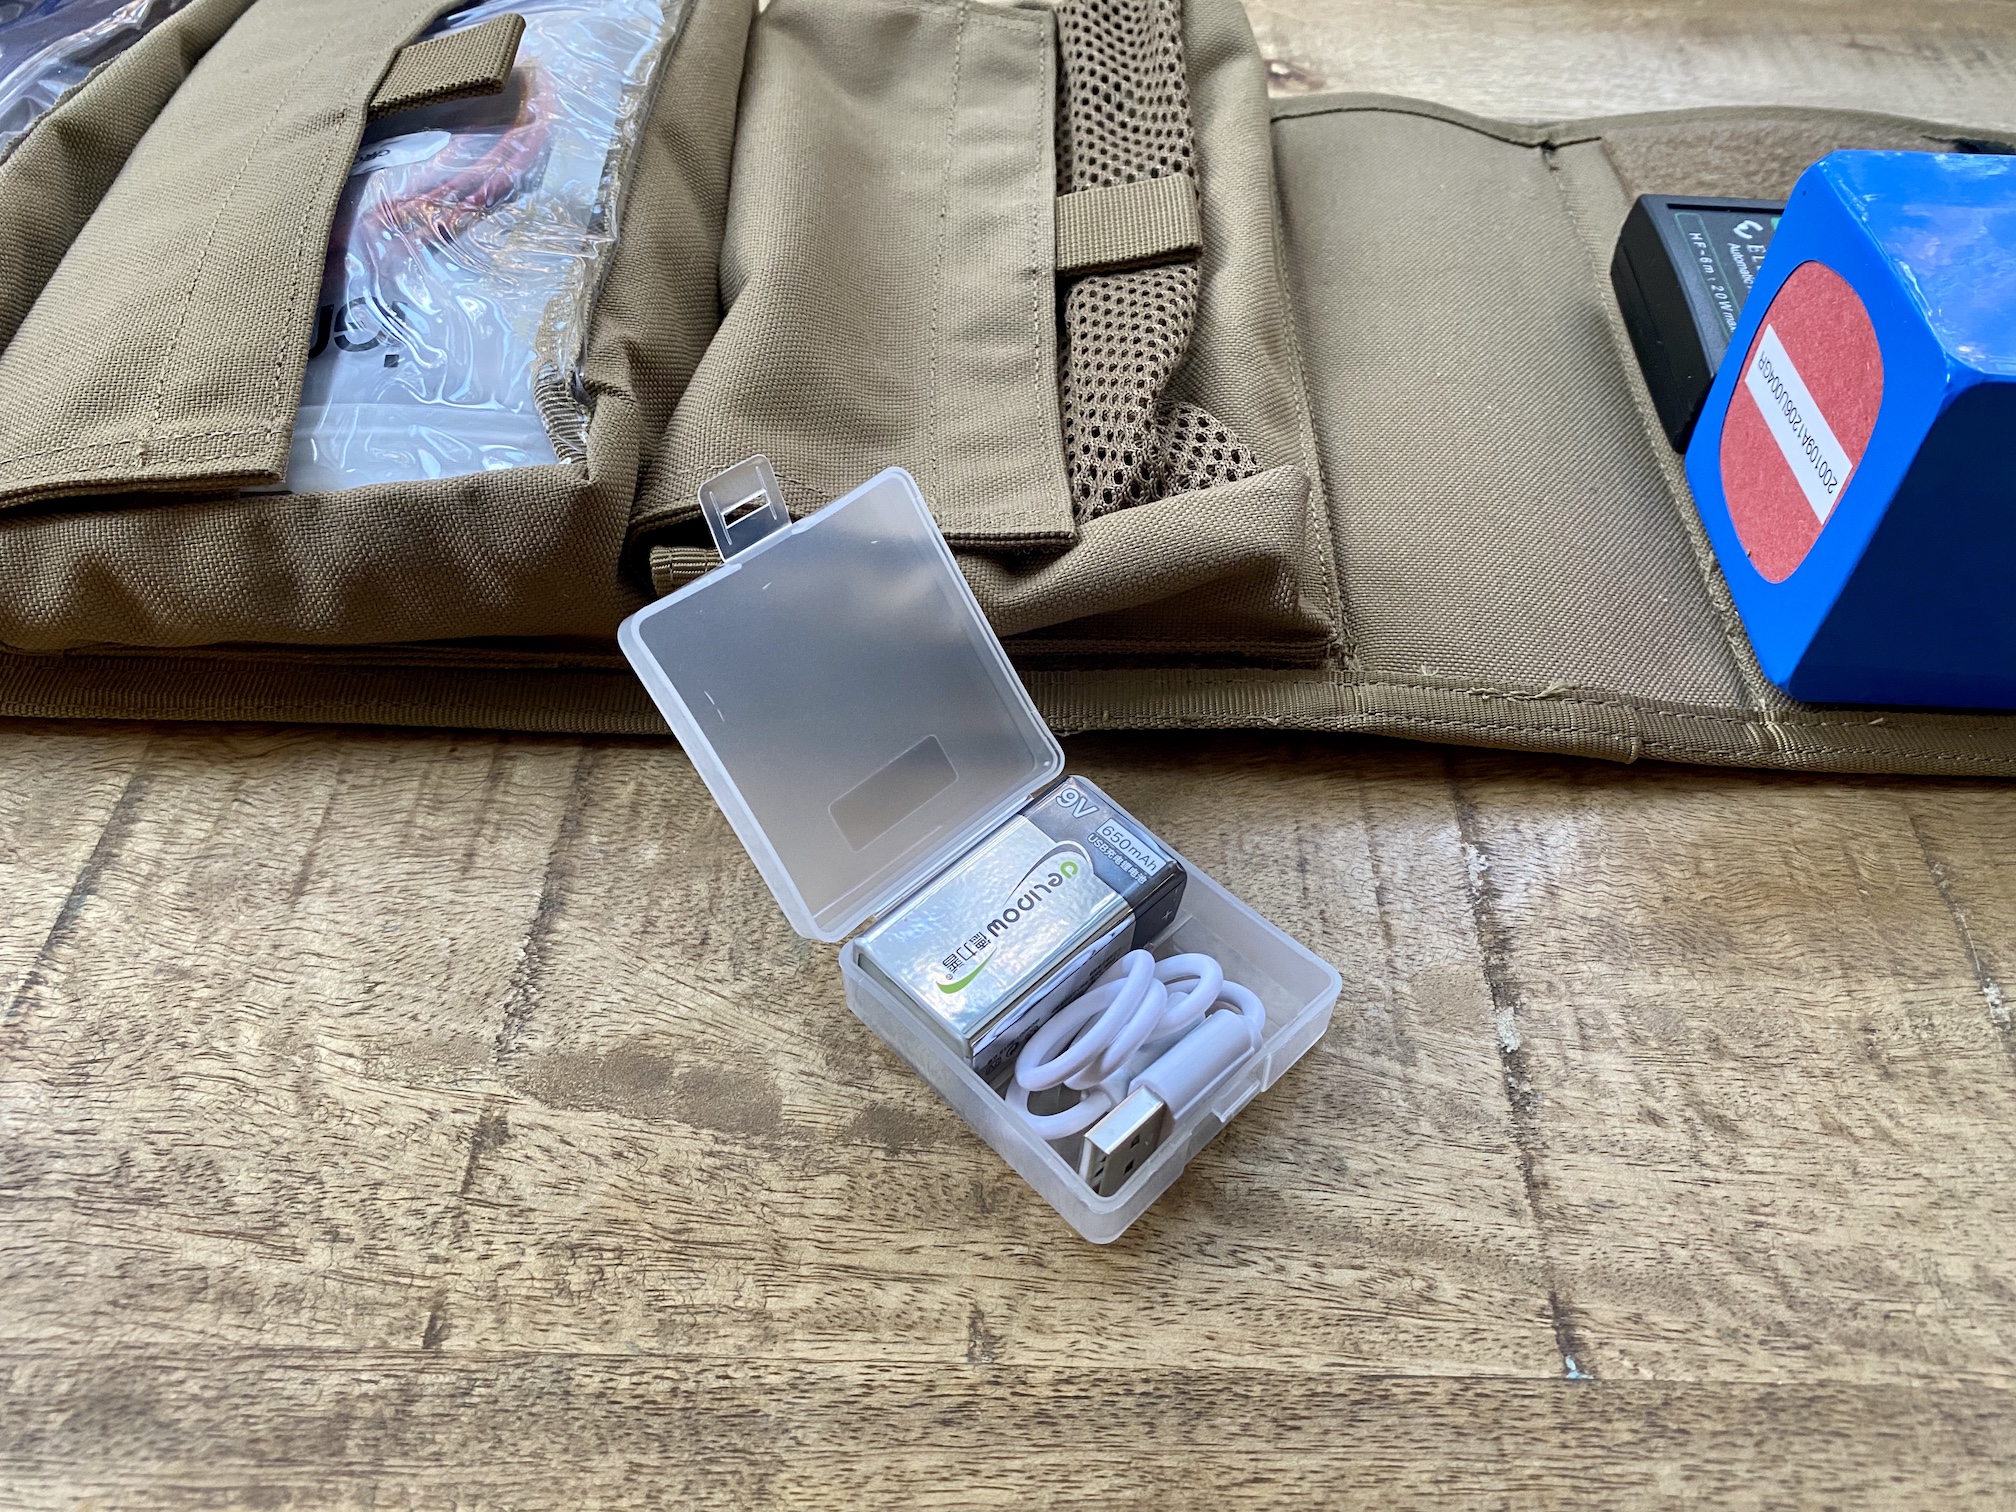
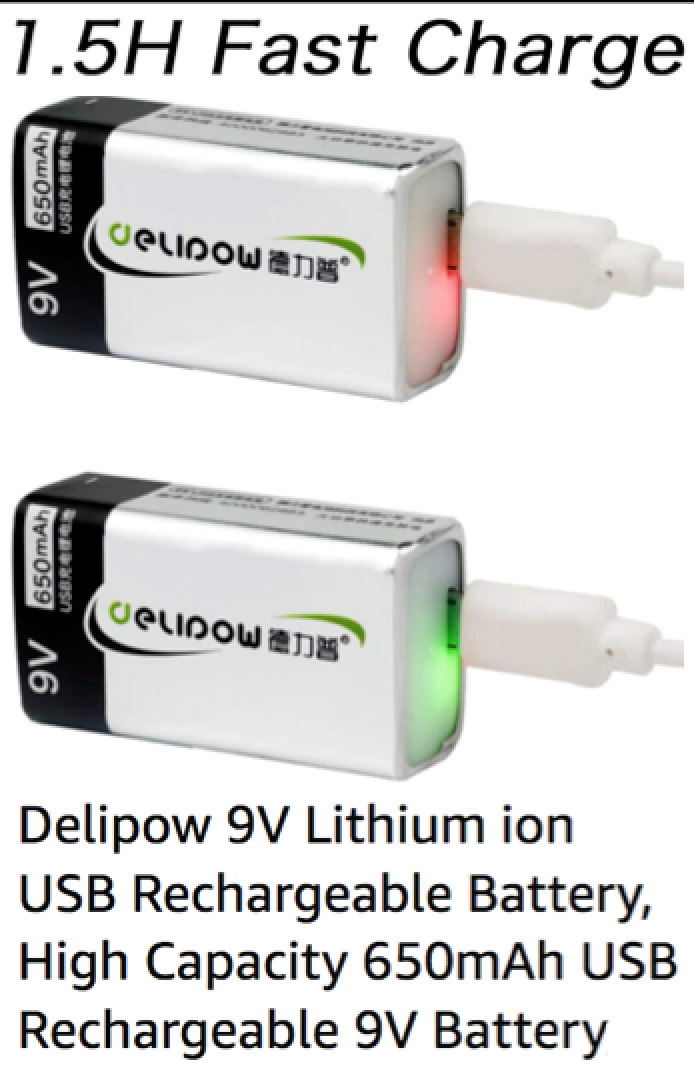
For this build, I wanted to ensure I could recharge everything for operation--but I also wanted to miniaturize the components. The Electraft T1 is smaller than the LDG z817 tuner, but the z817 uses AA batteries (which are easy to recharge) and the T1 uses a 9V battery, which I thought would be harder to recharge. Then I found these Delipow 9V Lithium Ion batteries that are rechargeable from a USB outlet! Now I can have a small tuner and be able to recharge the batteries with my normal kit. (I'm transitioning most of my powered accessories to Anderson Powerpoles, and I bought this Powerpole-to-USB cable to I can run any USB device from any of my power sources. I keep this cable in one of the accessory pouches in this manpack.)
I bought the two-pack, which comes with a plastic case sized perfectly to hold one battery and the USB charging cable in the accessory pouch, while the other battery is installed in the tuner.
Finish up by connecting the cables and adding whatever accessories remain, like the admin gear. How you organize the accessory pouches depends on which accessories you want to include. Some of these accessories are organized and linked below the pics.
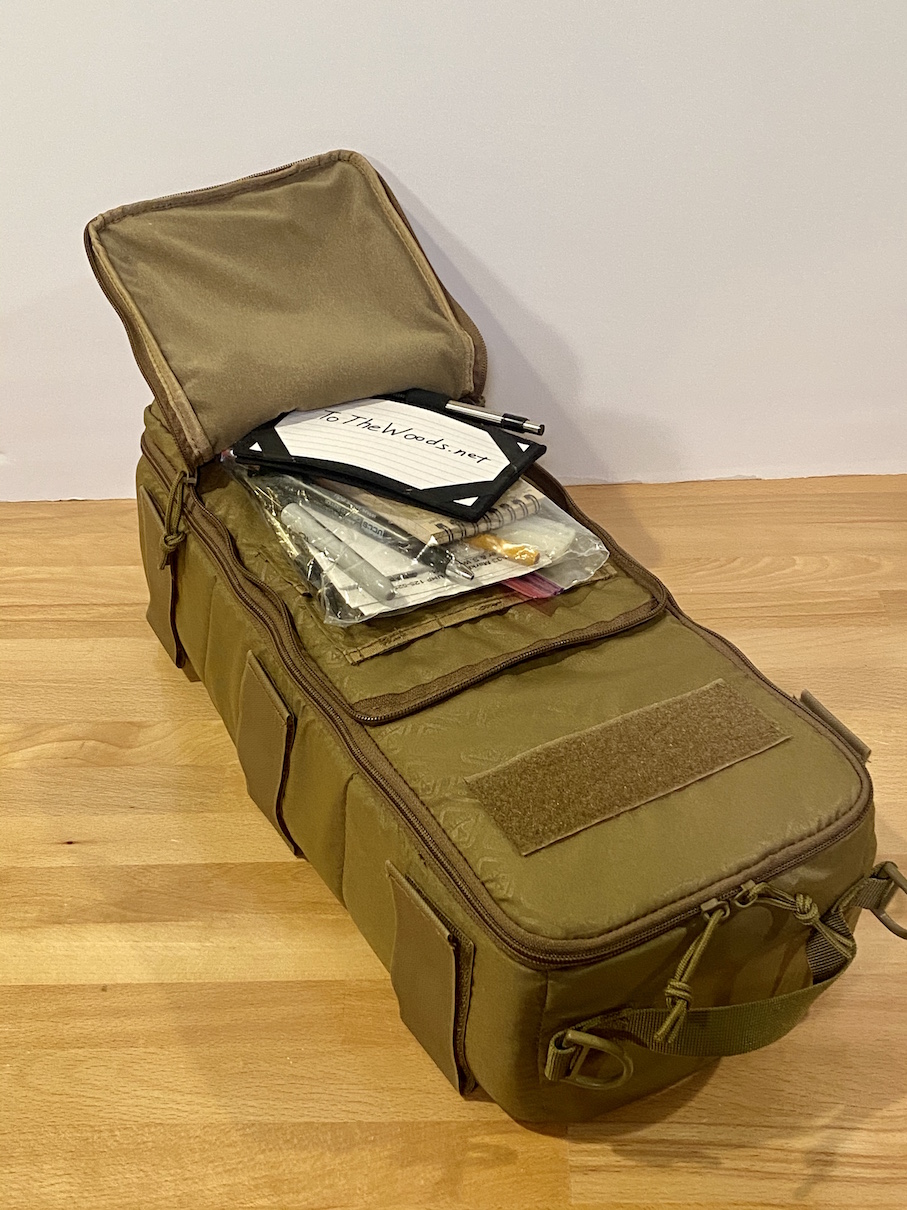
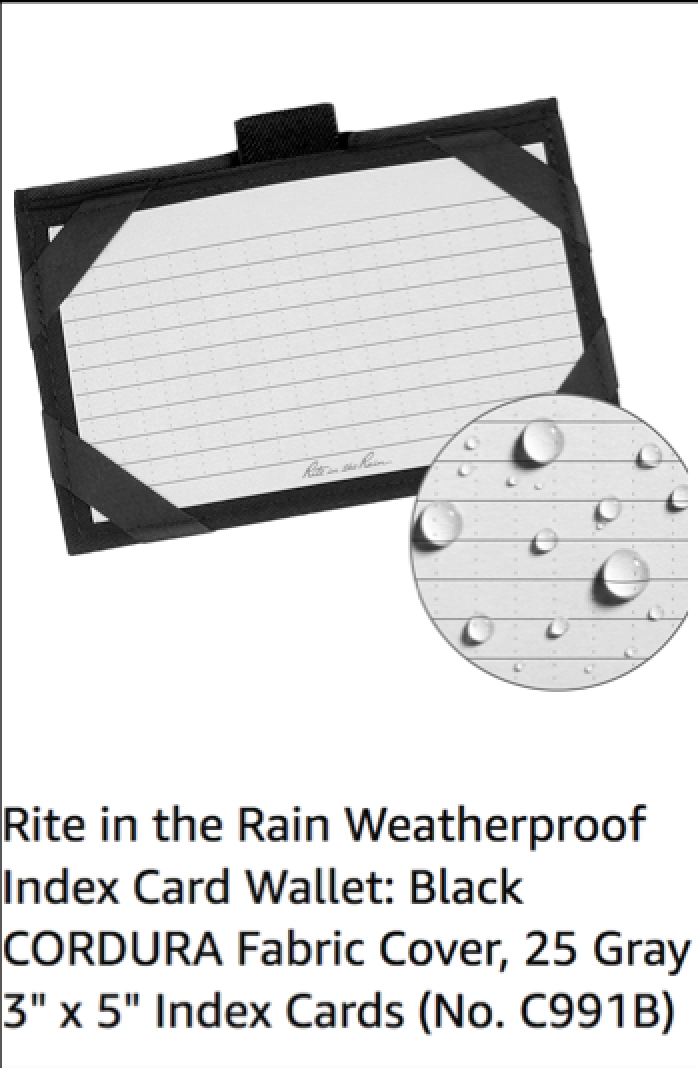
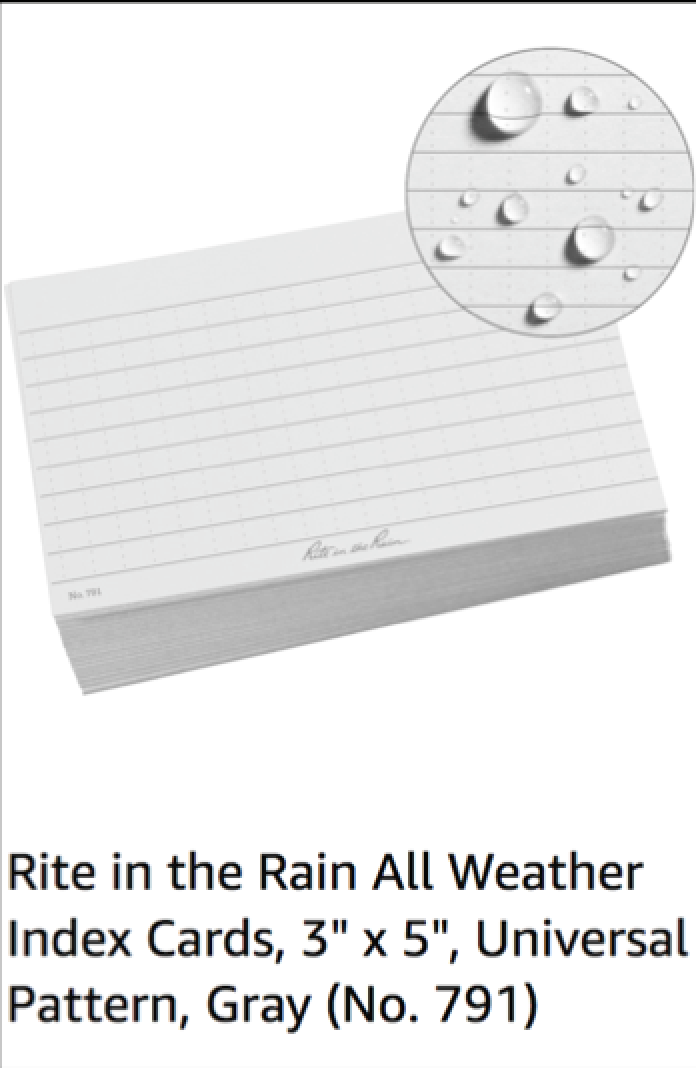
The Evac Insert is designed for photography, and the outer pocket is the one place where that limits its use. It has six small pockets sized to hold small memory cards, and they're pretty useless for anything else. But the zipper pocket is fine for notepads, pens and pencils, instruction manuals, etc. I always have some regular index cards, but I also like the Rite-In-The-Rain Wallet with waterproof index cards pictured below. I carry one of these at work, too.
If index cards aren't your thing, I like the Indestructible Field Notebooks, too. Very durable and handy. Like most waterproof paper products, be sure to test your writing instrument before you need it. Pencils usually work well, markers usually don't, and for pens it depends on the type.
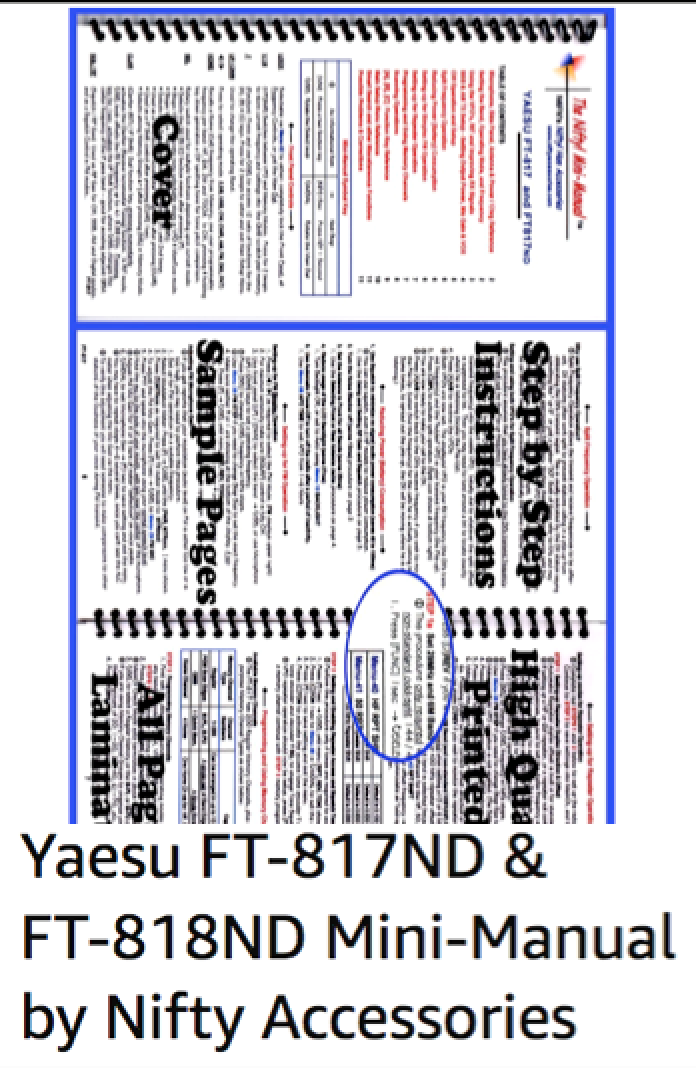
The Nifty Guide serves a secondary function of protecting the buttons on the Elecraft tuner right below it. The guide is laminated and pretty firm, and when the insert is closed it rests on the rear container and the back of the radio, making it less likely that any pressure will push a tuner button.
Now that the insert is set up, figure out how you want to organize the pack itself. As I said above, I want to be able to remove the radio insert and put in the photography insert, leaving some of the necessities in the pack and pouches--so that drove some of my choices here.
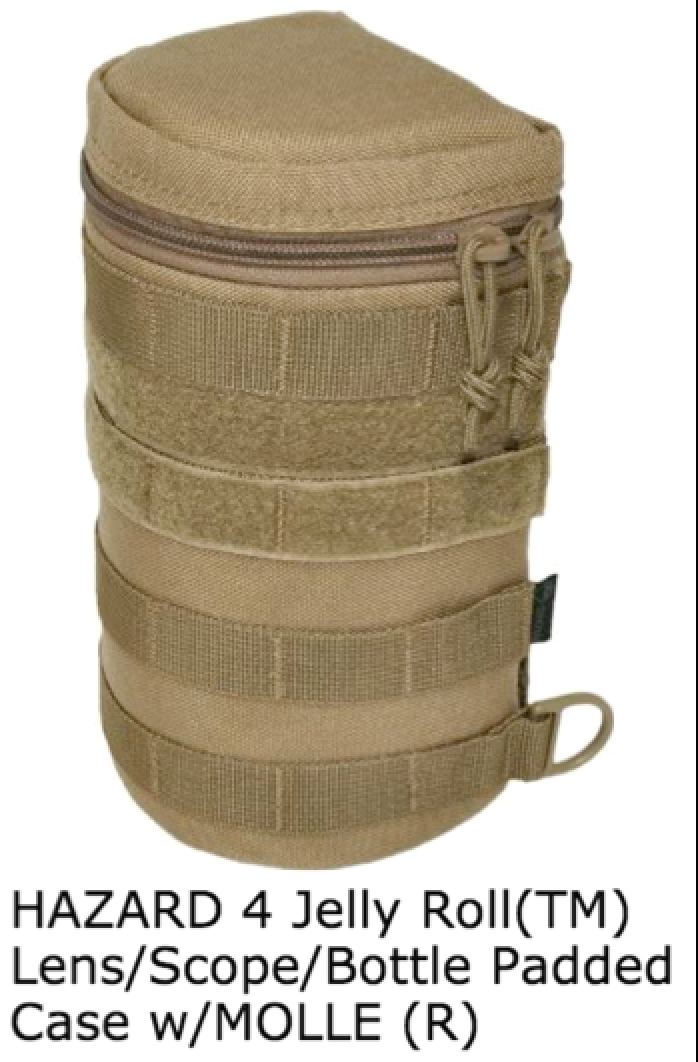
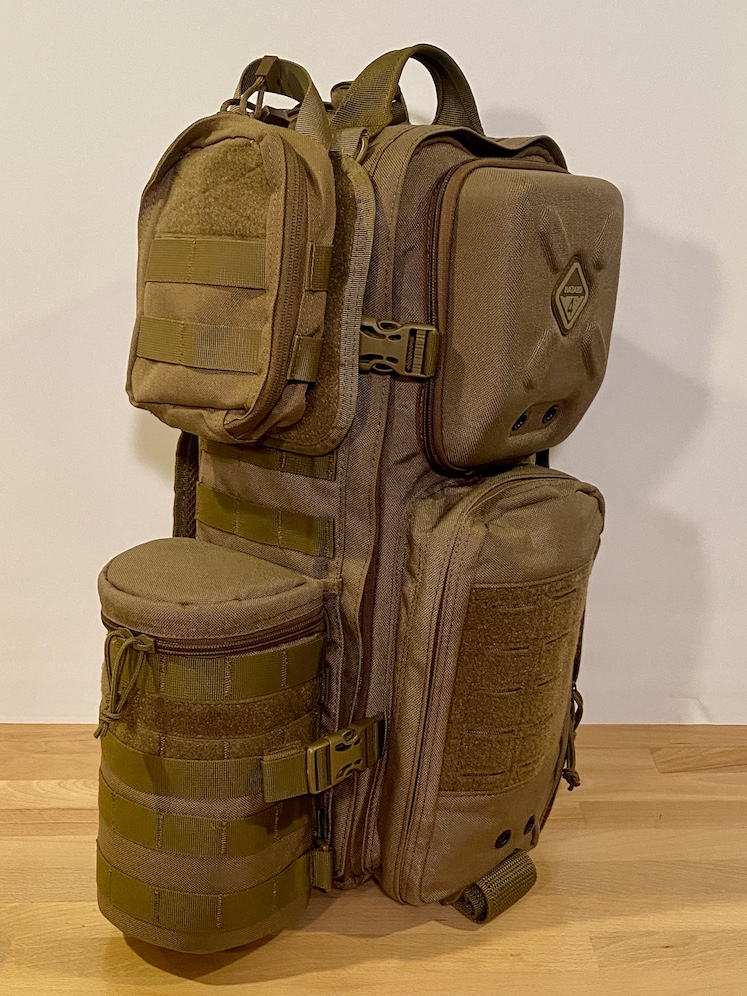
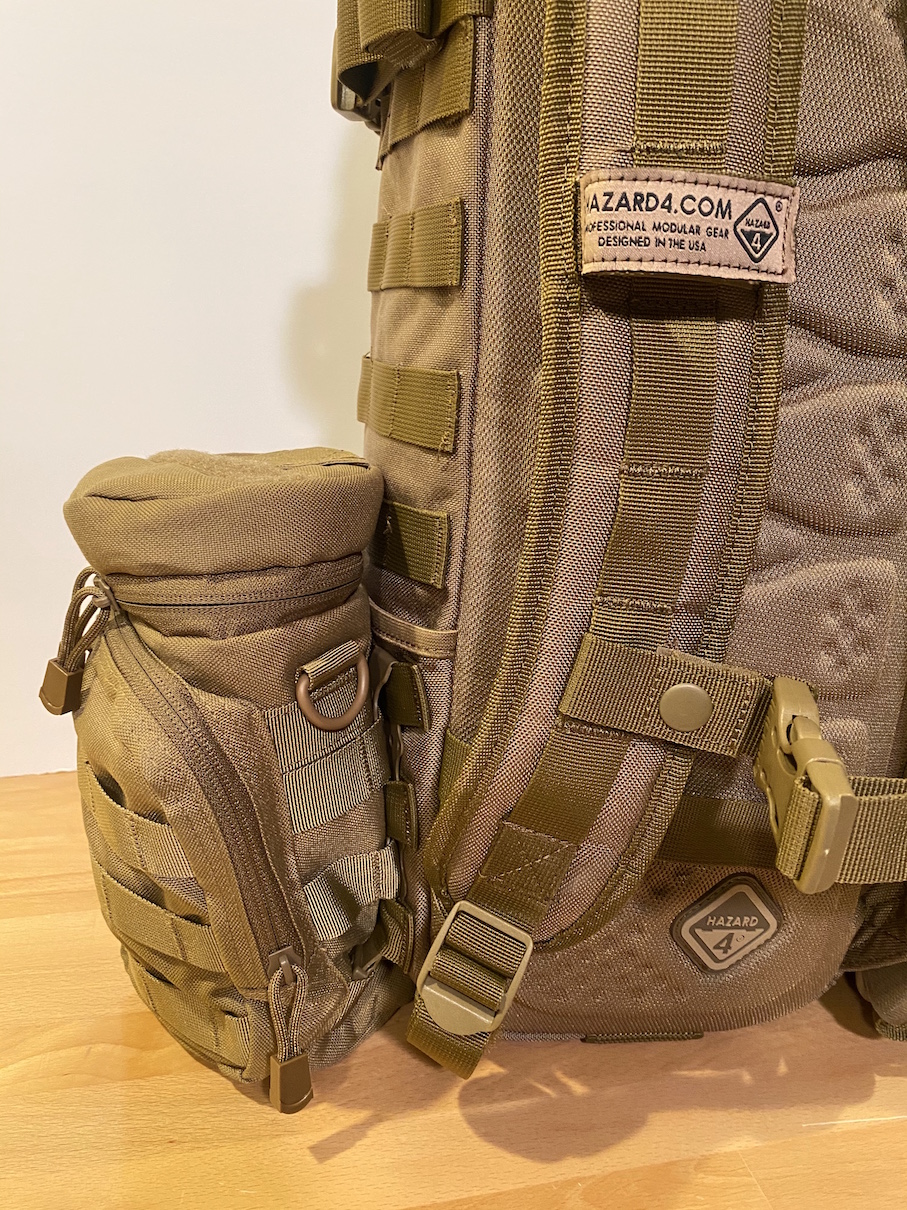
For example, I needed a quick and easy way to switch lenses on my camera without putting my pack down on wet ground. That's why I chose the Hazard 4 Jelly Roll for the main external pouch and the Condor EMT Rip-Away Pouch above it.
Actually, I have the EMT Rip-Away Pouch's velcro panel on the pack, but I usually put the smaller EMT Rip-Away Lite pouch on it. I like how the bigger velcro area provides more work space when I have the Plan C daypack slung across my chest, but I usually don't need the volume of the larger pouches for this purpose. But having the larger hook and loop panel also lets me attach the larger pouches when I need them, like when I go to the shooting range, so I appreciate the modularity.
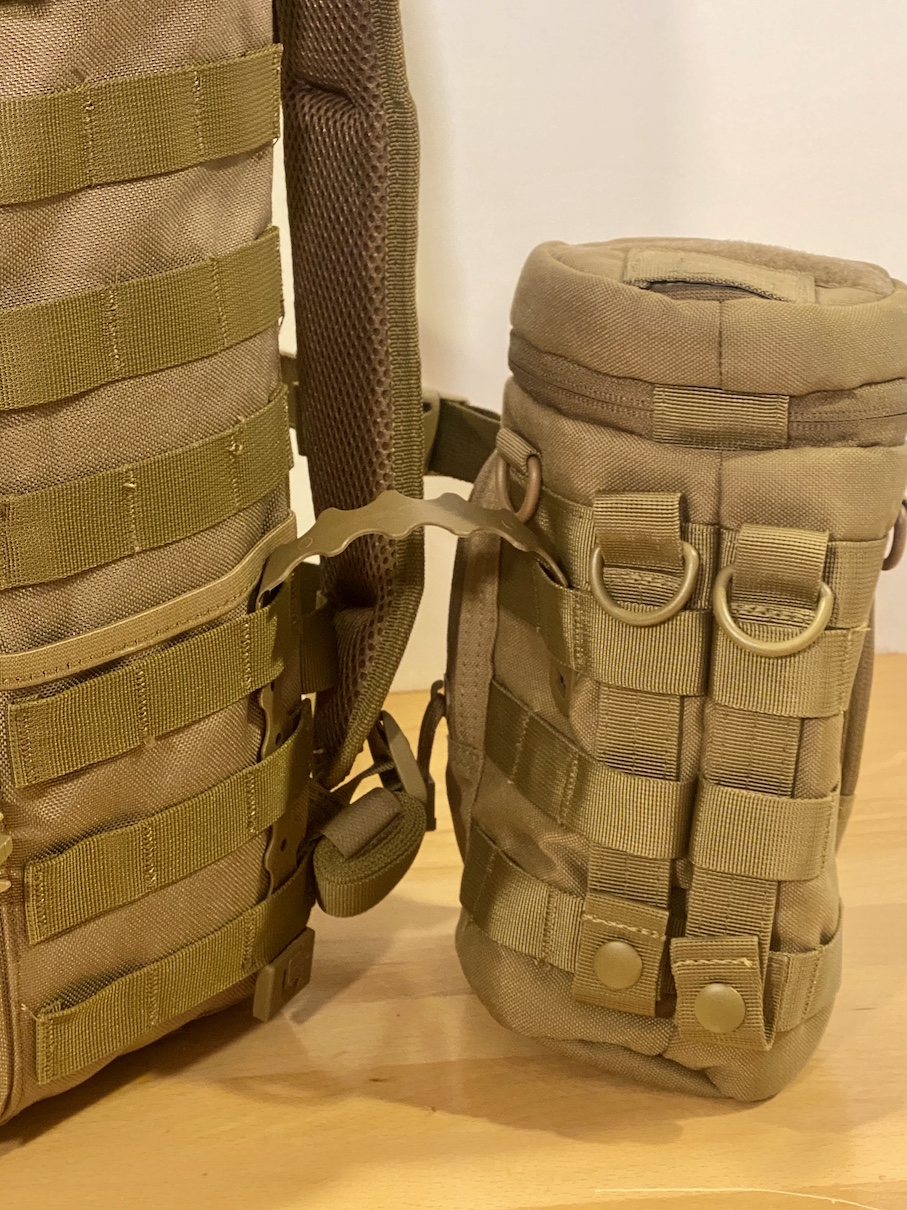
Below are some pics showing some different ways to use the hook and loop panel, and comparing three options for a water bottle or photo lens pouch.
I like how the Plan C is pretty stripped down, letting me customize how to carry my gear. Of course, the cost in this approach is the weight of MOLLE gear, but I'll pay that cost for the convenience.
The first decision for me was how to carry camera lenses so I could switch them easily without setting down my pack. I first started looking at insulated water bottle pouches, which worked ok, and then I found the Hazard 4 Jelly Roll designed for exactly this.
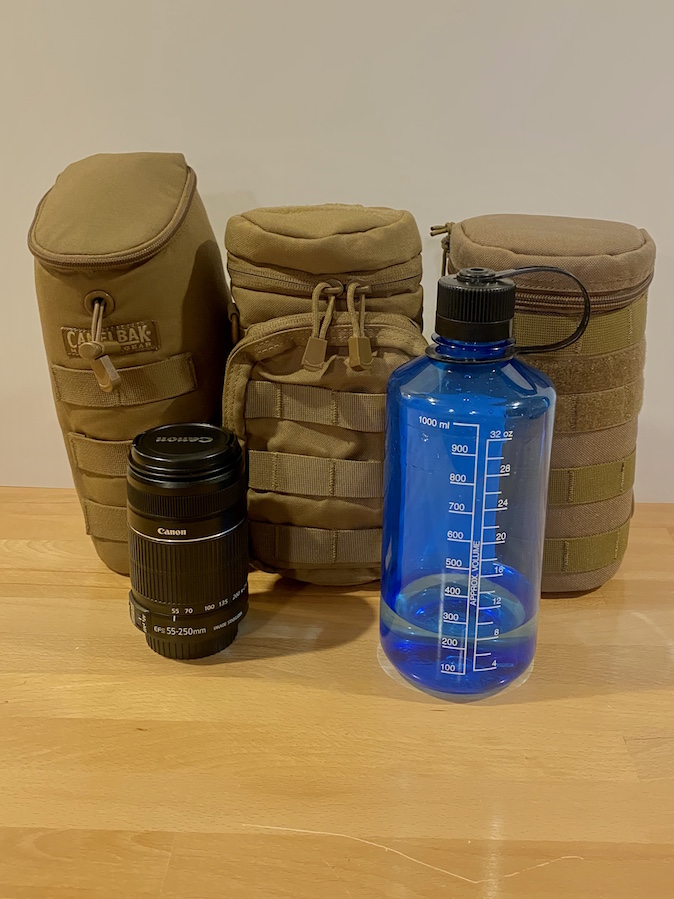
The pics below show the Jelly Roll and Condor EMT Rip-Away Pouch hook and loop panel, and give a size comparison of the Camelbak bottle pouch,Condor H2O Pouch, and Hazard 4 Jelly Roll (left-to-right). All are suitable for this purpose, but I picked the Jelly Roll for two main reasons: it is wider than the others so I can carry more non-photography gear in it, and it is stiffer so it's easier to unzip with one hand when I need to swap camera lenses.
Jelly Roll
Pouch Comparison
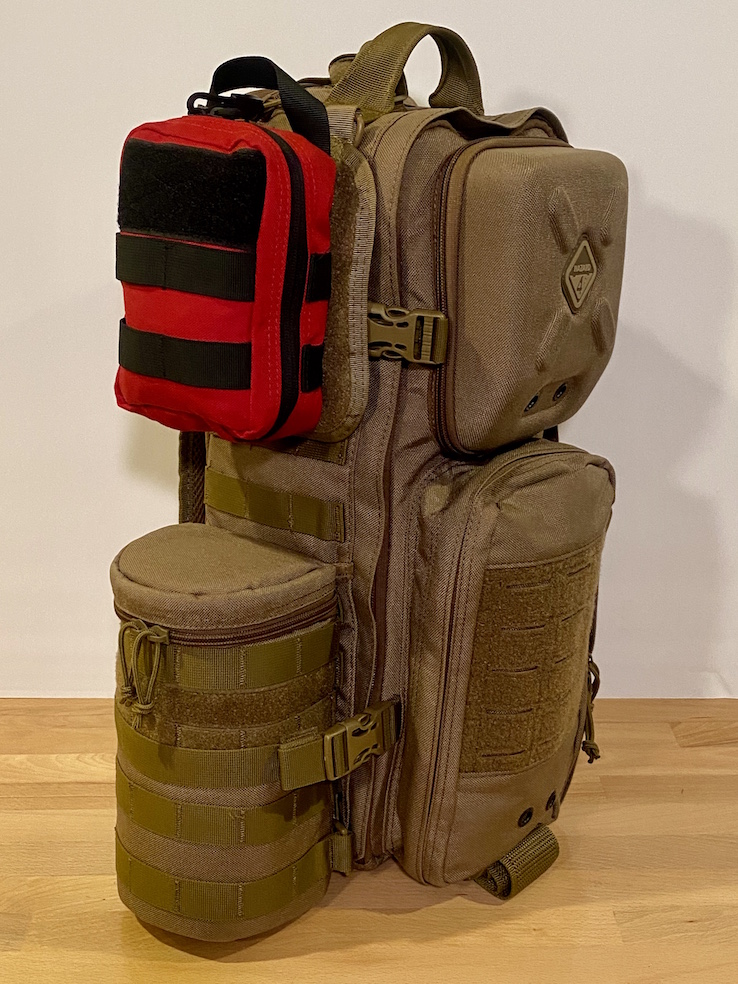
I put the hook and loop panel from the large Condor EMT Rip-Away pouch above the Jelly Roll so I'd have more real estate when I use it as a standing work space, and more room to attach different accessories. A benefit of this approach is that if I need extra storage space, I can choose the appropriate pre-packed pouch for that day simply by pulling it off the velcro and putting the new one on.
The pics below show a coyote pouch with extra radio gear, and a red first aid trauma pouch, that took me about five seconds to switch.
Condor Rip-Away EMT Lite
10-sec Swap to Trauma Kit
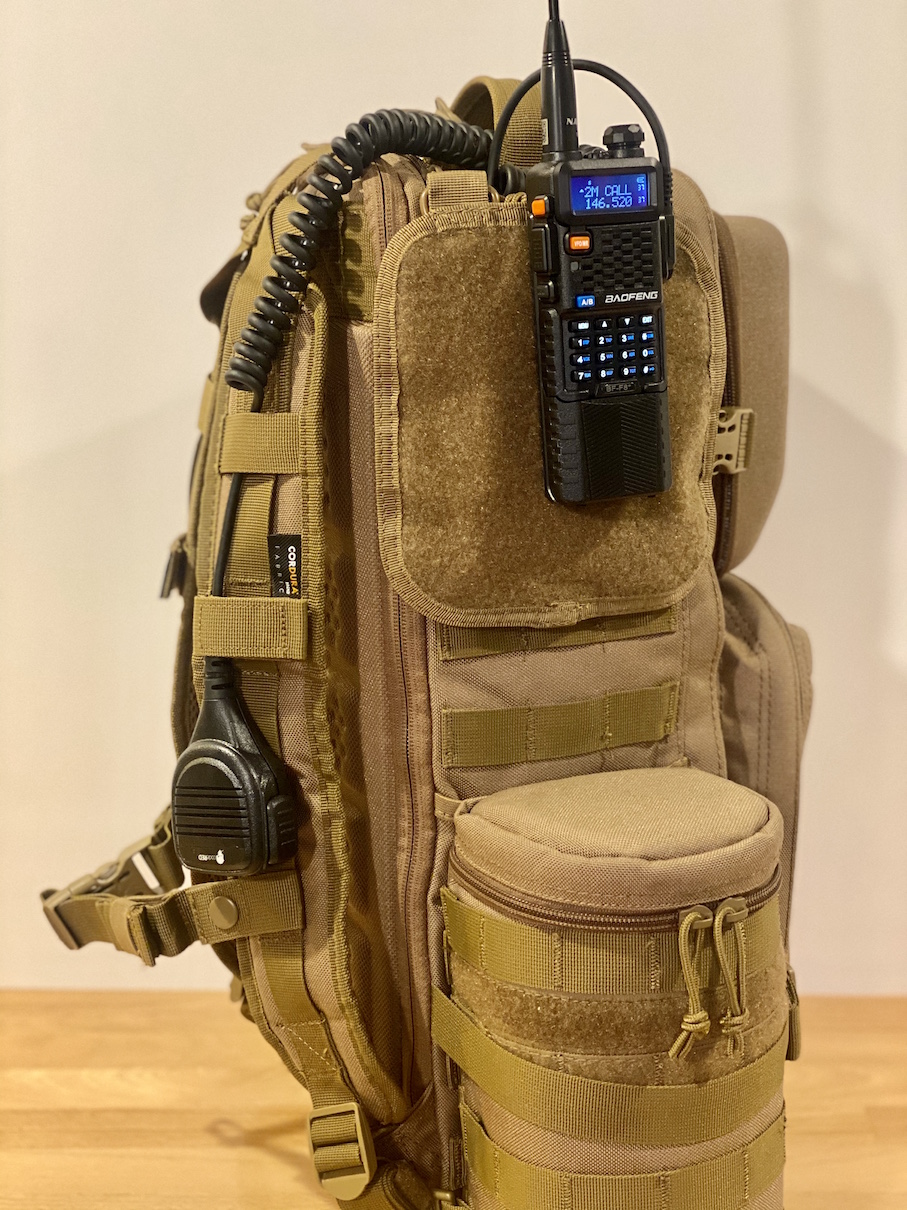
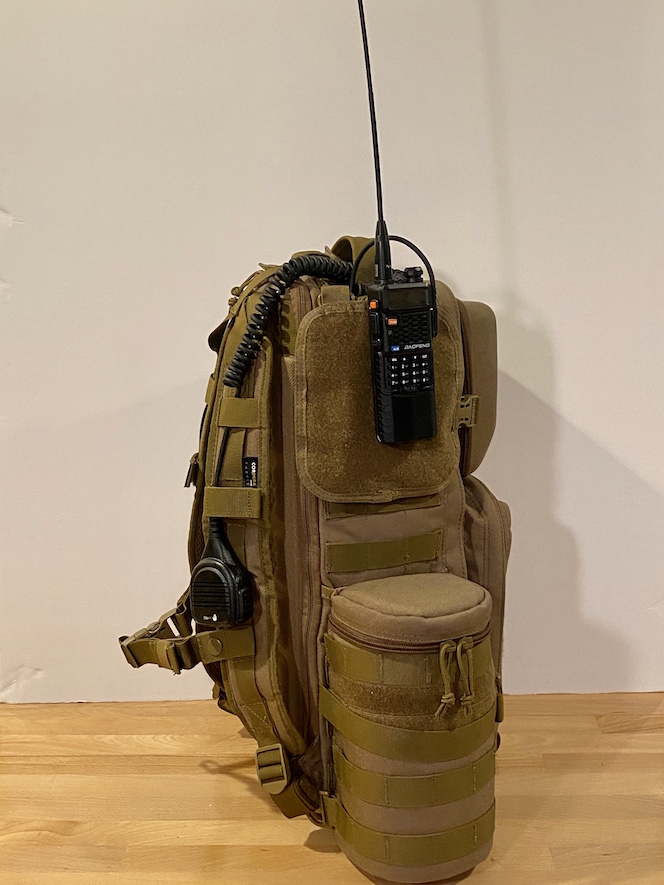
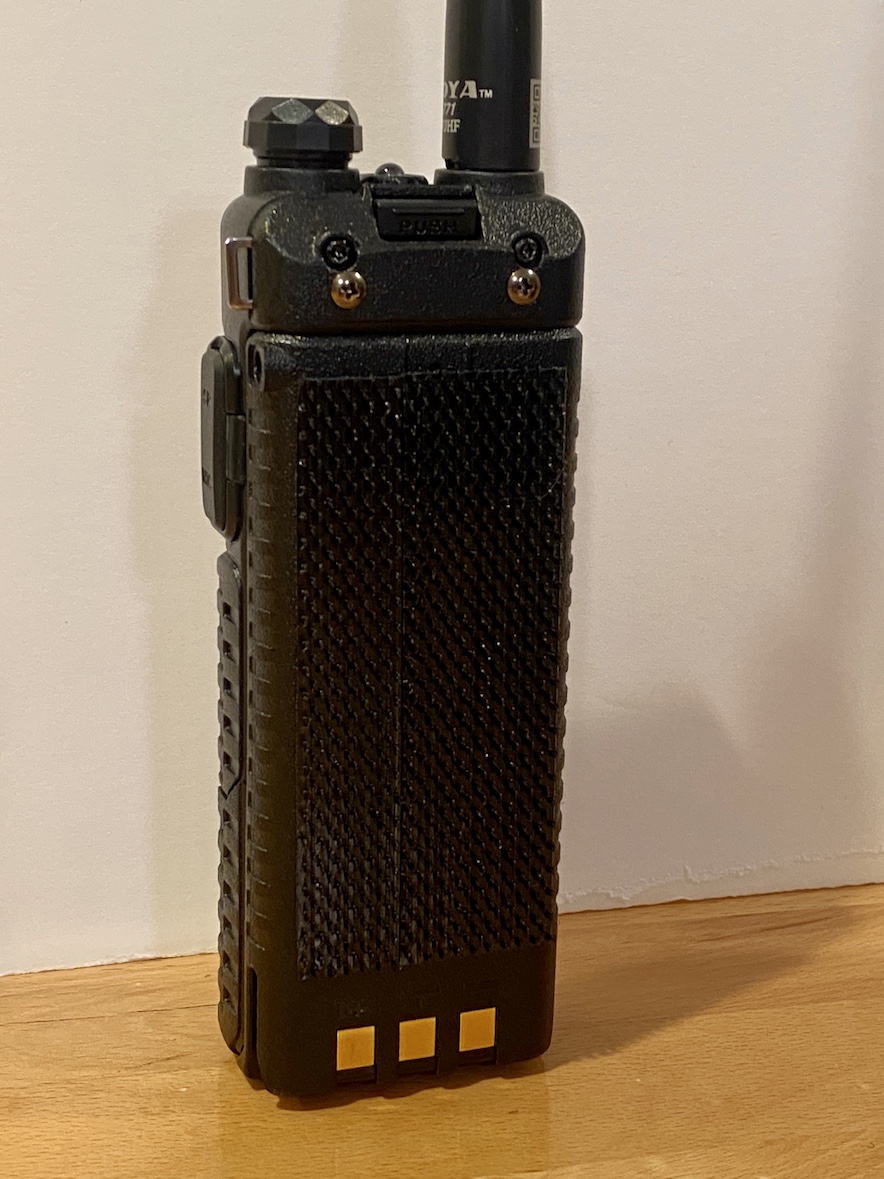
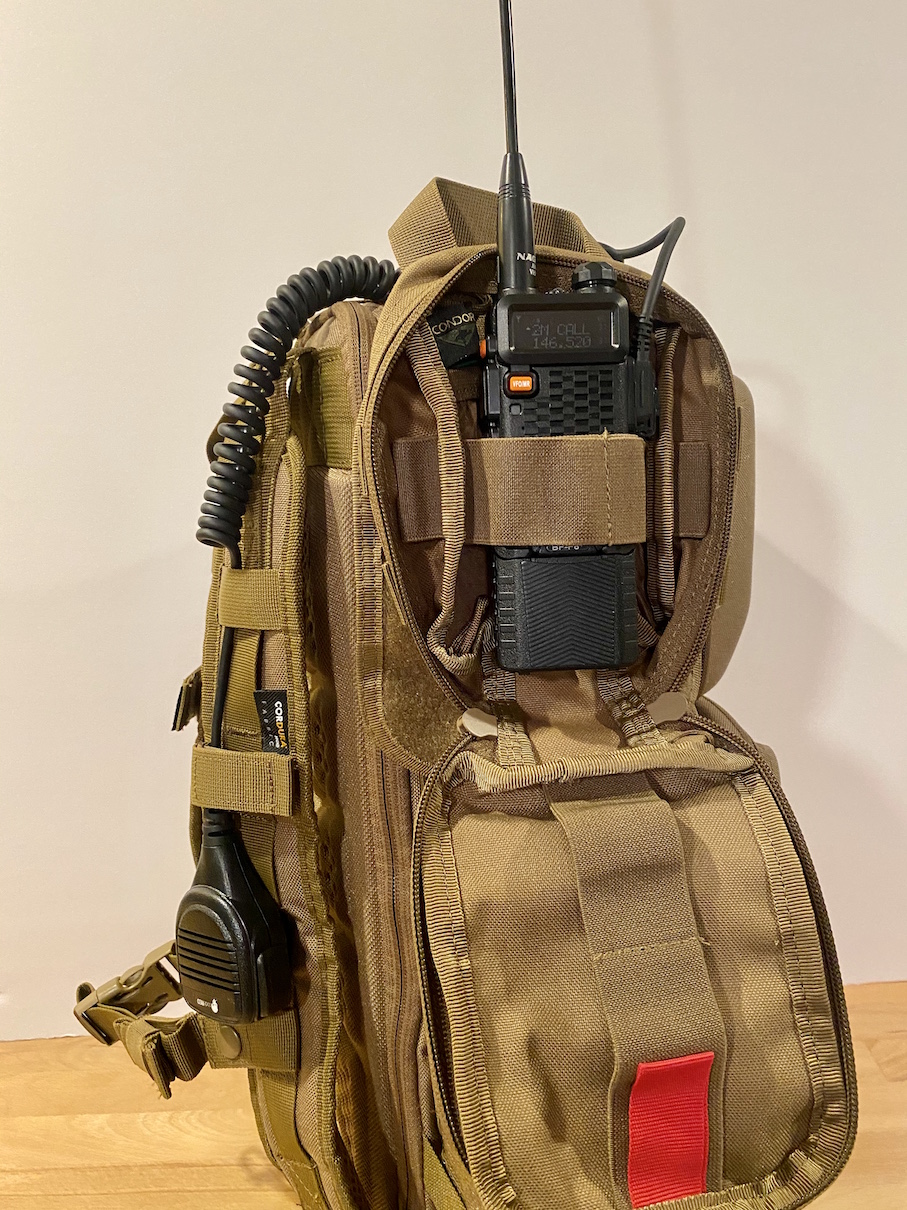
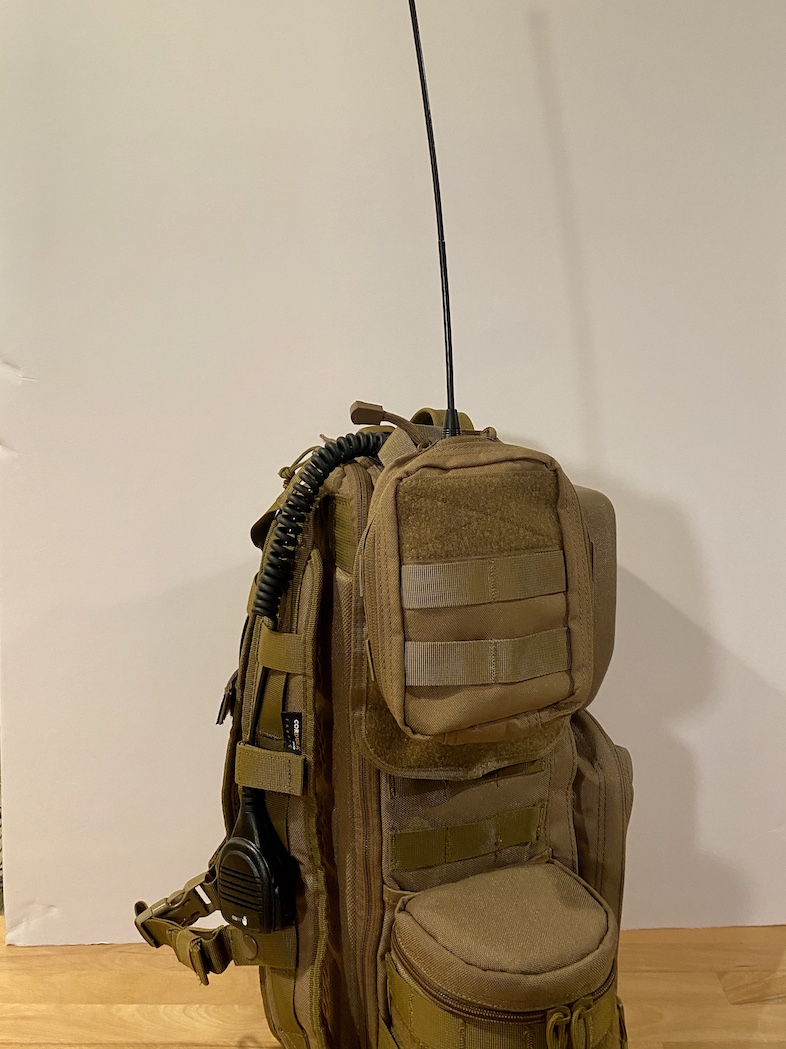
The next pictures just show another option for having velcro up there. With the right velcro, the radio is attached pretty solidly. The benefit here is that the antenna is up high so your body doesn't block any signals, and it doesn't require any extra gear like an antenna relocation cable and MOLLE mount, and you're not holding an antenna in front of your face. It does require a hand mic if you want to use it in this configuration, though.
I could see using this when all you need is a daypack and a radio, like when I helped marshall the Fourth of July parade in my town. We needed food, snack, weather gear, and a handheld radio. This would worked find and been just a little more convenient than having an HT on my belt.
Baofeng on Velcro
Baofeng on Velcro
Velcro on Battery
If you don't want to put velcro on the battery, the smaller Condor Rip-Away EMT Lite pouch fits the radio pretty well.
HT in Pouch
HT in Pouch
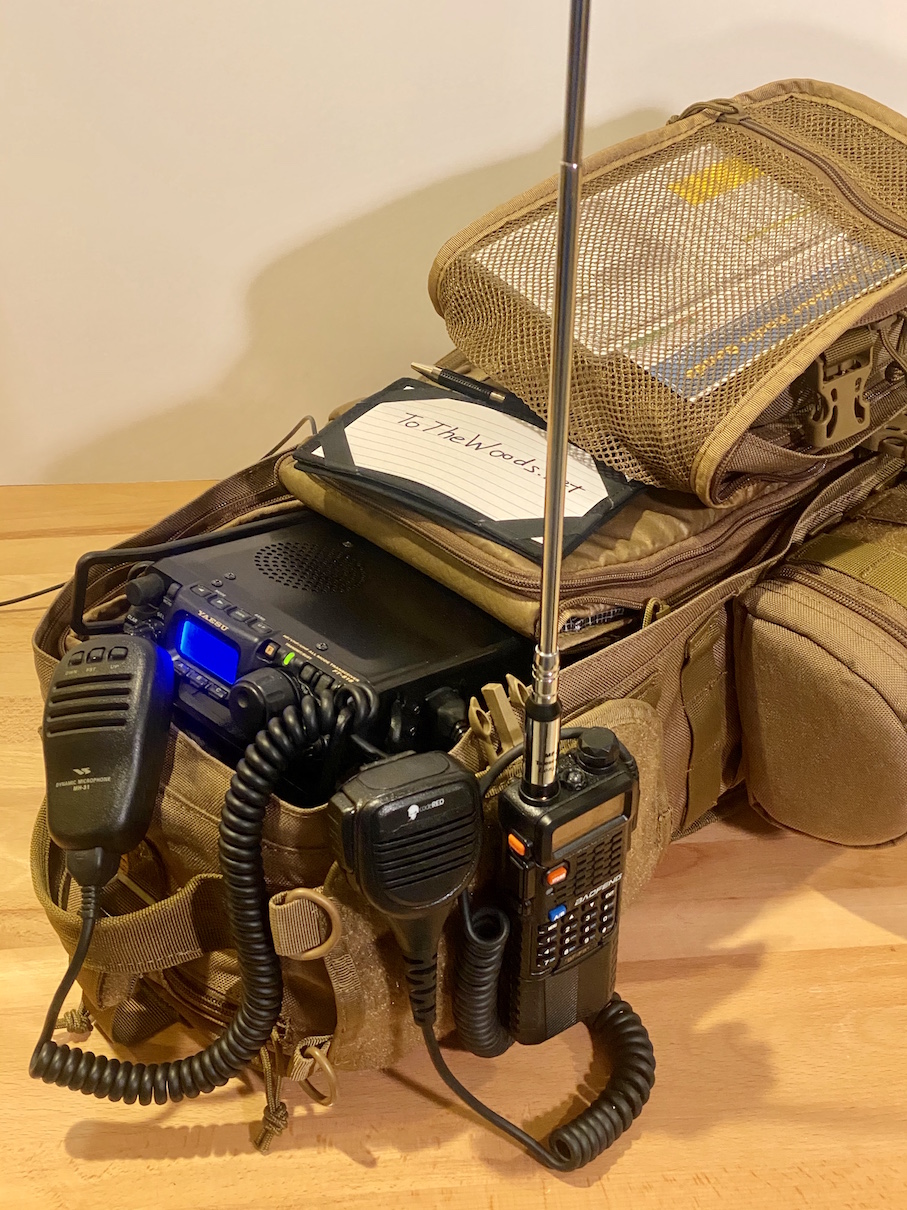
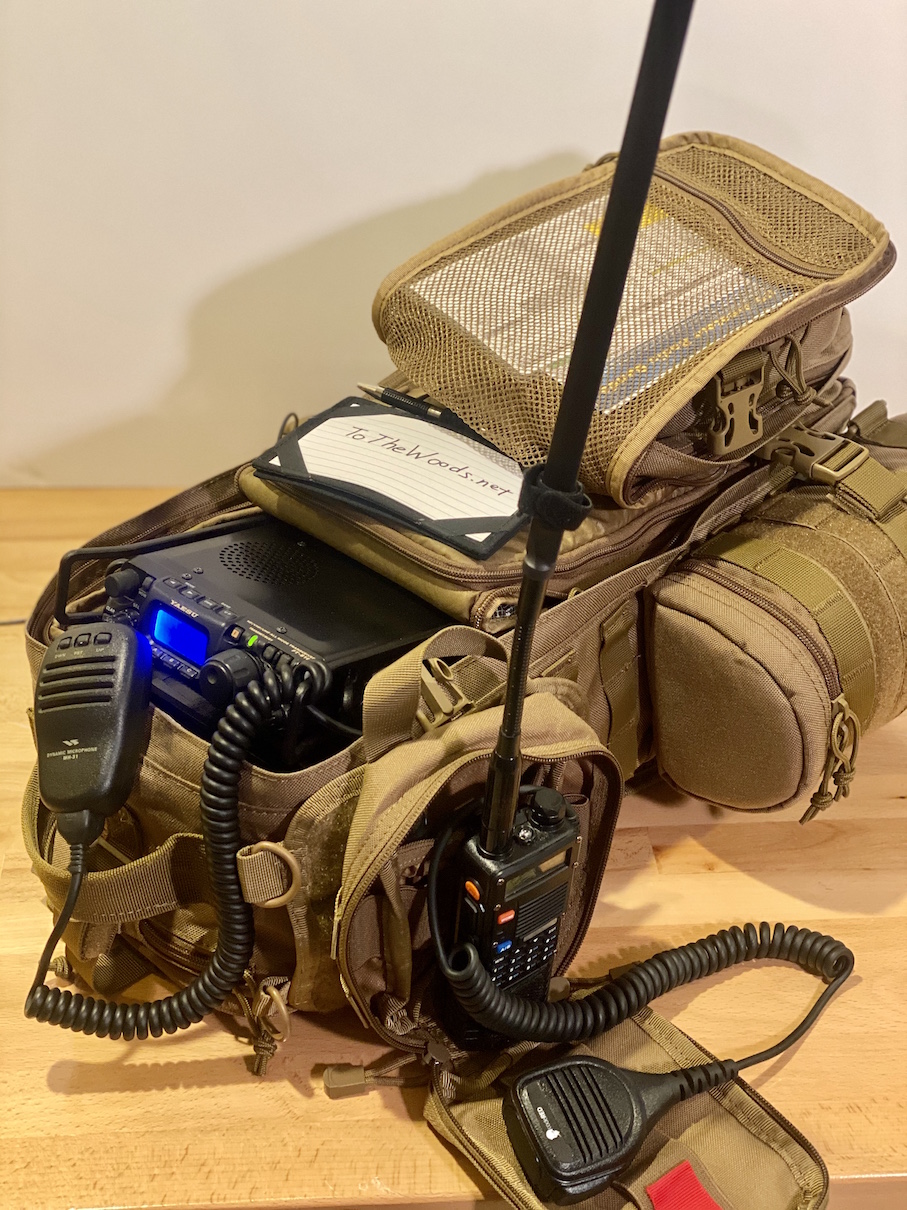
The below pic might shows what might be a more useful reason to put an HT on the Condor panel like this. If you have a reason to listen to VHF/UHF one one radio while you're working HF on another, this is a convenient way to quickly set up a mobile station.
HT Station
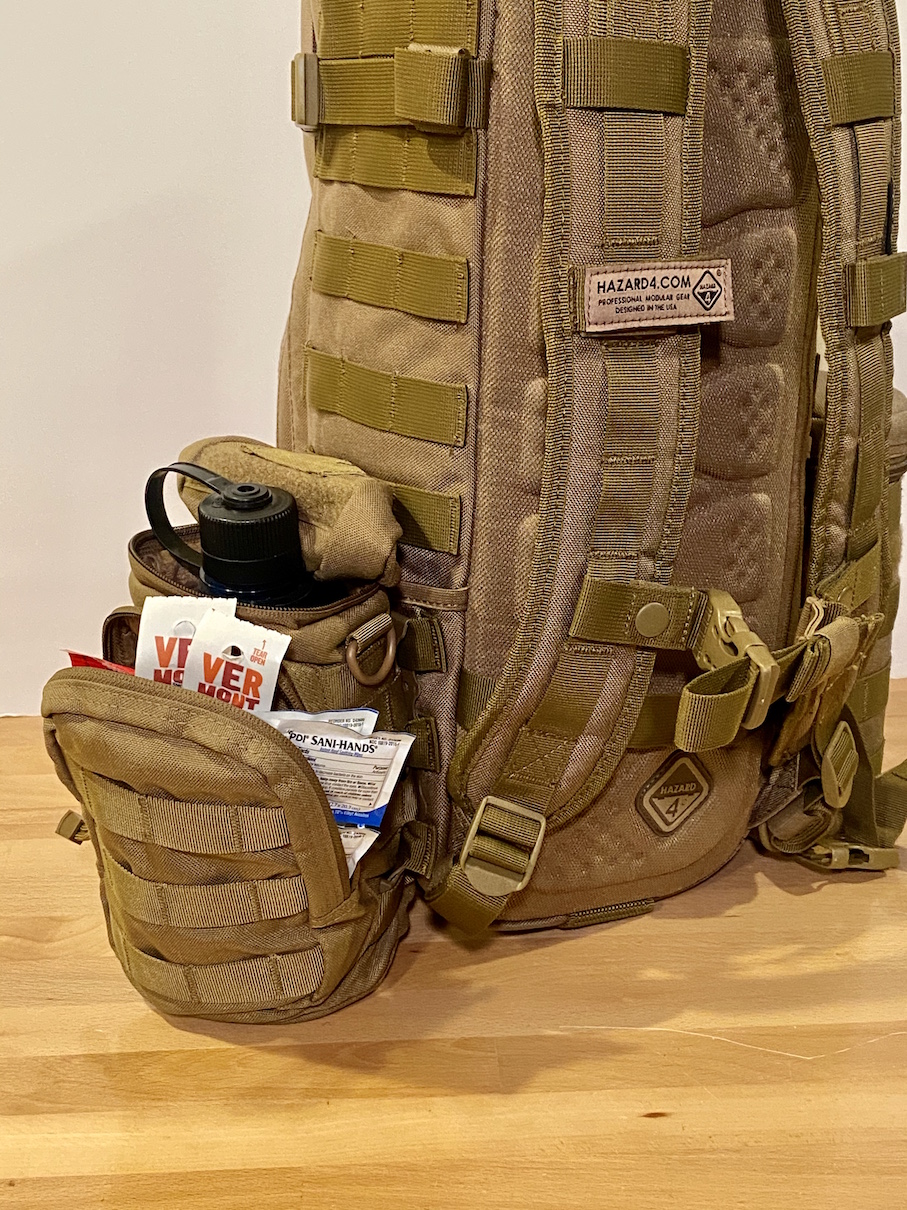
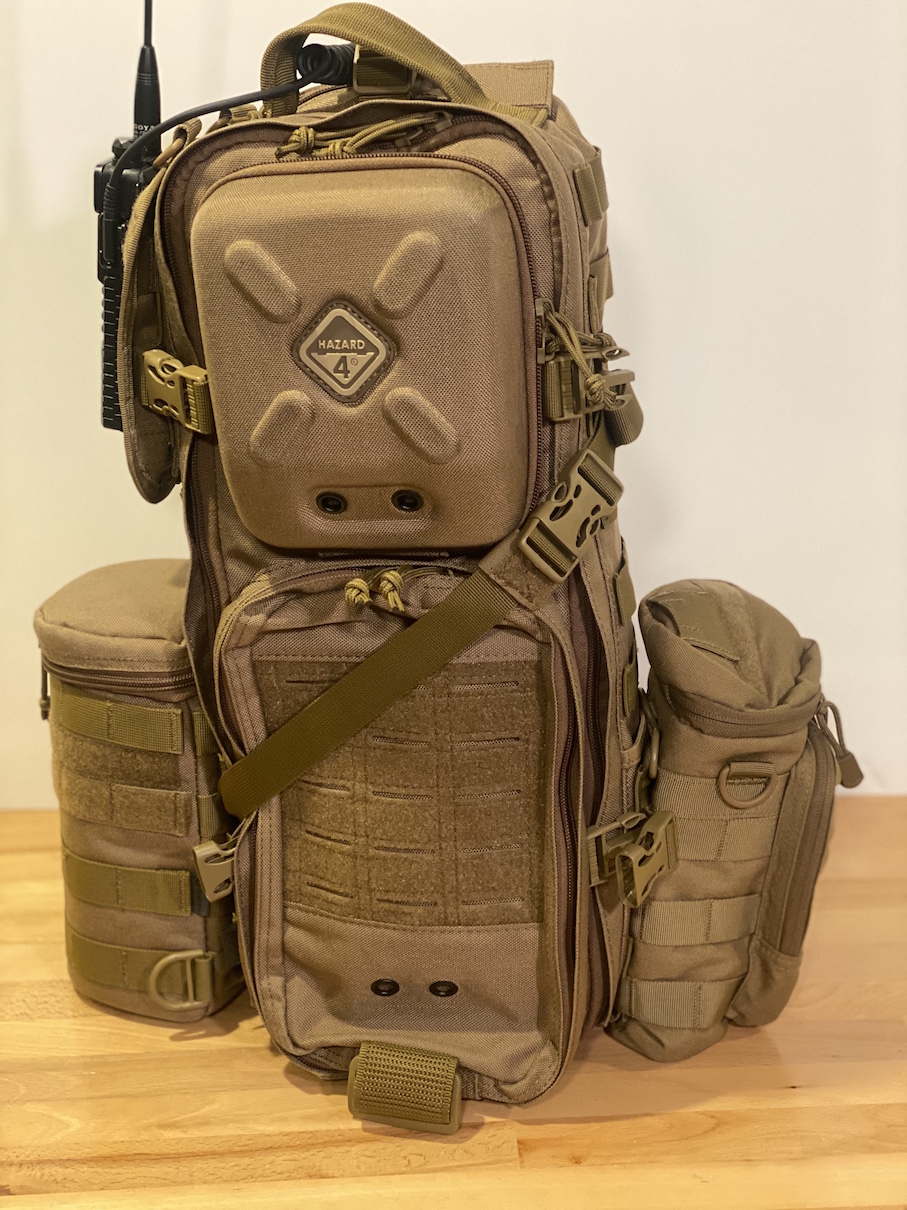
I also need a place to store water and snacks, so I put the Condor H2O Pouch on the other side. I like this pouch because it includes a zippered pocket where I keep some snacks and, now that coronavirus is a thing, a mask and PDI Sani-Hands medical grade hand sanitizer wipes.
The water bottle pocket is large enough to hold the small-mouth Nalgene, which is a little wider than a some water bottles.
Condor H2O Pouch
Snacks!
I attached it a little differently than normal, though. The Plan C has three rows of MOLLE here and the pouch only has two MOLLE strips. Attaching it across three strips instead of two makes the pouch more stable, and also turns the zippered pocket more towards my back so it's easier to access without taking off the pack. To do this, I used a Malice Clip I had left over from another project. (One benefit of committing to one system for lots of needs is that spare parts are often available.)
Malice Clip
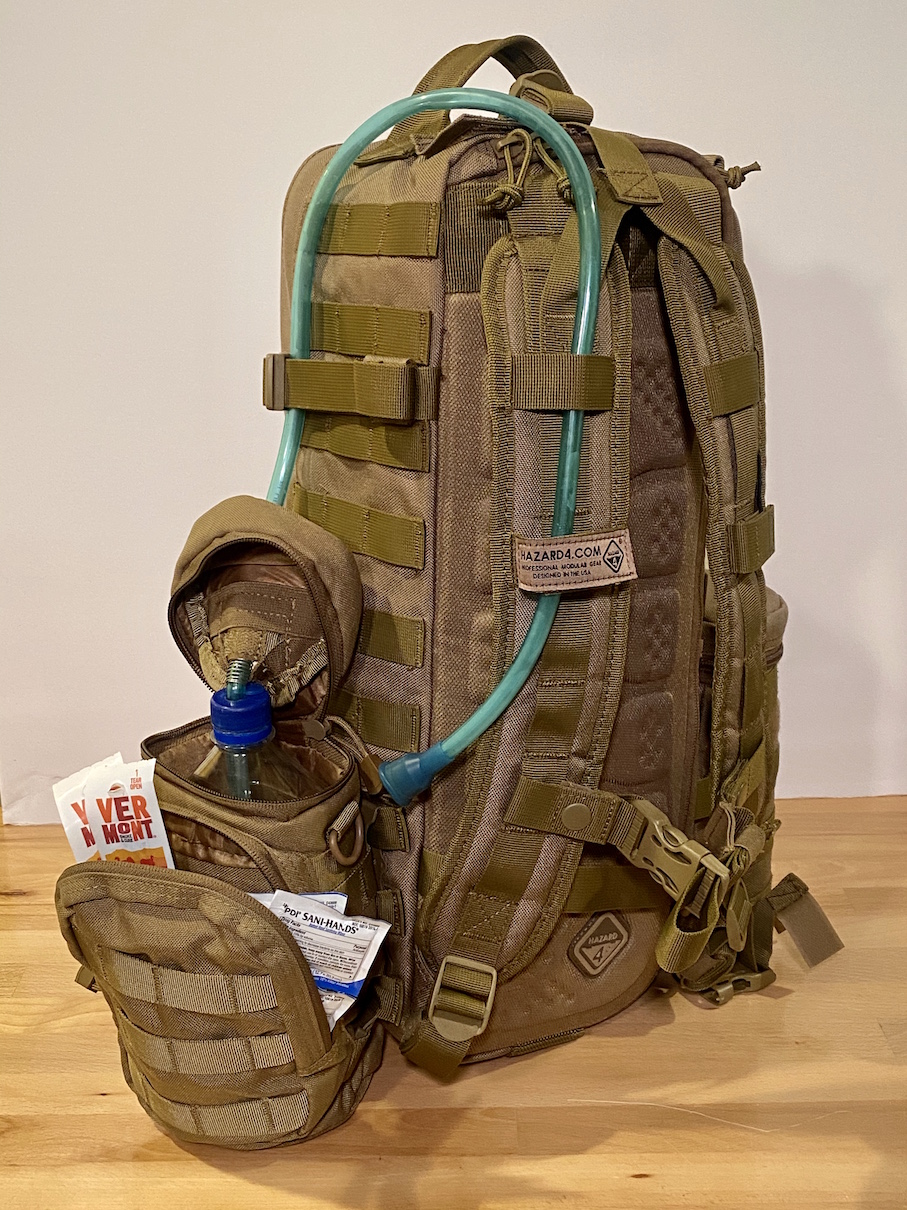
The Condor H2O Pouch's lid has an opening for a drinking tube, but it doesn't come with a bladder. For lightweight backpacking I use a really neat product called the SmarTube. It's a drinking tube that comes with a couple lids to fit different water bottles; it turns regular disposable water bottles into drinking bladders! When I'm on a backpacking trip, I use 1L Fiji water bottles and drink out of the tube. Then I have regular water bottles instead of a bladder when I'm eating meals; I can't stand drinking from a tube when I'm eating.
I'll probably just use regular water bottles with this kit, but I put it on just to ops check it.
Hazard 4 put a lot of thought into the details of the Plan C, and the fit and finish is excellent. Here's one great detail: the side compression straps are male-female on one side and female-male on the other. That means you can attach the strap across the pack, or criss-cross it, for better compression or to hold gear on the outside. This could come in handy!
Fit-Testing Other Electronics
I wanted to perform a quick fit-test to see how other gear would work in the Evac Insert and Plan C pack. I didn't spend a lot of time refining it because I won't use this gear in the field very often, but I thought a feasibility check would be helpful for people who use different gear.
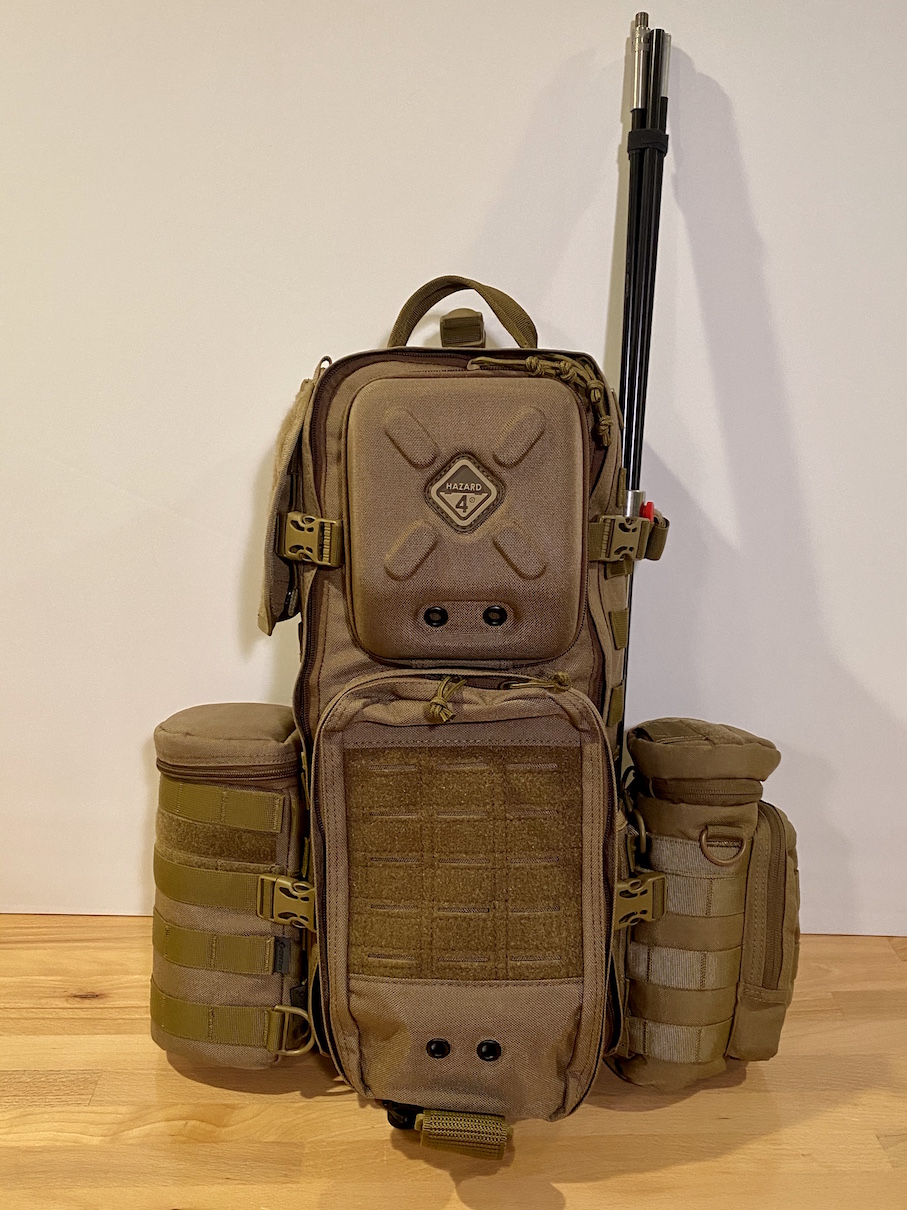
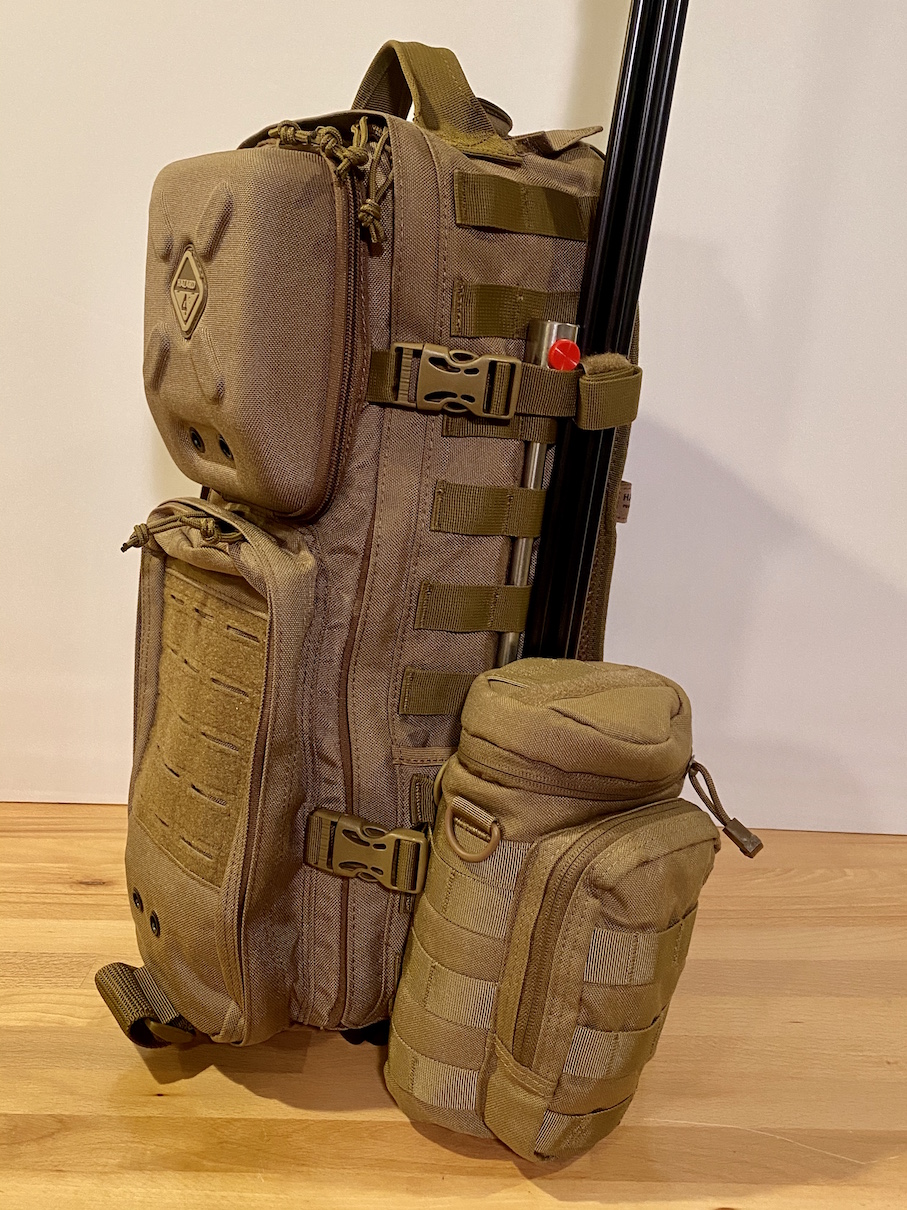
Chameleon MPAS Antenna
The Chameleon Modular Portable Antenna System (MPAS) is a very popular antenna kit. The pics below are of the older version, which is 29" (73.7cm) long, so it sticks above the pack a bit. You can see the spike in the second picture; this sticks into the ground so you can put the MPAS onto it, then attach the antenna. If you put the spike through the MOLLE loop right where I did in the picture, the sharp end won't stab the pack's pocket behind the bottle pouch.
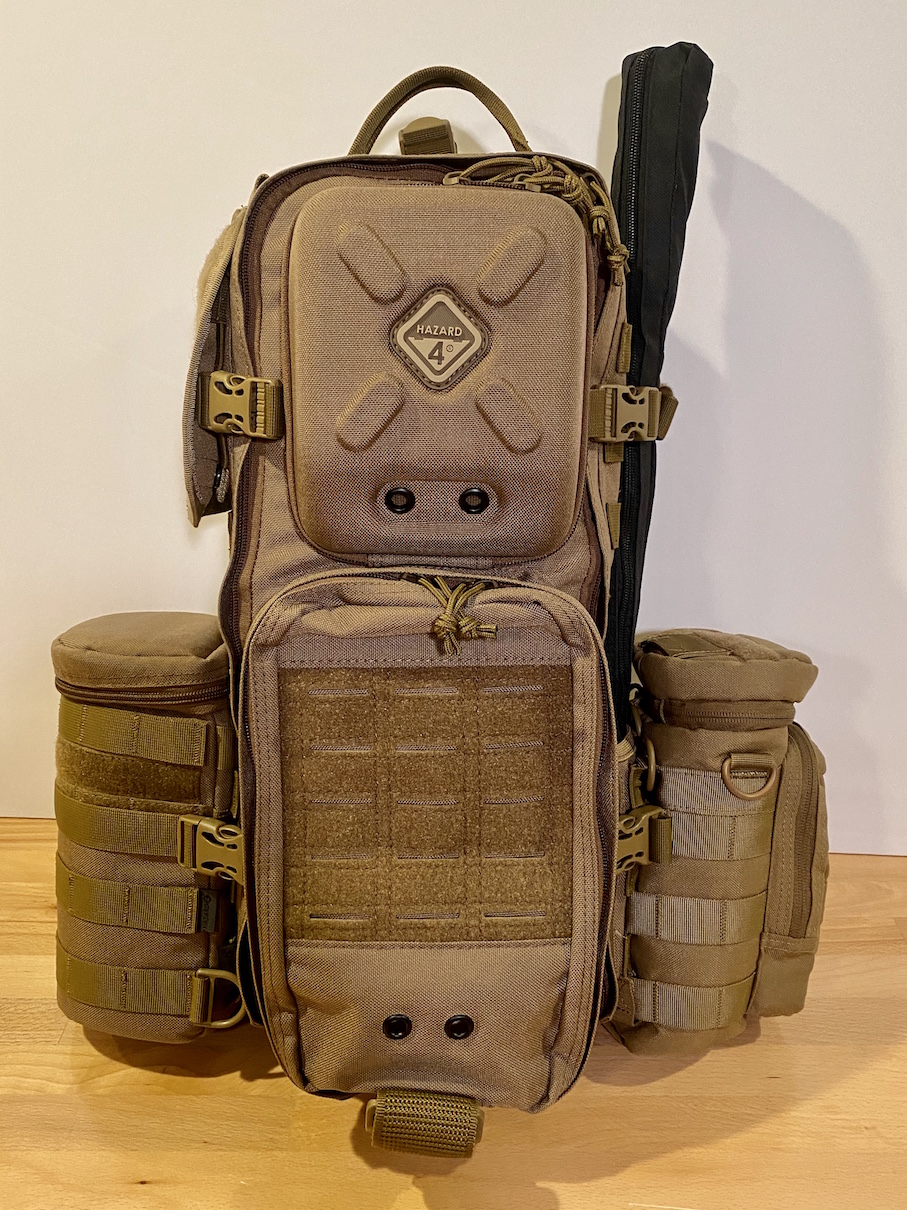
The newer Chameleon MPAS 2.0 is 20" (51cm) long. I don't have access to one of those so I used this mock-up to estimate the length and bulk. It's a much better fit, and the spike is inside the zippered pouch.
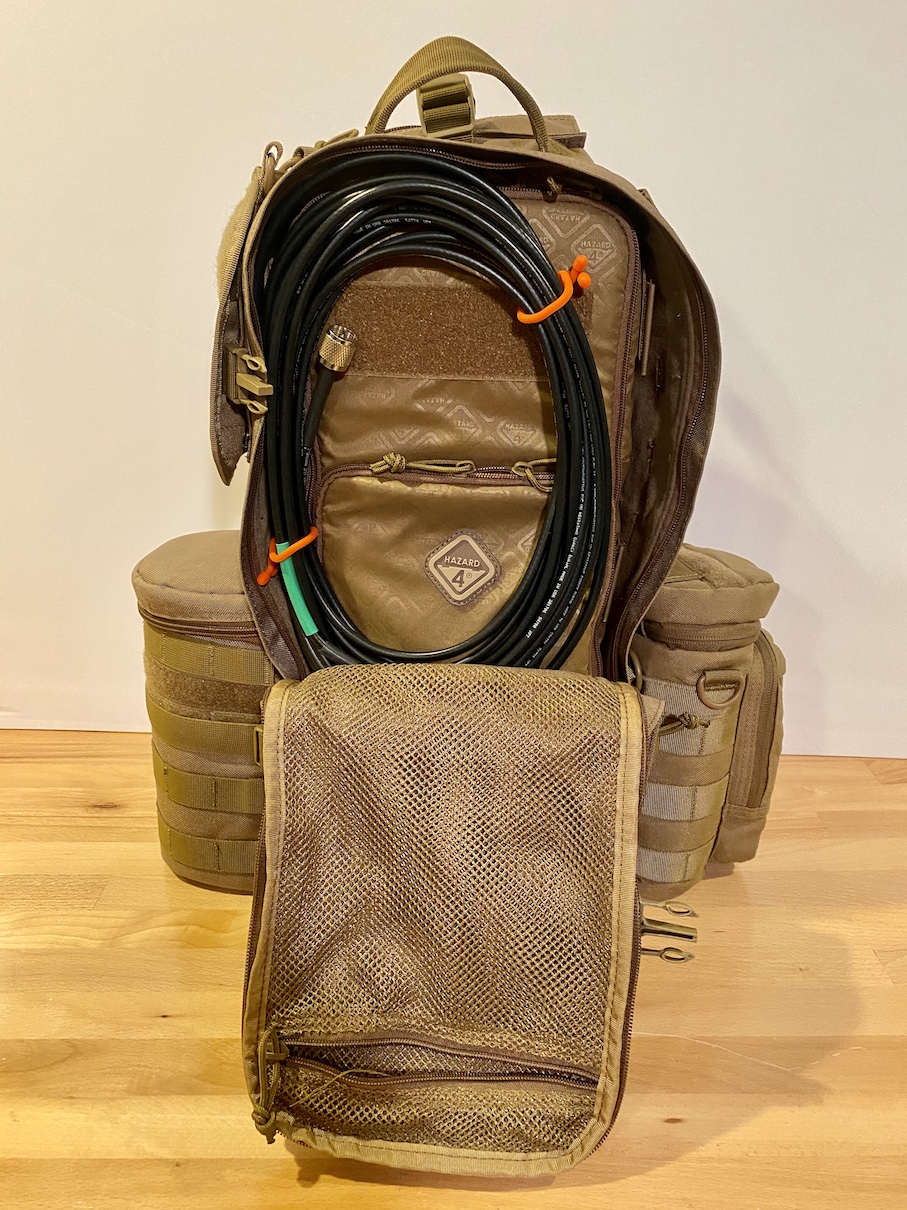
The MPAS requires counterpoises, which fit in the Jelly Roll (first pic below). Also, the MPAS normally uses a double UHF-male antenna cable. The second pic below shows that there's room in the pack, outside the insert, to hold a lot more antenna cable than I showed in the main article.
In all of these pics, the base module is in the hard pouch on top of the pack, but it would fit in the insert, too.
LDG z817 Tuner with FT-818ND Radio
The LDG z817 tuner is about the right height to put under the radio. If I were building this kit, I would probably velcro the tuner to the insert and then velcro the radio on top of the tuner. If the radio is not exactly centered over the tuner, there's some space underneath the radio where the microphone would fit. But there are probably other creative ways to set it up, especially if the battery had different dimensions. Point is, it fits.
FT-857 with LDG z817 Tuner
The Yaesu FT-857 is a more powerful radio (100W) that's still suitable for manpack operations, and it also fits in the Evac insert with the LDG z817 tuner. (Note: The z817 is not compatible with the FT-857. I show them together here because many 857 owners are familiar with with the size of the z817.) It takes up quite a bit more space, and the increased power means a bigger battery would be helpful. That combination limits the size of the rear container and decreases the convenience a little. As shown above, though, the Plan C has plenty of room to carry the antenna outside the Evac insert.
The yellow container is from the Dewalt Deep Pro Organizer as I described in the Parts List, and it's velcroed into place.
That's It!
So that's it! I hope you found this page helpful, and it gave some ideas for building your own HF manpack! Don't forget to check out my other ham radio projects!